Creamy Butternut Squash Gnocchi: Little Pumpkins in a Silky Mushroom Sauce
Homemade gnocchi are already delicious, but have you ever tried turning them into adorable little pumpkins? These Creamy Butternut Squash Gnocchi bring a playful autumn twist to a classic Italian-inspired dish, combining tender, golden-orange dumplings with a rich mushroom and spinach sauce. Roasted butternut squash gives the dough a delicate sweetness, while Parmesan and freshly grated nutmeg add just the right amount of savoury warmth. And the best part? You don't need any special equipment to create the pumpkin shapes, just a toothpick and a little patience! I've experimented with different gnocchi recipes before, including my Homemade Potato Gnocchi with Roasted Garlic Tomato Sauce and Burrata and colourful Purple Sweet Potato Gnocchi with Spinach and Feta, but this version is particularly fun to prepare. It's a lovely choice for cosy dinners, seasonal gatherings or whenever you fancy making something a little different.
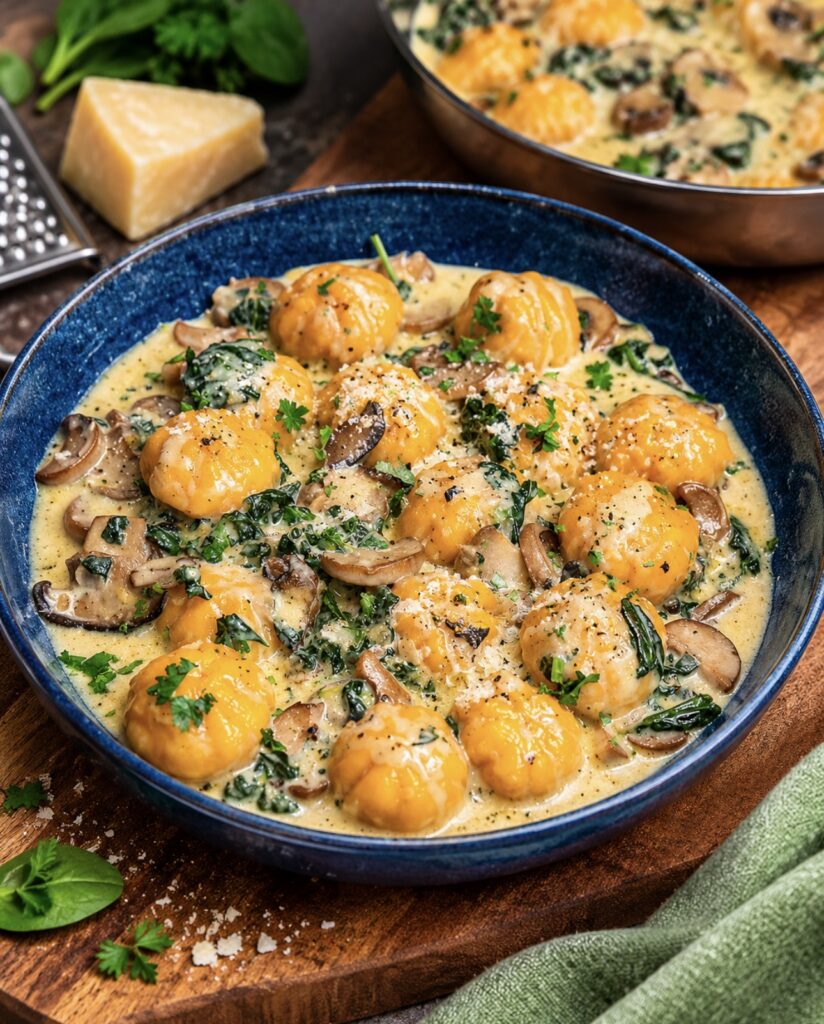
Pumpkin-shaped gnocchi in a creamy sauce.
Scroll down or tap 'Jump to Recipe' for the full printable recipe card with exact measurements and cooking times.
Simple Ingredients, Big Flavours
What makes these homemade butternut squash gnocchi so satisfying is the balance between the naturally sweet dough and the savoury mushroom sauce. Each ingredient has a specific purpose, from the flour and egg yolk that help bind the dough to the starchy cooking water that creates a smooth, silky finish. Roasted squash is one of my favourite ingredients to cook with because it works beautifully in everything from pasta to hearty vegetable bakes. If you enjoy its naturally sweet flavour, you'll also love my Butternut Squash Ricotta Pasta and Butternut Squash and Gruyère Gratin. Here's a closer look at the ingredients that make this recipe work:
Butternut squash
The star of the recipe! Roasting brings out its natural sweetness and helps reduce excess moisture, creating a beautifully smooth base for the gnocchi dough.
Plain flour
Helps bind the roasted squash into a workable dough. The amount may vary slightly depending on the moisture content of your squash, so avoid adding more than necessary.
Egg yolk
Holds the ingredients together and helps the gnocchi maintain their shape during cooking.
Parmesan cheese
Adds a delicious savoury depth to the dough and gives the creamy mushroom sauce extra richness.
Ground coriander and nutmeg
Warm, aromatic spices that complement the squash beautifully. Nutmeg also pairs wonderfully with spinach, mushrooms and cream.
Mushrooms
Bring an earthy, savoury flavour and a satisfying texture. Cooking them until golden makes a noticeable difference to the finished sauce.
Red onion and garlic
Add sweetness and fragrance, creating a flavourful base for the sauce.
Fresh spinach
Brings colour, freshness and a pleasant contrast to the richer ingredients.
Cooking cream
Creates a smooth, velvety sauce that gently coats the gnocchi without overpowering their delicate flavour.
Reserved gnocchi water
The starch released during cooking helps the cream and Parmesan come together into a silky sauce.
Fresh parsley
An optional garnish that adds freshness and a lovely finishing touch.
How to Make Creamy Butternut Squash Gnocchi
Roasting the Butternut Squash
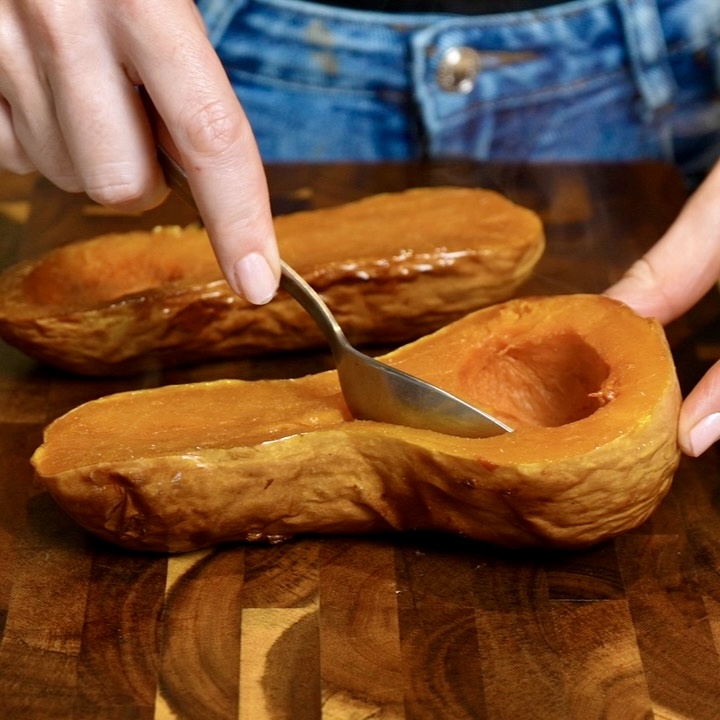
Start by cutting the butternut squash in half lengthways and scooping out the seeds. Using a sharp knife, lightly score the flesh in a criss-cross pattern to expose more of the surface during roasting. Drizzle with olive oil and season with salt and ground coriander. Place the squash halves cut-side down in your air fryer and cook at 200°C (400°F) for approximately 40 minutes, or until completely tender. Alternatively, roast them in a preheated oven at 200°C fan for 40–50 minutes. Once cooked, allow the squash to cool slightly before scooping out the flesh.
Scooping out the roasted squash flesh.
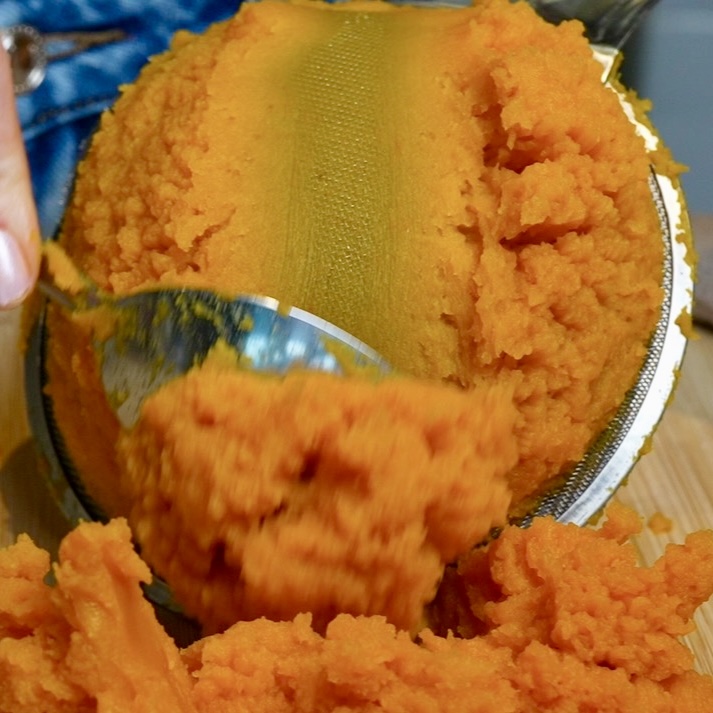
Weigh the roasted squash, as the amount of flour needed will depend on how much cooked flesh you have and how moist it is. For the smoothest possible dough, pass the squash through a potato ricer or fine-mesh sieve until completely lump-free.
Sieving roasted squash for a smooth texture
Preparing the Gnocchi Dough
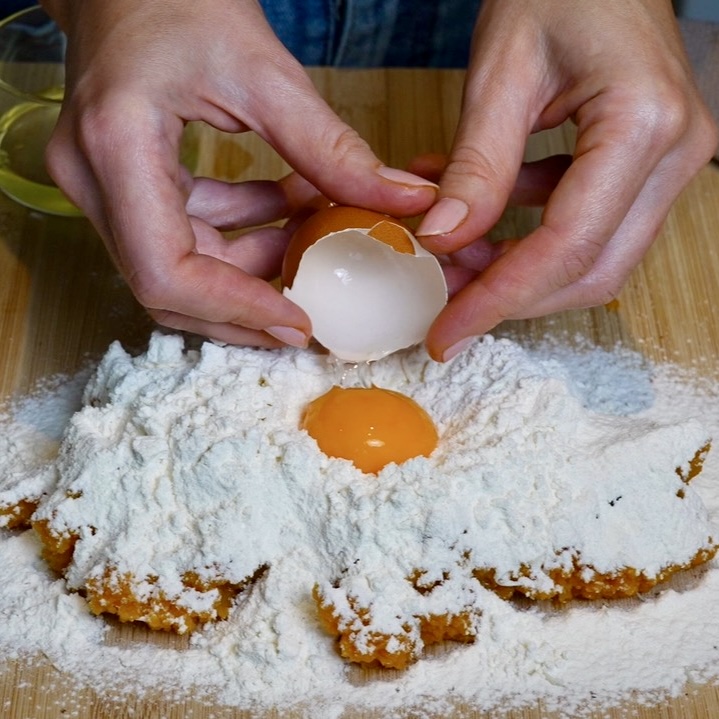
Transfer the smooth butternut squash onto a clean work surface and gently flatten it into an even layer. Sprinkle with salt, freshly grated nutmeg and Parmesan, then sift the flour over the top. Make a small well in the flour and add the egg yolk.
Adding egg yolk to bind the dough.
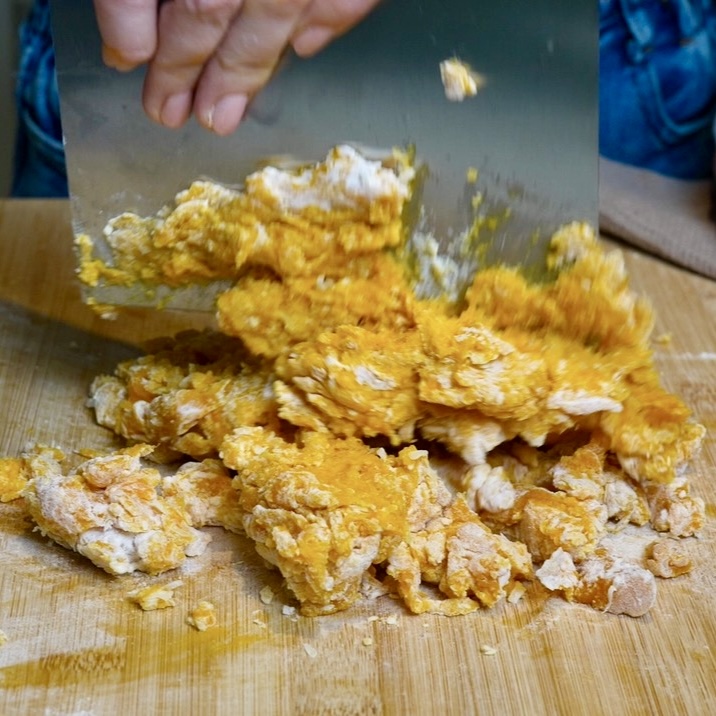
Using a dough scraper, gently cut through the ingredients, scraping underneath and folding the mixture over itself until everything begins to come together. If you don't have a dough scraper, a wide spatula or large butter knife works just as well. Avoid kneading the dough, as overworking it develops gluten and can make the finished gnocchi tough rather than light and pillowy.
Gently cutting and folding the dough.
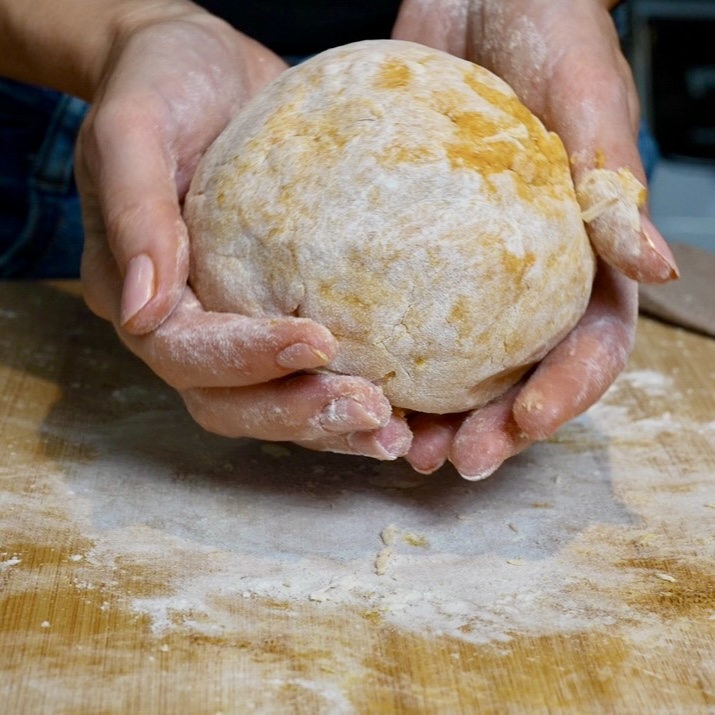
Lightly flour your hands and gently press the mixture together until it forms a soft ball. Scrape any sticky pieces from the work surface, dust lightly with flour and continue shaping the dough just until cohesive. It should feel tender and slightly tacky, so resist the temptation to add too much extra flour.
Soft gnocchi dough shaped into a ball
Shaping the Gnocchi into Little Pumpkins
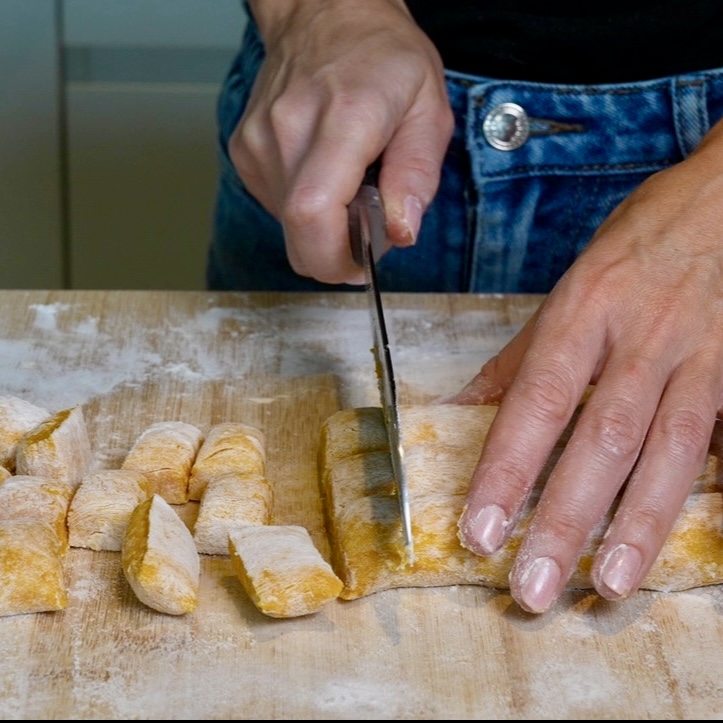
Divide the dough into four equal portions and cover three with a clean kitchen towel while working with the first. On a lightly floured surface, gently roll the dough into an even rope, approximately 2 cm thick. Cut the rope into small pieces, roughly 2 cm long, using a knife or dough scraper. To speed things up, you can roll all four portions into ropes, line them up next to each other and cut them together.
Cutting dough ropes into even pieces
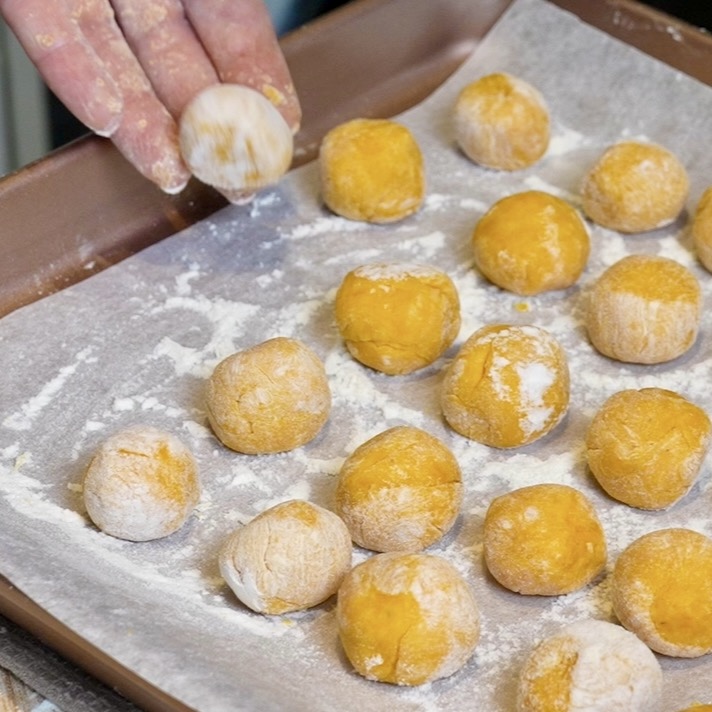
Gently roll each piece between your palms to form a small, smooth ball, then arrange them on a parchment-lined tray lightly dusted with flour. Make sure the tray is small enough to fit inside your freezer, as the gnocchi will need to chill before cooking.
Arranging dough balls on a floured tray
Creating the Pumpkin Details
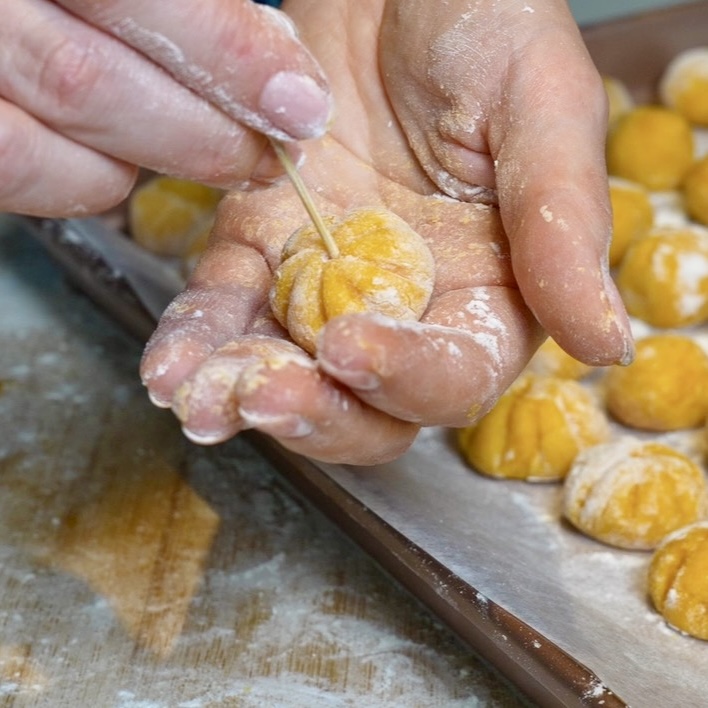
Now for the fun part! Using a toothpick, gently press eight evenly spaced lines around each dough ball, working from the top towards the bottom to create the characteristic pumpkin ridges. Don't press too deeply, as you want to keep the rounded shape intact. Next, use the tip of the toothpick to make a small indentation in the centre of the top of each pumpkin. If the toothpick starts sticking to the dough, simply dust it with a little flour. Repeat with the remaining pieces until all your little pumpkins are ready.
Using a toothpick to create the pumpkin shape
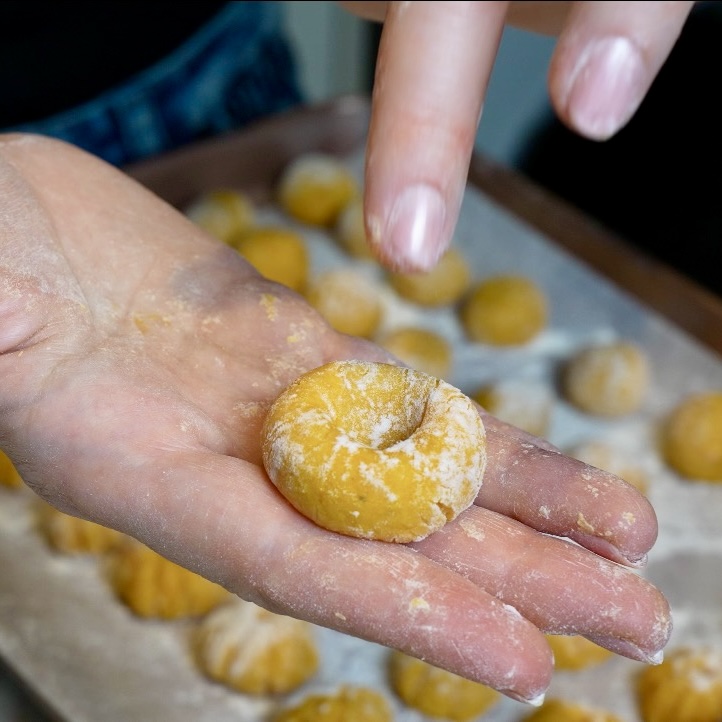
If you're short on time, you can skip the decorative ridges and simply press your finger into the centre of each ball to create a button-shaped gnocchi instead. Once shaped, place the tray in the freezer for at least 15 minutes. This helps the dough firm up slightly, making the gnocchi easier to handle and less likely to lose their delicate shape during boiling.
A quicker way to shape homemade gnocchi
Cooking the Homemade Gnocchi
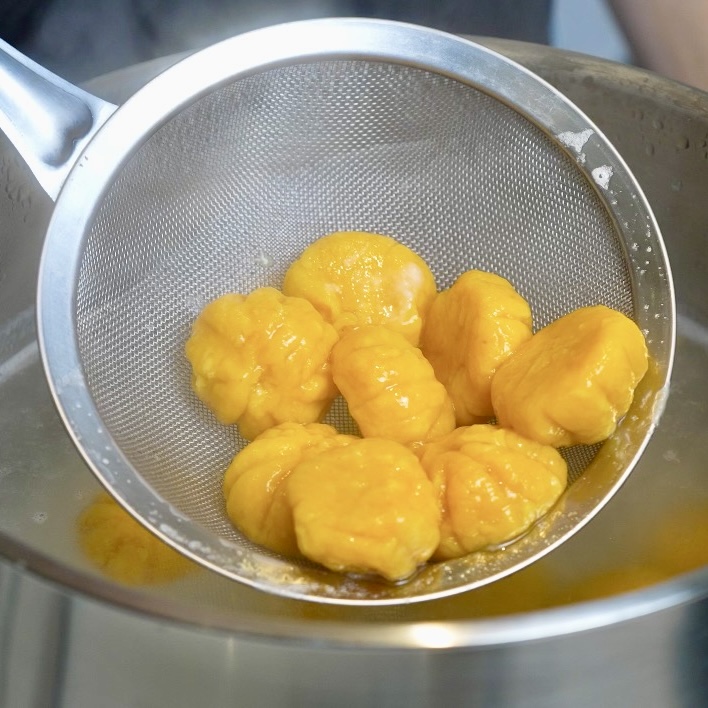
Bring a large pot of generously salted water to the boil. Carefully add the chilled gnocchi and give them a gentle stir to prevent sticking. Cook until they float to the surface, which is a good indication that they're nearly ready. Allow them a few more seconds to finish cooking, then carefully lift them out using a slotted spoon. If necessary, cook the gnocchi in batches to avoid overcrowding the pot. Transfer the cooked gnocchi onto a plate in a single layer so they don't stick together while you finish the sauce. Before discarding the cooking water, remember to reserve some for the sauce. The starch released by the gnocchi is particularly useful for creating a smooth, creamy consistency without making the sauce too heavy.
Lifting cooked gnocchi from boiling water.
Making the Creamy Mushroom and Spinach Sauce
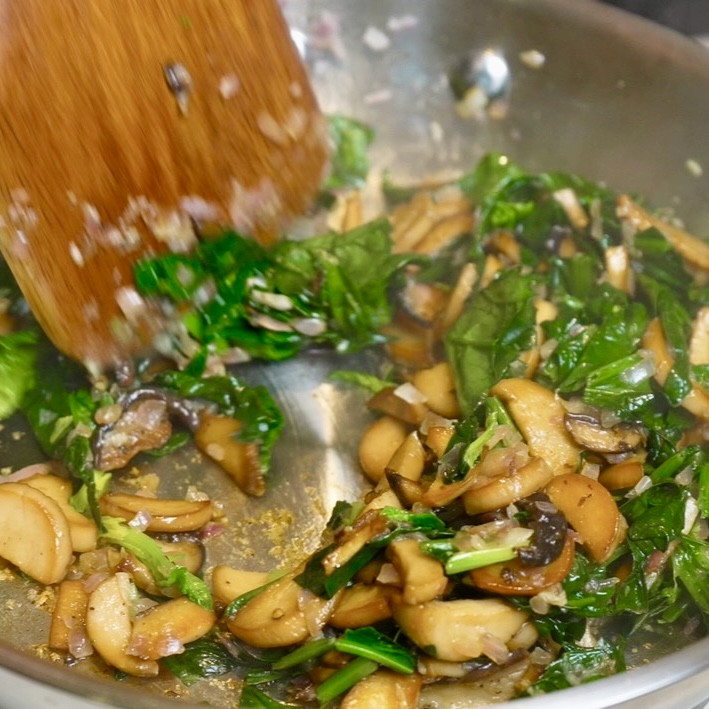
While the water for the gnocchi is heating, prepare the sauce. Heat olive oil in a large frying pan over medium heat and add the sliced mushrooms. Season with salt and freshly ground black pepper, then cook until softened and golden, stirring occasionally. Give the mushrooms enough time to develop some colour, as this creates a deeper, more savoury flavour. Add the finely chopped red onion and cook for approximately 2 minutes, or until softened. Stir in the garlic and continue cooking for another 2 minutes until fragrant. Add the roughly chopped spinach and cook until the leaves have wilted.
Sautéing vegetables for the gnocchi sauce.
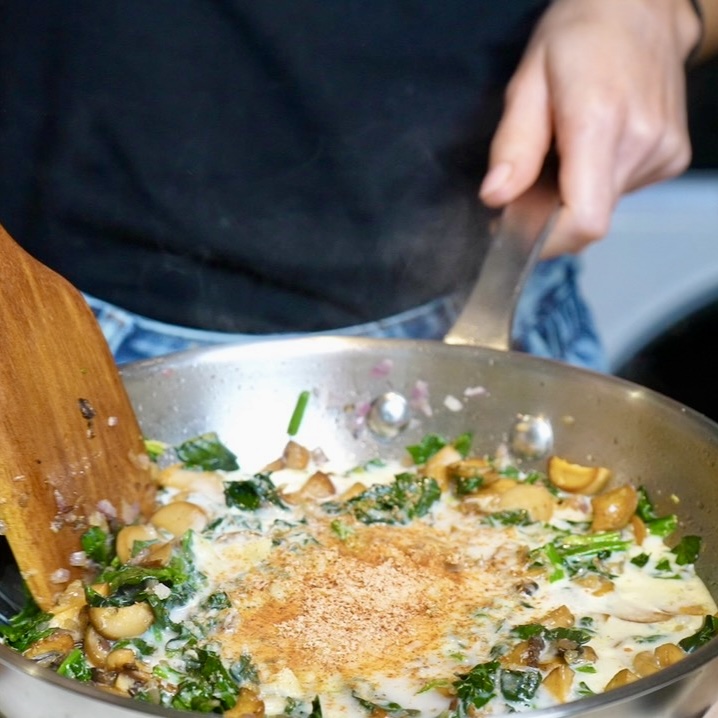
Pour in the cooking cream, followed by about half of the reserved gnocchi water, then stir in the grated Parmesan and nutmeg. Allow the sauce to simmer gently for a few minutes until slightly thickened. If it becomes too thick, gradually add more cooking water until you reach your preferred consistency. Taste and adjust the seasoning with additional salt and pepper if needed.
All sauce ingredients added, ready to stir
Combining and Serving
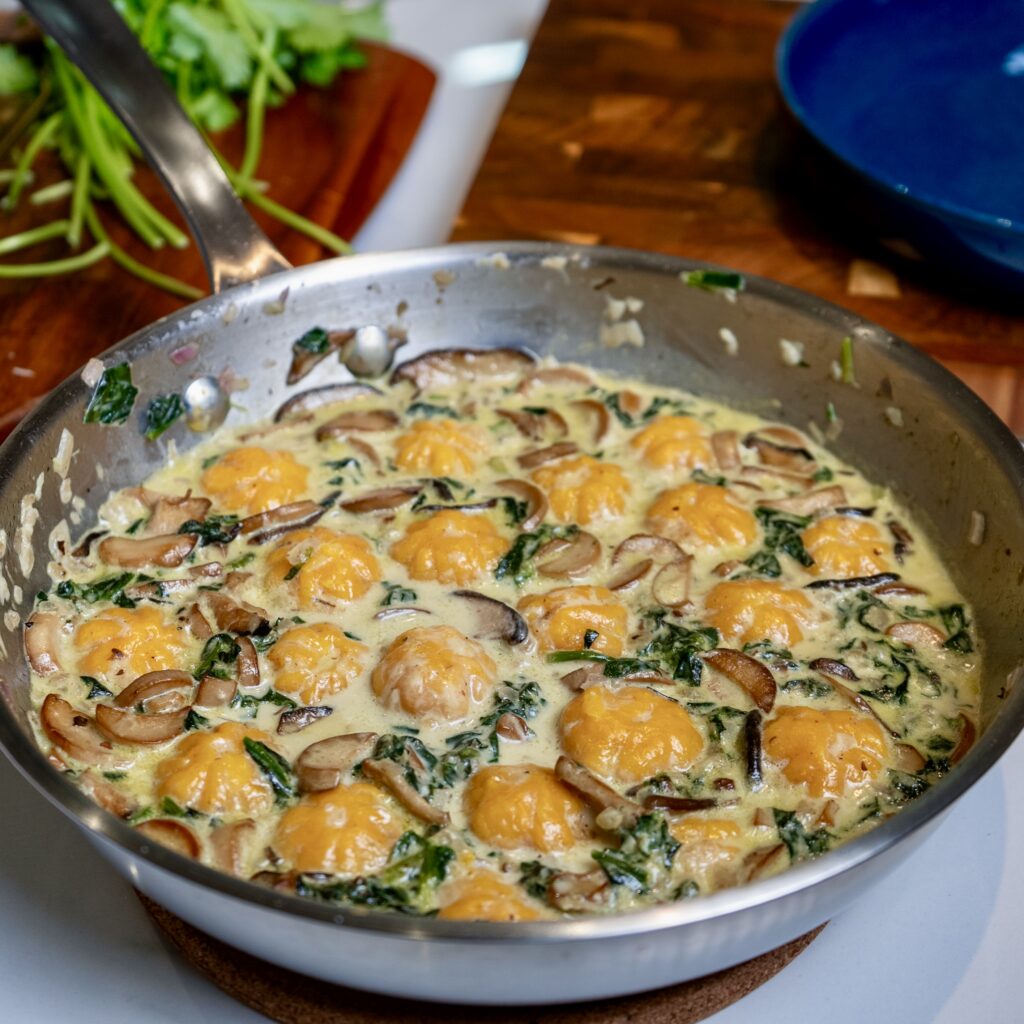
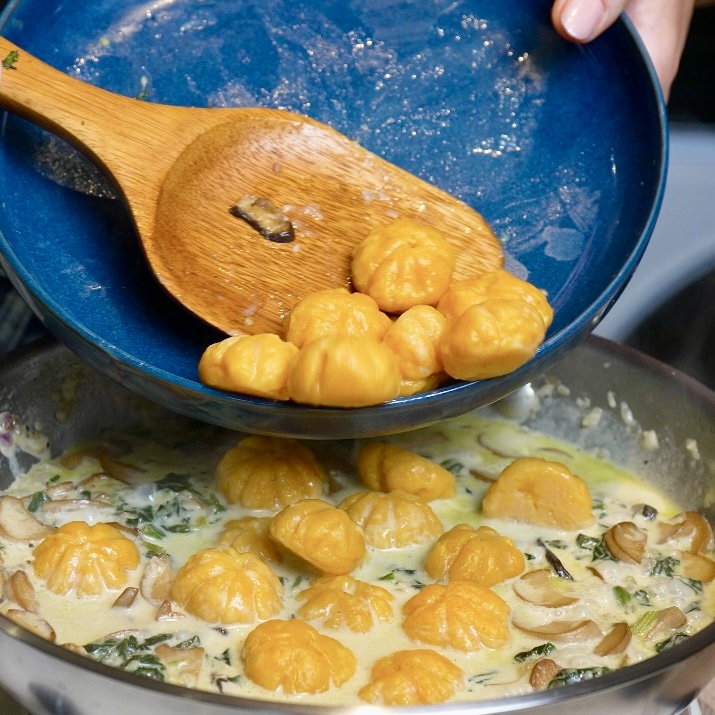
Carefully transfer the cooked butternut squash gnocchi into the frying pan with the creamy mushroom and spinach sauce. Gently fold everything together until the gnocchi are evenly coated, taking care not to damage their delicate pumpkin shapes. The sauce should be smooth and creamy, coating each piece without completely hiding its beautiful shape.
Adding cooked gnocchi to the creamy sauce.
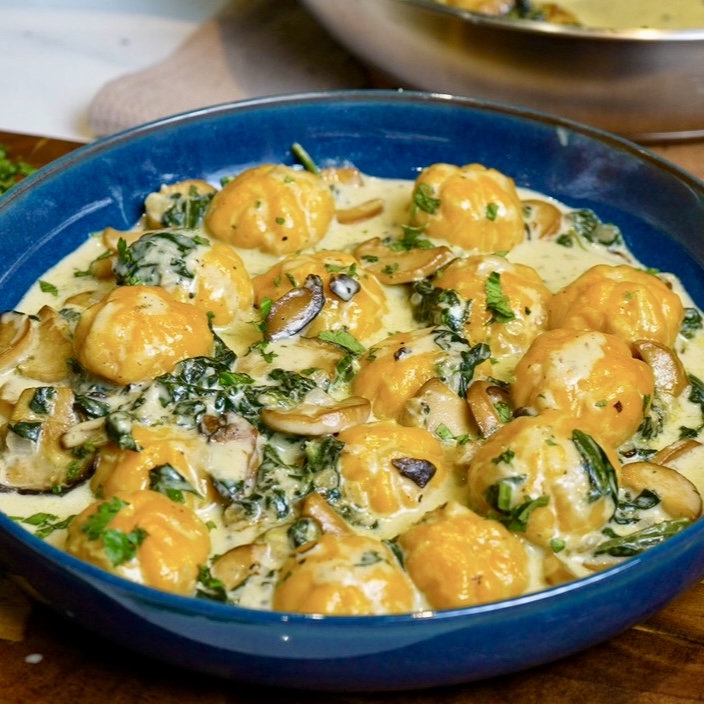
Divide between serving plates and finish with freshly chopped parsley and an extra sprinkle of grated Parmesan, if desired. Serve immediately while the gnocchi are wonderfully tender and the sauce is still silky.
Homemade pumpkin-shaped gnocchi, ready to serve.
Scroll down for the full printable recipe card with exact ingredient quantities, temperatures and step-by-step YouTube video.
Why We Love Creamy Butternut Squash Gnocchi
There's something incredibly satisfying about making gnocchi completely from scratch, especially when you can turn a simple dough into something so beautiful. What I particularly love about this recipe is that the little pumpkin shapes are created entirely by hand, without any specialist pasta-making equipment. The roasted butternut squash gives the gnocchi a naturally vibrant colour and delicate sweetness, while the creamy mushroom and spinach sauce adds richness and a lovely savoury contrast. The dough also gives you plenty of flexibility: you can make traditional gnocchi shapes when you're short on time or spend a little longer creating the miniature pumpkins for a more decorative finish. Another advantage is that the uncooked gnocchi freeze beautifully, so you can prepare a batch in advance and cook them whenever you need a homemade dinner. If you're interested in trying a simpler variation, my 2-Ingredient Sweet Potato Gnocchi is a great place to start. And if creamy mushroom sauces are your weakness, don't miss my Stuffed Pasta Shells with Mushrooms, Ricotta and Spinach, another comforting dish that's perfect for sharing.
Perfect for Any Occasion
These homemade butternut squash gnocchi are ideal for autumn and winter dinners, when you're craving something warm, satisfying and a little more special than your usual pasta dish. Their adorable pumpkin shapes make them particularly lovely for Halloween, Thanksgiving or a seasonal dinner party, but they're equally enjoyable for a relaxed weekend meal at home. You can prepare the gnocchi ahead of time and freeze them uncooked, then boil them straight from frozen when you're ready to serve. This makes entertaining much easier, especially when you'd rather spend time with your guests than preparing everything at the last minute. The dish is satisfying enough to serve on its own, although a light starter or fresh green salad would complement the creamy sauce beautifully. For a seasonal menu, you could begin with my Roasted Squash and Tomato Soup or Roasted Butternut Squash and Pear Soup with Gorgonzola. Whether you're cooking for family, friends or simply treating yourself, these little pumpkins are guaranteed to make dinner feel that bit more special.
YouTube Tutorial & More
Want to see how to make these Creamy Butternut Squash Gnocchi step by step? Watch my full YouTube video to follow the entire process, from preparing the dough and shaping the little pumpkins to making the creamy mushroom and spinach sauce. And don't miss my other easy and delicious recipes:
Best Season:
Suitable throughout the year, Fall, Winter
Description
This Creamy Butternut Squash Gnocchi is the ultimate comfort food for autumn! Made with roasted butternut squash, Parmesan and a touch of nutmeg, these homemade gnocchi are wonderfully soft, tender and full of flavour. Shaping them into adorable little pumpkins adds a fun seasonal twist that's easier than you might think. They're paired with a deliciously creamy sauce made with golden mushrooms, fresh spinach, garlic and Parmesan. Whether you're planning a cosy family dinner or looking for something special to impress your guests, this recipe is well worth trying. Scroll down or tap ‘Jump to Recipe’ to get started!
Ingredients
For the Butternut Squash Gnocchi:
1 butternut squash (approximately 600 g (1 lb 5 oz))
1tbsp olive oil
Salt (to taste)
½tsp ground coriander
1tsp freshly grated nutmeg
20g Parmesan, (2 tbsp + 2 tsp, grated)
100g plain flour (¾ cup + 2 tsp, plus extra for dusting)
1 egg yolk
For the Creamy Mushroom and Spinach Sauce:
300g mushrooms (10.5 oz, halved and sliced)
1tbsp olive oil
Salt and freshly ground black pepper (to taste)
1 red onion (finely chopped)
2 garlic cloves (minced)
100g spinach leaves (3 ⅓ cup, roughly chopped)
100ml cooking cream (just under ½ cup)
240ml reserved gnocchi cooking water, as needed (1 cup)
30g Parmesan (¼ cup, grated)
½tsp ground nutmeg
fresh parsley (chopped, for garnish, optional)
grated parmesan (for garnish, optional)
Instructions
1
Roast the Butternut SquashCut the butternut squash in half lengthways and scoop out the seeds. Using a sharp knife, lightly score the flesh in a criss-cross pattern to help release excess moisture during roasting. Drizzle with olive oil and season with salt and ground coriander. Place the squash halves in the air fryer, cut-side down, and cook at 200°C (400°F) for approximately 40 minutes, or until the flesh is completely tender. Alternatively, roast in a preheated oven at 200°C fan (425°F conventional) for 40–50 minutes, or until soft. Once cooked, allow the squash to cool slightly before scooping out the flesh. Weigh the roasted flesh; I ended up with 325 g (11.5 oz). The 100 g of flour listed in the ingredients is based on this amount of cooked squash, so if you end up with more or less, you may need to adjust the flour accordingly. Pass the roasted flesh through a potato ricer or fine-mesh sieve to achieve a completely smooth, lump-free texture.
2
Prepare the Gnocchi DoughTransfer the smooth butternut squash purée onto a clean work surface and gently flatten it into an even layer. Sprinkle with salt, freshly grated nutmeg and Parmesan, then sift the flour over the top. Make a small well in the centre of the flour and add the egg yolk. Using a dough scraper, gently cut through the mixture, then scrape underneath and fold the dough over itself. Repeat this cutting and folding motion until the ingredients begin to come together. If you don't have a dough scraper, a wide, flat spatula or large butter knife will work just as well. Avoid kneading the dough, as overworking it develops gluten and can make your gnocchi tough rather than light and pillowy. Instead, lightly flour your hands and gently press the mixture together until it forms a cohesive dough. Use your dough scraper to remove any sticky bits from the work surface, dust it lightly with flour and carefully shape the dough into a soft ball. The dough should feel tender and slightly tacky, so resist the temptation to add too much extra flour.
3
Shape the Gnocchi into Little PumpkinsDivide the dough into four equal portions. Cover three portions with a clean kitchen towel to prevent them from drying out while you work with the first. On a lightly floured surface, gently roll one portion into an even rope, approximately 2 cm thick. Using a sharp knife or dough scraper, cut the rope into pieces about 2 cm long. For a quicker method, roll all four portions into ropes, line them up next to each other and cut them together. Gently roll each piece of dough between your palms to form a small, smooth ball. Arrange the balls on a parchment-lined tray lightly dusted with flour, making sure the tray is small enough to fit inside your freezer. To create the pumpkin shape, take a toothpick and gently press eight evenly spaced vertical lines around each ball, working from the top towards the bottom to form the characteristic pumpkin ridges. Then, using the tip of the toothpick, make a small indentation in the centre of the top of each pumpkin. If the toothpick starts sticking to the dough, simply dust it with a little flour. Repeat with the remaining dough. If you're short on time, you can skip the pumpkin design and simply press your finger into the centre of each ball to create a small, button-shaped gnocchi instead. Once shaped, place the tray in the freezer for at least 15 minutes. This helps the gnocchi firm up slightly and hold their delicate shape during cooking.
4
Cook the GnocchiBring a large pot of generously salted water to the boil. Carefully add the chilled gnocchi and give them a gentle stir to prevent them from sticking together. Cook until they float to the surface, which indicates they're ready. Using a slotted spoon, carefully lift the cooked gnocchi out of the water and arrange them in a single layer on a plate to prevent sticking. Reserve approximately 240 ml (1 cup) of the cooking water for the sauce.
5
Make the Creamy Mushroom and Spinach SauceWhile the water for the gnocchi is coming to the boil, start preparing the sauce. Heat the olive oil in a large frying pan over medium heat. Add the sliced mushrooms, season with salt and freshly ground black pepper, and cook until softened and golden brown, stirring occasionally. Add the finely chopped red onion, stir well and cook for approximately 2 minutes, or until softened. Stir in the garlic and cook for another 2 minutes, or until fragrant. Add the chopped spinach and continue cooking until wilted. Pour in the cooking cream, followed by 120 ml (½ cup) of the reserved gnocchi water, grated Parmesan and nutmeg. Stir until everything is well combined, then allow the sauce to simmer gently for a few minutes until it thickens slightly. If the sauce becomes too thick, gradually add more of the reserved cooking water until you reach your desired consistency. Taste the sauce and adjust the seasoning with additional salt and pepper if needed.
6
Combine and ServeCarefully add the cooked butternut squash gnocchi to the creamy mushroom and spinach sauce. Gently toss to coat, taking care not to damage their delicate pumpkin shapes. Serve immediately, garnished with freshly chopped parsley and an extra sprinkle of grated Parmesan, if desired. Enjoy!
Weigh the roasted squash: I used 325 g (11.5 oz) of roasted butternut squash flesh. The 100 g of flour in this recipe is based on that amount. If you end up with more or less squash, adjust the flour accordingly.
Avoid excess moisture: Roasting the squash cut-side down helps it cook until tender, but the moisture content can vary. If the flesh seems particularly wet, allow some excess moisture to evaporate before making the dough. This will help prevent the need for too much flour.
Don't overwork the dough: Use a dough scraper to gently cut and fold the ingredients together rather than kneading. Overworking the dough develops gluten and can make your gnocchi tough instead of soft and pillowy.
Use flour sparingly: The dough should be soft and slightly tacky. Dust your hands and work surface lightly with flour, adding only as much as necessary to make the dough manageable.
Pumpkin shaping is optional: For the little pumpkin shapes, use a toothpick to create eight evenly spaced ridges around each dough ball, then make a small indentation on top. Dust the toothpick with flour if it sticks. For a quicker alternative, simply press your finger into the centre of each ball.
Don't skip the freezer: Freezing the shaped gnocchi for at least 15 minutes helps them firm up and maintain their delicate pumpkin shapes during cooking.
Cook gently: Avoid overcrowding the pot and cook the gnocchi in batches if necessary. Once they float to the surface, allow them a few more seconds to finish cooking before carefully removing them with a slotted spoon.
Save the cooking water: The starchy gnocchi water helps create a silky, creamy sauce. Start with ½ cup and gradually add more until you reach your preferred consistency.
Make ahead: You can freeze the uncooked gnocchi on a parchment-lined tray until solid, then transfer them to a freezer-safe bag or container for up to 2 months. Cook directly from frozen without thawing, allowing a little extra cooking time.
Serving tip: The pumpkin shapes are delicate, so gently fold the cooked gnocchi into the sauce rather than stirring vigorously. Serve immediately with extra Parmesan and freshly chopped parsley.