Easy No-Knead Ciabatta (4 Ingredients): Crispy, Airy, and Effortless
There’s something incredibly satisfying about baking your own bread, especially when it looks and tastes like it came straight from a bakery, yet requires almost no effort. This easy no-knead ciabatta is exactly that kind of recipe. With just four basic ingredients and a simple method, you get beautifully rustic loaves with a crisp crust and a light, airy centre. It’s the kind of bread that instantly elevates any meal, whether you’re dipping it into a rich soup like my High-Protein Cauliflower Basil Soup or serving it alongside flavourful dips such as my Easy Roasted Pepper Hummus or Roasted Garlic Dip.
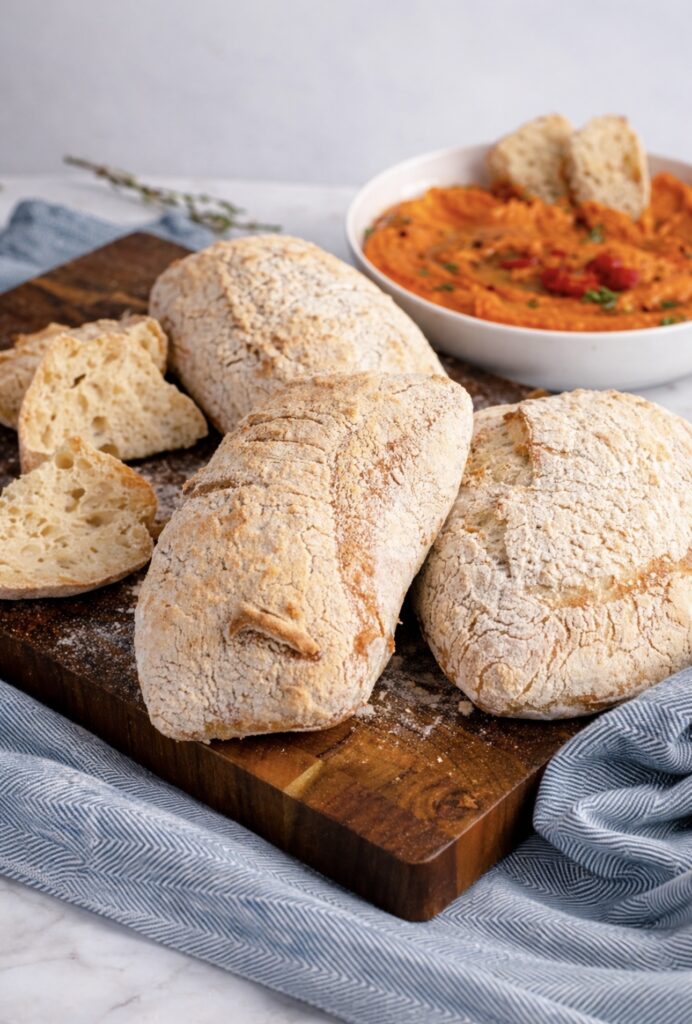
Fresh ciabatta served on a rustic wooden board
Scroll down or tap ‘Jump to Recipe’ to get started with this foolproof homemade ciabatta.
Simple Ingredients, Incredible Results
What makes this ciabatta so special is how a handful of everyday ingredients can create something truly impressive. Each component plays a key role in the final texture and flavour:
Flour : Bread flour gives the best structure and that classic chewy bite. Plain flour works too, but the crumb will be slightly softer.
Water : A high hydration dough is essential for achieving those signature air pockets.
Yeast : Instant yeast keeps things simple and reliable, helping the dough rise beautifully without extra steps.
Salt : Enhances flavour and strengthens the dough structure.
That’s it. No extras, no complications. Just simple ingredients doing exactly what they’re meant to do. This is the kind of bread that pairs perfectly with dips like my Beetroot and Feta Dip or a Delicious Roasted Red Pepper and Feta Dip Recipe, turning even the simplest spread into something special.
How to Make Easy No-Knead Ciabatta
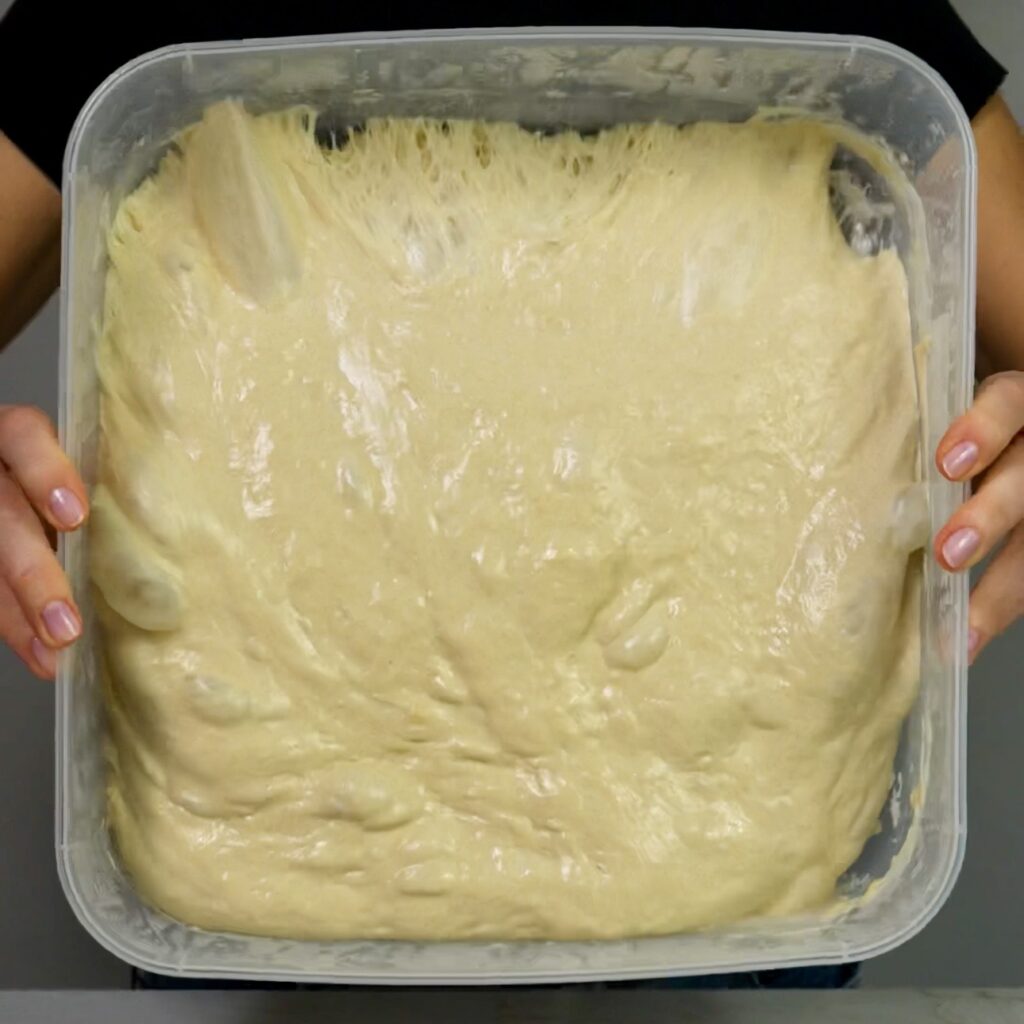
Mixing the Dough
Start by combining lukewarm water, instant yeast, and salt in a square container. The square shape helps later when shaping the dough, but a regular bowl will work just fine. Add the flour and mix everything together with a spoon until fully combined and no dry patches remain. The dough will look sticky and slightly rough at this stage, which is exactly what you want. Cover the container with a lid or cling film and let it rest for 30 minutes.
Stretch and Folds
After the initial rest, begin the stretch and fold process, which replaces traditional kneading. Take one side of the dough, gently stretch it upwards, then fold it over to the opposite side. Repeat this with all four sides. Cover again and let the dough rest for another 30 minutes. Repeat this process three more times, for a total of four rounds, allowing the dough to rest for 30 minutes between each round. With each round, the dough will become smoother, stronger, and more elastic.
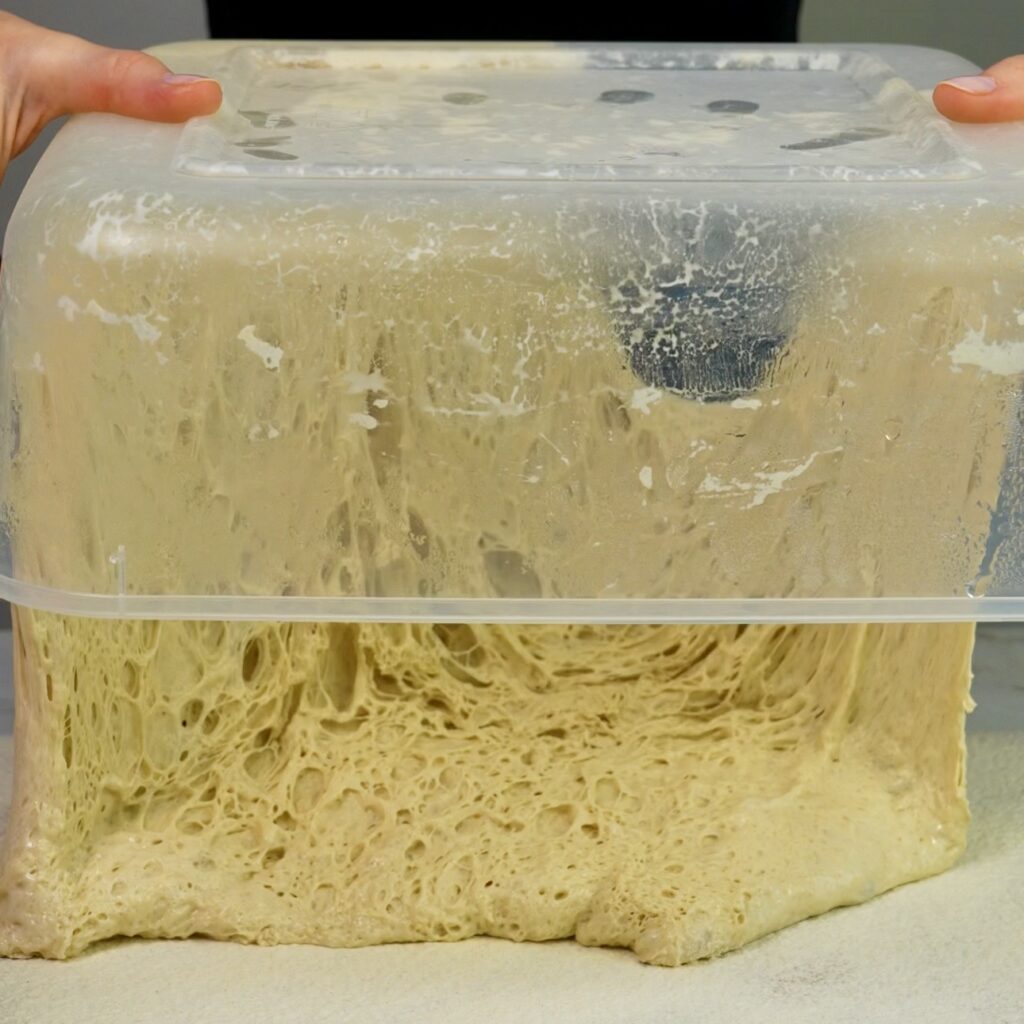
Cold Fermentation
Once all stretch and folds are complete, cover the container and place it in the fridge overnight, or for at least 8 hours. This step develops flavour and improves the dough structure, making it easier to handle the next day.
Perfectly risen dough ready for shaping
Shaping the Dough
When ready to shape, generously dust a clean, flat working surface with flour using a fine sieve, making sure the entire surface is well covered to prevent sticking. Prepare one large or two smaller kitchen towels and dust them generously with flour as well, ensuring there are no gaps where the dough could stick. Remove the dough from the fridge, take off the lid, and turn the container upside down over the floured working surface so the dough falls directly onto it. Let it release naturally without forcing it.
Gently turning the dough out onto a floured surface
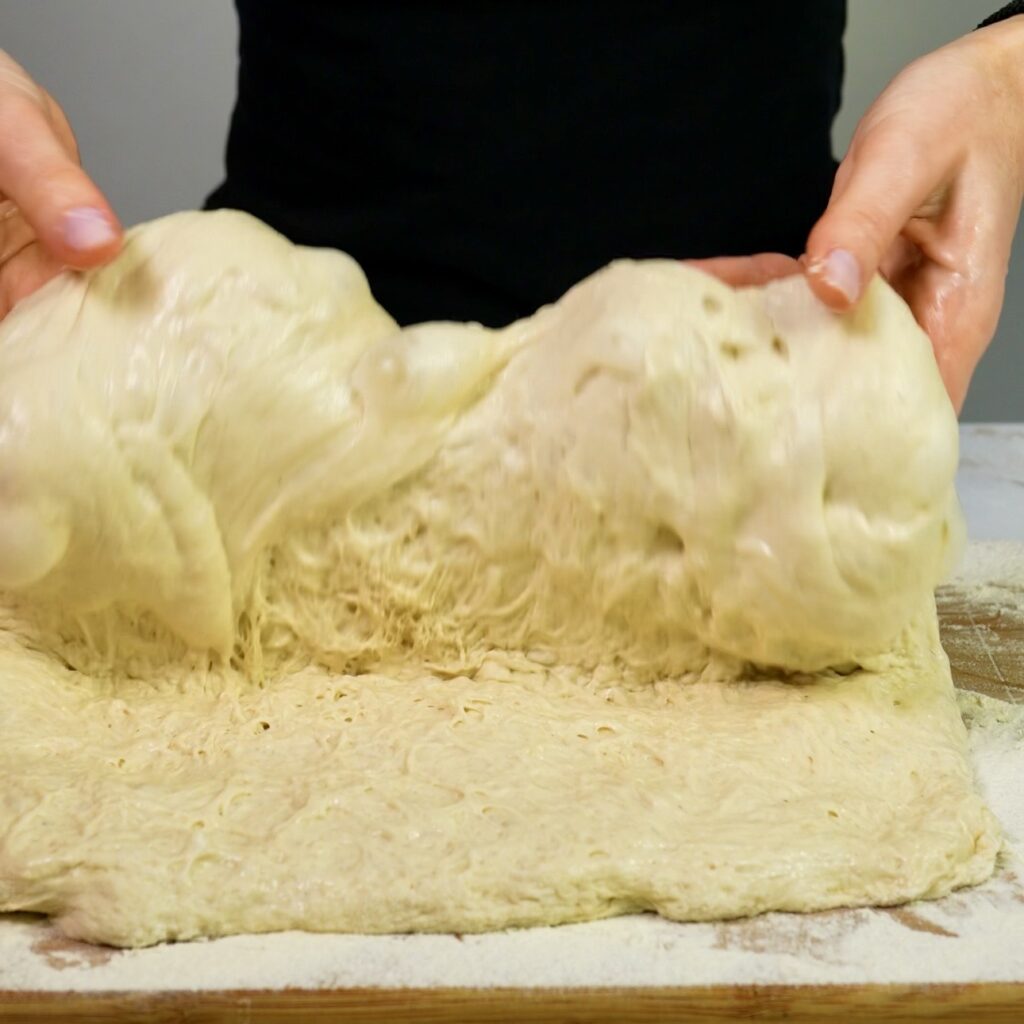
Lightly wet your hands and, working quickly, gently tidy the dough into a square shape. This step is easier if you used a square container. Fold the dough in half to form a rectangle, then tuck in the edges to neaten the shape.
Gently folding the dough to build structure
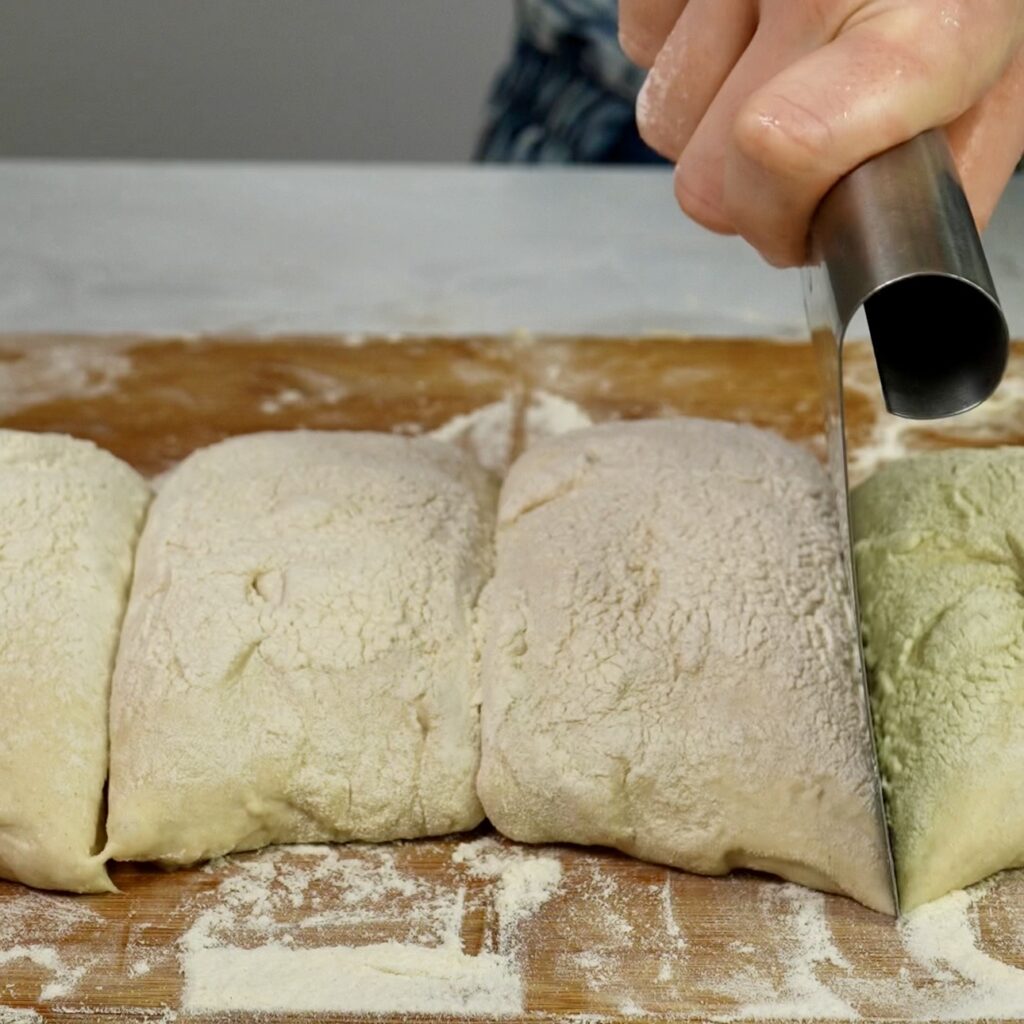
Using a dough scraper, divide the dough into five equal portions.
Cutting the dough into portions for shaping
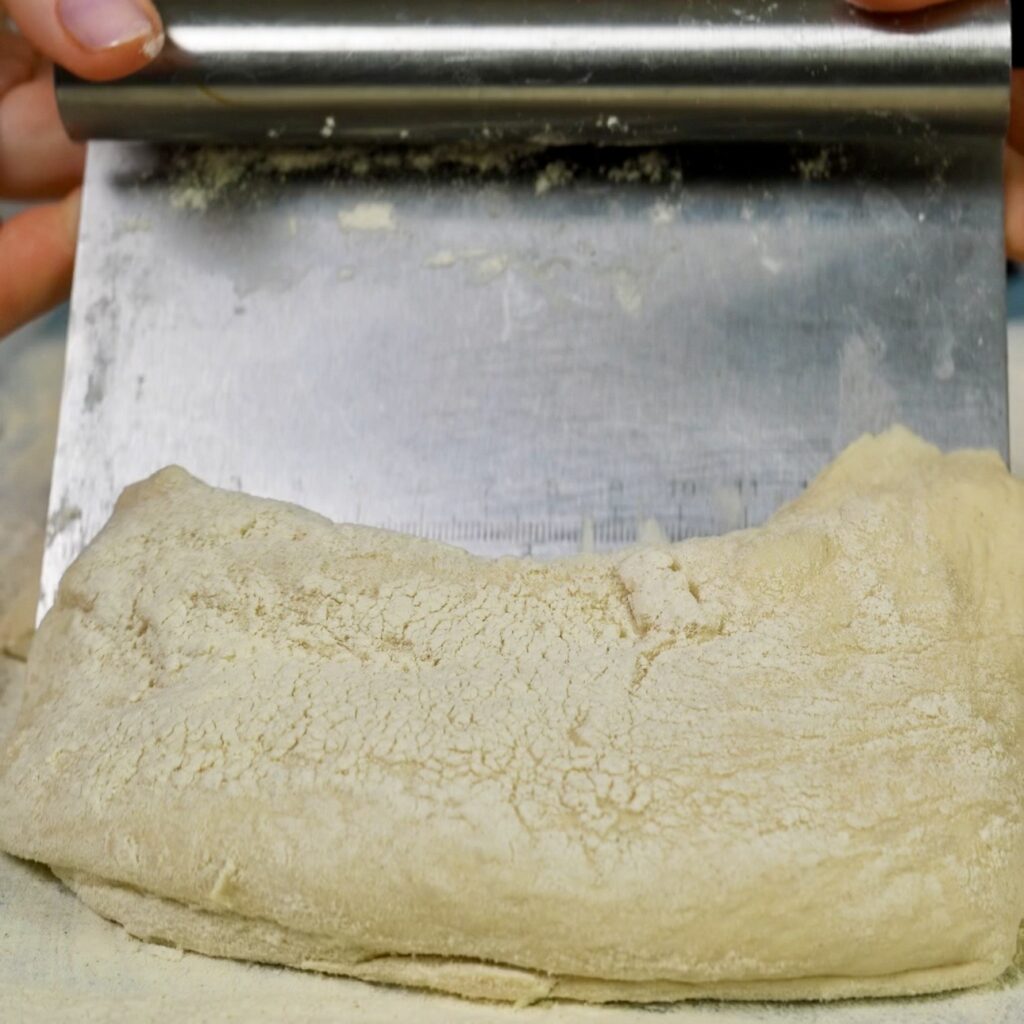
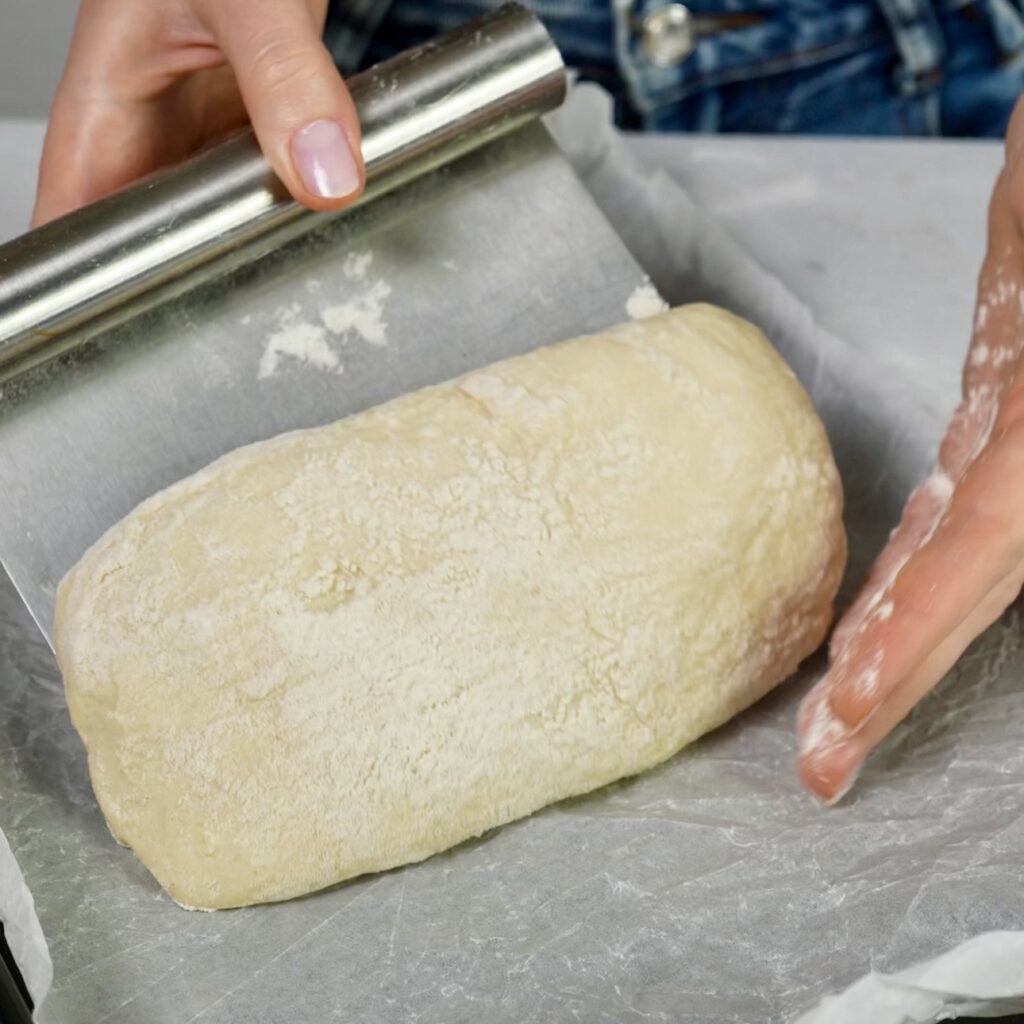
Take one portion at a time and transfer it onto the floured towel using the scraper, then gently shape it into a rectangle. Repeat with the remaining dough. Cover with another clean towel and let the loaves proof for 20 minutes.
Dough placed on a dusted towel for proofing
Baking
Preheat the oven to 220°C/430°F with the fan on. Line a baking tray with parchment paper and place another empty tray at the bottom of the oven. Using a dough scraper, gently lift one loaf by sliding the scraper underneath, then transfer it onto the baking tray, flipping it so the top becomes the bottom.
Gently transferring the proofed dough for baking
Place the tray in the oven and immediately add a handful of ice cubes to the bottom tray, or pour about one cup of water into it if you don’t have ice. This creates steam, allowing the ciabatta to rise quickly before the crust sets. Bake for 15 to 20 minutes, or until the loaves are deep golden brown, keeping in mind that timing may vary depending on your oven. Remove from the oven and let the loaves cool on a wire rack. Repeat with the remaining dough. Allow the ciabatta to cool before slicing, as it continues to cook slightly after baking.
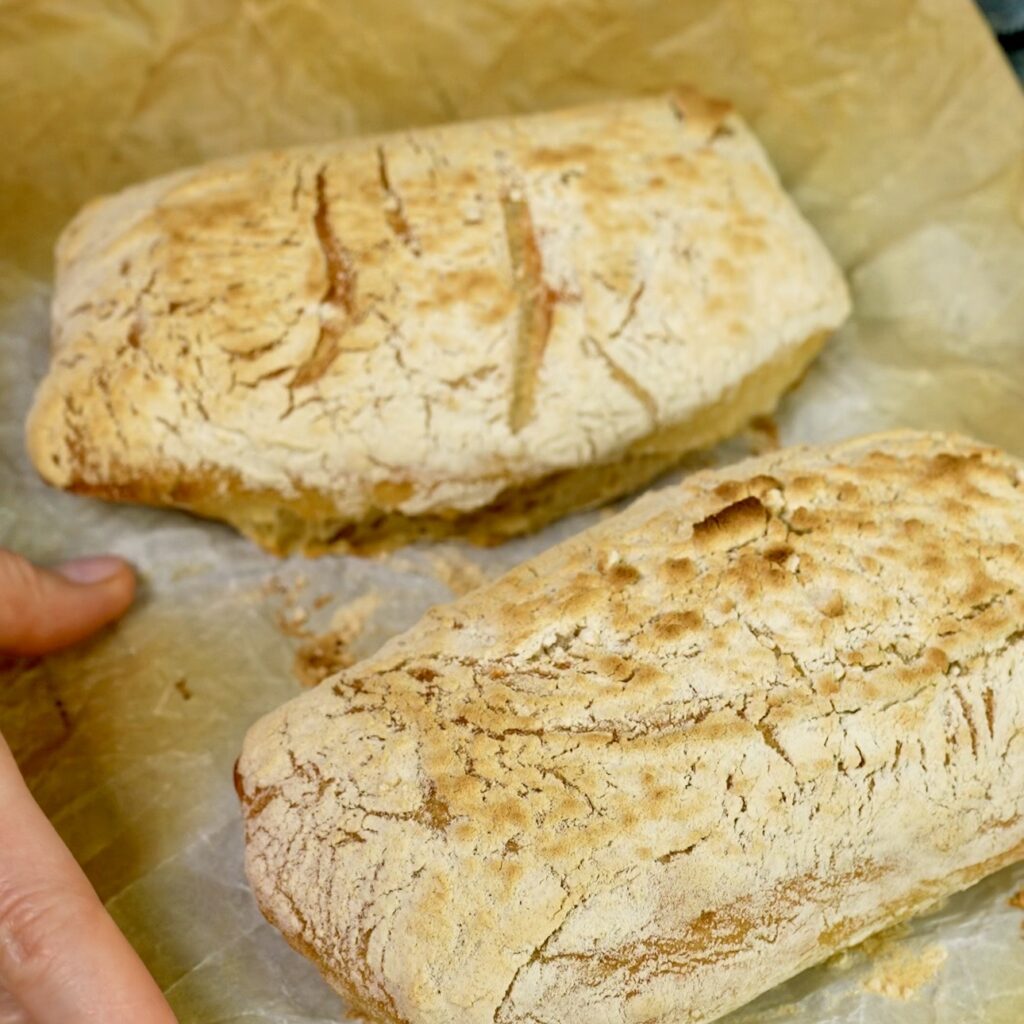
Golden, crisp ciabatta straight from the oven
Serve warm with dips, alongside soups, or simply enjoy on its own.
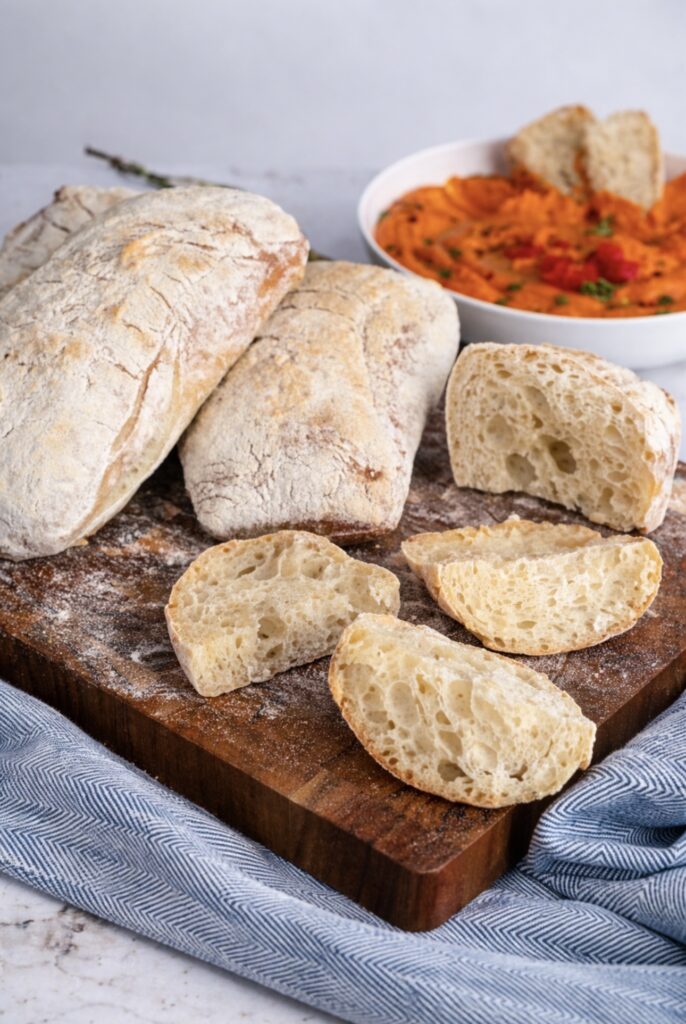
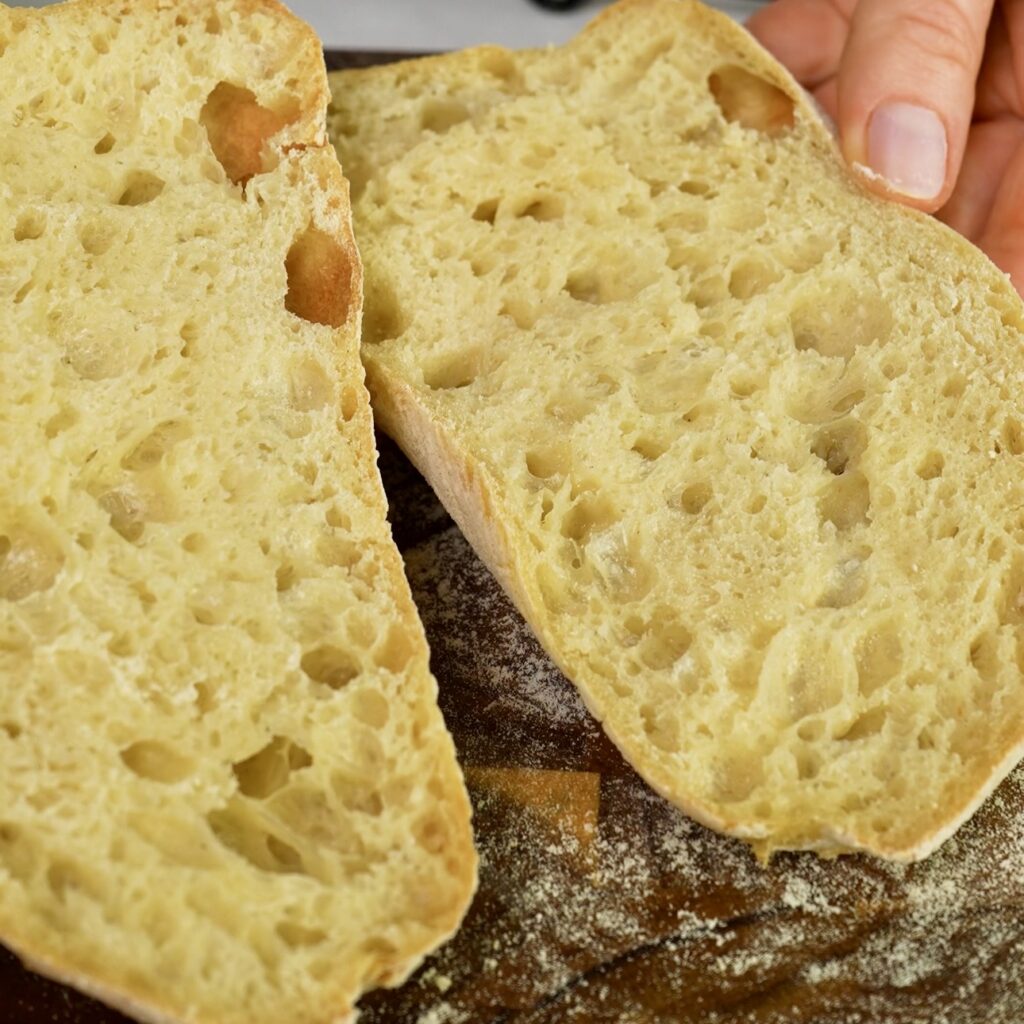
Light, airy interior with an open crumb
Rustic, Versatile, and Perfect for Any Meal
One of the best things about ciabatta is how versatile it is. It works just as well for a casual lunch as it does for a cosy dinner or entertaining guests. Slice it open and fill it with your favourite sandwich ingredients, or use it to recreate my Leftover Chicken Ciabatta Sandwich, where I originally used store-bought bread. This homemade version takes it to another level. You can also toast it lightly and drizzle with olive oil, or simply tear it apart and dip it into something delicious. It’s especially good with hearty dishes and rich sauces, soaking up every bit of flavour. Try it with something deeply comforting like my Braised Beef Shanks or Braised Short Ribs with Potatoes for a meal that feels truly special. You can also get creative and use it as a base for bruschetta, panini, or even homemade garlic bread. Once you make it, you’ll find yourself reaching for this recipe again and again.
Why You’ll Love This Recipe
This easy no-knead ciabatta is all about simplicity without compromise, giving you bakery-quality bread with minimal effort, no special equipment, and no complicated techniques. The crust bakes up beautifully golden and crisp, while the inside stays soft, airy, and full of those irregular holes that make ciabatta so satisfying. The flavour is subtle yet rich, making it incredibly versatile and easy to pair with so many dishes. It’s especially good served alongside comforting soups like my Chilled Avocado Soup , Roasted Butternut Squash and Pear Soup with Gorgonzola, or Roasted Parsnip Soup, where it soaks up every bit of flavour. What really makes this recipe stand out is how reliable it is, once you try it, you’ll realise just how approachable homemade bread can be, and how easily it can become part of your everyday cooking.
You May Also Like
Watch our quick video tutorial on Instagram and don’t miss out on our other easy and comforting recipes:
This easy no-knead ciabatta is made with just 4 simple ingredients and delivers bakery-style results at home. The dough comes together in minutes, then slowly develops flavour and structure with a few stretch and folds and an overnight rest. Each loaf bakes up with a crisp golden crust and a light, airy centre. No kneading, no complicated steps, just a reliable and foolproof method. Perfect served warm with dips, alongside soups, or simply enjoyed on its own. A simple bread recipe you’ll keep making again and again.
Ingredients
500g bread flour (4 cups + 2 tbsp + 2 tsp, plus extra for dusting and shaping)
435ml lukewarm water (1¾ cup + 1 tbsp)
10g salt (2 tsp)
8g instant yeast (2.5 tsp)
Instructions
1
Prepare the Dough: In a square container, combine the lukewarm water, yeast, and salt. A square container makes shaping easier later, but a regular bowl will also work. Add the flour and mix with a spoon until fully combined and no dry patches remain. Cover with a lid or cling film and let it rest for 30 minutes. Now begin the stretch and fold process. Take one side of the dough, gently stretch it upwards, then fold it over to the opposite side. Repeat this with all four sides, then cover and let the dough rest for another 30 minutes. Repeat this process 3 more times, for a total of 4 rounds of stretch and folds, resting the dough for 30 minutes between each round. After the final round, cover the container and place it in the fridge overnight, or for a minimum of 8 hours.
2
Shaping: When ready to shape, generously dust a clean, flat working surface with flour using a fine sieve, making sure it is fully covered to prevent sticking. Prepare one large or two smaller kitchen towels and dust them generously with flour as well, ensuring there are no gaps, otherwise the dough will stick. Remove the dough from the fridge, take off the lid, and turn the container upside down over the floured working surface so the dough falls directly onto it. It should release easily, just be patient. Lightly wet your hands and, working quickly, tidy the dough into a square shape. This is where the square container helps. Fold the dough in half to form a rectangle, then tuck in the edges to neaten the shape. Using a dough scraper, divide the dough into 5 equal portions. Take one piece and transfer it onto the floured towel using the scraper, then gently shape it into a rectangle. Repeat with the remaining dough. Cover with another clean towel and let the loaves proof for 20 minutes.
3
Baking: Preheat the oven to 220°C / 430°F with the fan on and line a baking tray with parchment paper. Place another empty tray at the bottom of the oven. You will bake the ciabatta in batches, first 3 loaves, then the remaining 2. Using a dough scraper, gently lift one loaf by sliding the scraper underneath, then transfer it onto the baking tray, flipping it so the top becomes the bottom. Place the tray in the oven and immediately throw a handful of ice cubes onto the bottom tray, or pour about 1 cup of water into it if you don’t have ice. This creates steam, allowing the ciabatta to rise quickly before the crust sets. Bake for 15 to 20 minutes, or until deep golden brown, keeping in mind that timing may vary depending on your oven. Remove from the oven and let the loaves cool on a wire rack. Repeat with the remaining dough. Allow the ciabatta to cool before slicing, as it continues to cook slightly after baking. Serve with my roasted pepper dip or feta dip, or simply enjoy on its own. Crisp on the outside, airy on the inside, this is the kind of bread you’ll keep coming back to.
Flour choice matters: For the best structure and open crumb, use bread flour. Plain flour will still work, but the texture will be slightly softer and less chewy.
Dough consistency: This is a very high-hydration dough, so it should feel loose, sticky, and slightly jiggly. Don’t be tempted to add extra flour, this is what gives ciabatta its signature airy texture.
Stretch and folds are key: These replace kneading. Don’t skip them, as they build gluten strength and help the dough hold its shape later.
Cold fermentation: An overnight rest in the fridge improves flavour and makes the dough easier to handle. Minimum 8 hours is enough, but longer will deepen the taste even more.
Handle gently when shaping: Avoid pressing or deflating the dough too much. You want to keep as many air bubbles as possible for that classic ciabatta structure.
Flour generously: Dust both the working surface and towels well. This dough sticks easily, and insufficient flour will make handling difficult.
Steam is essential: Adding ice or water to the bottom tray creates steam, which helps the loaves rise quickly and develop a crisp crust.
Do not skip flipping: Flipping the dough when transferring to the tray helps create that rustic, uneven surface typical of ciabatta.
Baking batches: Avoid overcrowding the tray. Baking in batches ensures proper airflow and even browning.
Cooling time: Let the ciabatta cool before slicing. Cutting too early will compress the crumb and make it slightly gummy.
Keywords:
no knead ciabatta, easy ciabatta bread, homemade ciabatta, 4 ingredient bread, artisan bread recipe, no knead bread, rustic Italian bread, crusty bread recipe, airy crumb bread, overnight bread dough
Did you make this recipe?
Tag @shicocooks if you made this recipe. Follow @shicocooks on Instagram for more recipes.
Pin this recipe to share with your friends and followers.
Izabella Jakubec
Food Blogger and Recipe Developer
Hi there!
I’m Izabella, and I’m thrilled to have you here!
Here, you’ll discover a collection of simple, easy-to-follow recipes that are perfect for anyone who loves quick and delicious meals.