Pear Cloud Cubes with Cinnamon Filling: A Fluffy Dessert Under 100 Calories
Imagine biting into something as light as a cloud, only to discover a soft, cinnamon-spiced pear filling tucked inside. These Pear Cloud Cubes with Cinnamon Filling are unlike your usual fruit desserts. Fresh pears are transformed into an incredibly airy, marshmallow-like mixture, shaped into generous squares and finished with a delicate coating of cocoa powder. With approximately 85 calories per cube when made with regular pears, this naturally gluten-free, low-fat dessert is a lovely alternative to traditional sweets. There's no baking involved, and the result looks far more complicated than it actually is. If you enjoyed my Strawberry Fluff Squares (Gluten-Free) or Low-Calorie Fruity Yogurt Jelly, you're going to love this fruity creation.
Scroll down or tap 'Jump to Recipe' for the full printable recipe card.
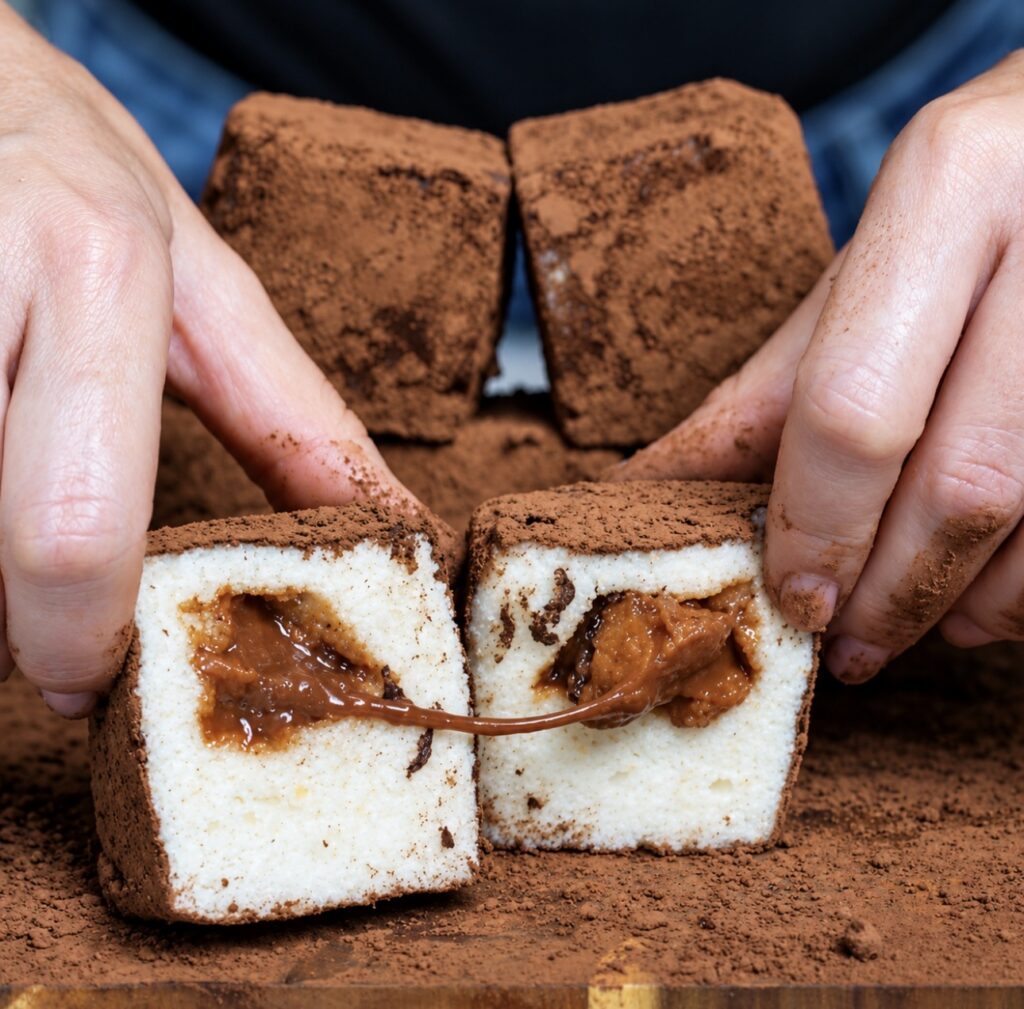
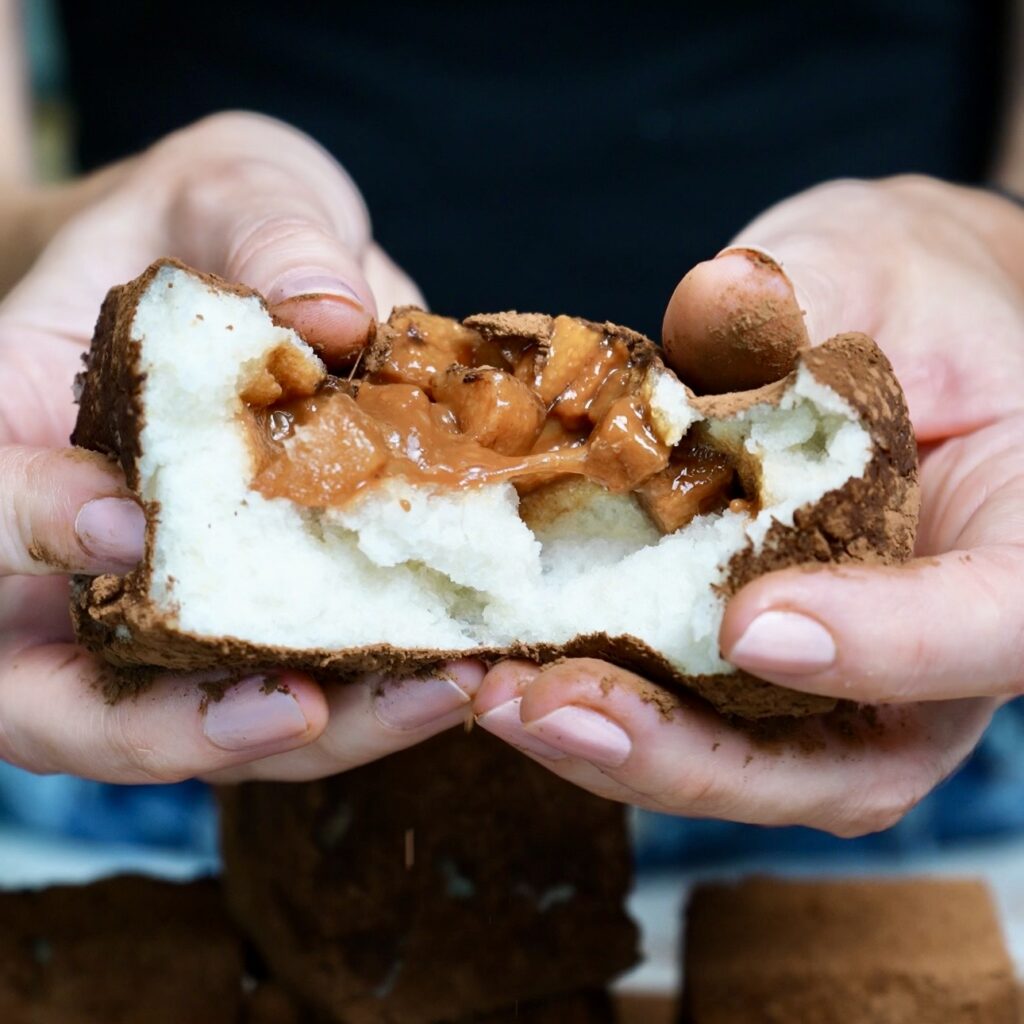
One Pear Cloud Cube cut in half and gently pulled apart by hand to reveal its soft, airy texture and hidden cinnamon pear centre.
Simple Ingredients, Big Flavours
What makes these pear cloud cubes so interesting is how a few ordinary ingredients create such an unusual texture. There is no flour, butter or double cream, and only a little added sweetness. Instead, the recipe relies on ripe fruit, properly prepared gelatine and plenty of whisking to achieve its signature fluffy consistency. It's a similar approach to the clever ingredient combinations in my Mosaic Jelly Domes and No-Bake Coconut Cheesecake, where simple ingredients become something beautifully structured. Here's what makes each ingredient important:
Pears or apples
The foundation of the dessert, providing natural sweetness, moisture and a delicate fruity flavour. I used snow pears (Asian pears), but regular pears or sweet apples work too. Remember to weigh the fruit after peeling, coring and cubing.
Honey
Just a tablespoon enhances the natural sweetness of the fruit without overpowering its flavour. You can adjust the amount depending on how sweet your pears are.
Gelatine
The secret to that remarkable cloud-like consistency. When properly dissolved and whipped with the fruit purée, it helps create a light, aerated structure that holds its shape after chilling.
Ice-cold water
Essential for blooming the gelatine before melting it. This allows the granules to hydrate evenly, helping prevent lumps in the finished dessert.
Brown sugar and cinnamon
These give the hidden fruit filling its warm, comforting flavour. The gentle caramel notes of brown sugar work particularly well with pears, while cinnamon adds a lovely aromatic finish.
Cornflour (cornstarch)
A small amount thickens the cooked fruit filling, preventing it from spreading too much when the cubes are assembled.
Unsweetened cocoa powder
Adds a subtle chocolate bitterness that balances the sweet pear mixture. It also creates a beautiful contrast against the pale, fluffy interior.
Neutral oil
Just a little is needed to grease the silicone mould, making the delicate cubes easier to release without damaging their shape.
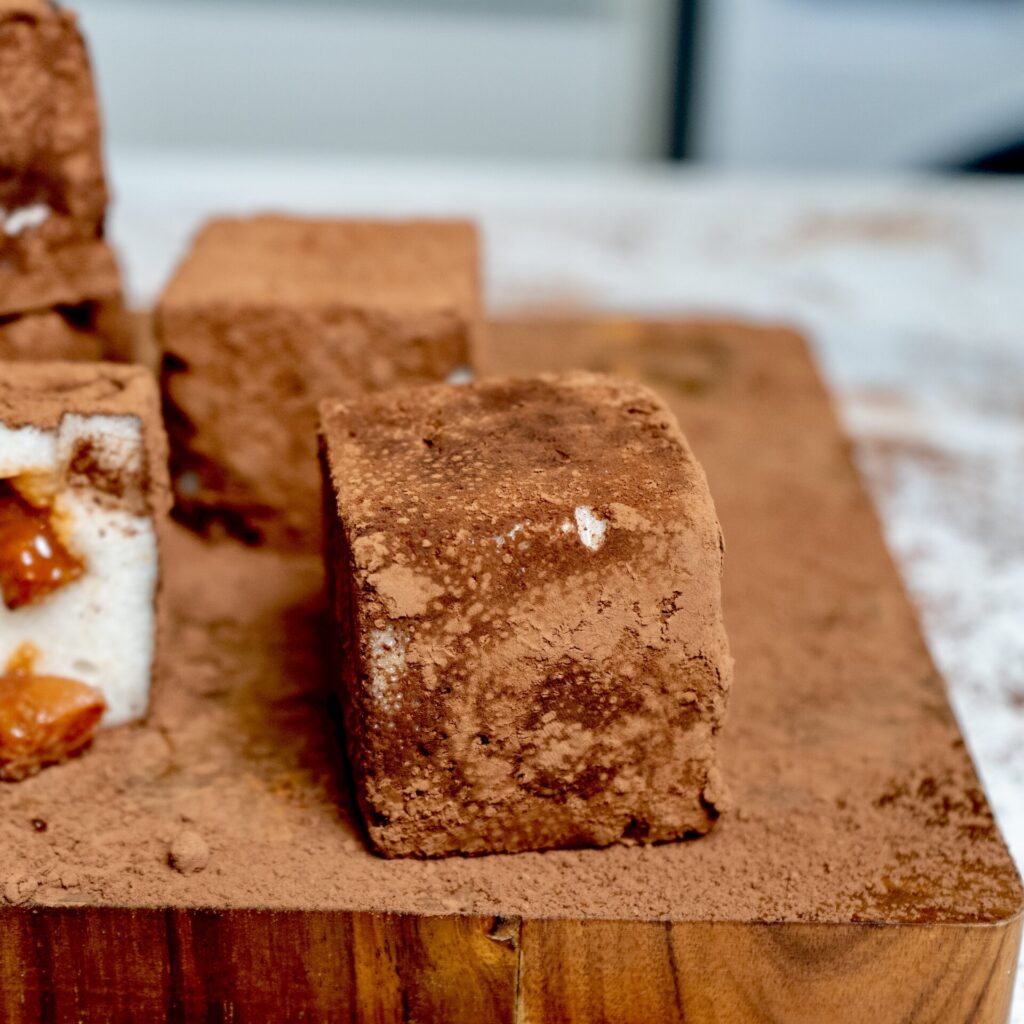
A single soft and airy Pear Cloud Cube coated in cocoa powder and served on a wooden board.
How to Make Pear Cloud Cubes with Cinnamon Filling
Prepare the Cinnamon Pear Filling
Let's start with the filling, as it needs to cool completely before we assemble the cubes. Place the peeled, cored and cubed pears in a frying pan, then add the brown sugar, cinnamon and water. Give everything a good stir and bring to the boil. Reduce the heat slightly and continue cooking, stirring occasionally, until the pears have softened and most of the liquid has evaporated. If the mixture starts looking too dry before the pears are tender, simply add another splash of water. In a small bowl, mix the cornflour (cornstarch) with a little water until completely smooth, making sure there are no lumps. Pour it into the pan while stirring continuously, then continue cooking until the filling thickens nicely. Remove from the heat and leave it to cool completely. Once cooled, transfer the filling to a piping bag, which will make assembling the cubes much easier. Don't worry if you don't have one, though. A small spoon will work just as well!
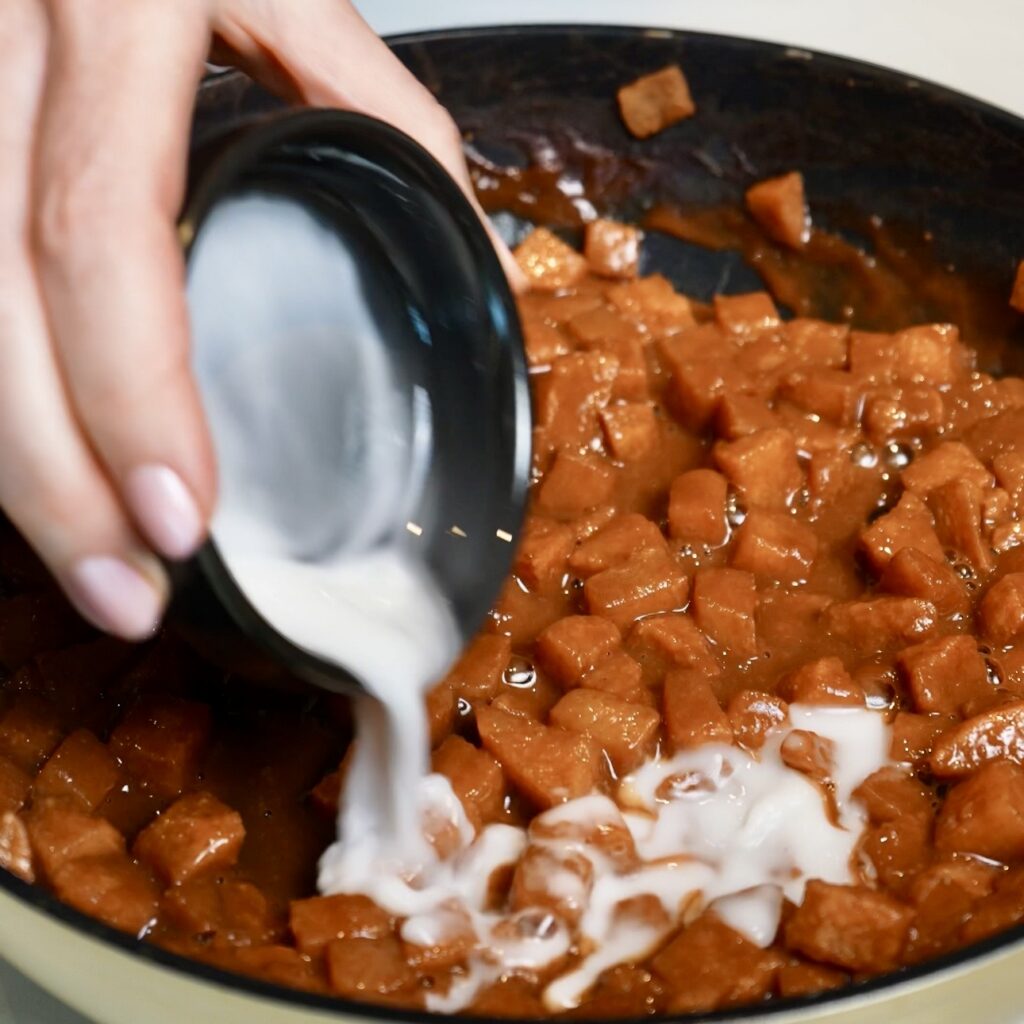
Adding the cornflour mixture to the softened cinnamon pears, stirring continuously until the filling thickens.
Bloom the Gelatine
Now let's move on to the pear base. First, we need to prepare the gelatine, as it needs a little time to bloom. Place the powdered gelatine in a medium bowl and pour the ice-cold water over it. Transfer the bowl to the fridge until the gelatine has absorbed all the water and developed a thick, spongy consistency. Don't rush this step, as properly bloomed gelatine is important for achieving that lovely, fluffy texture later. While it's sitting in the fridge, we can get started on the pears.
Prepare the Pear Purée
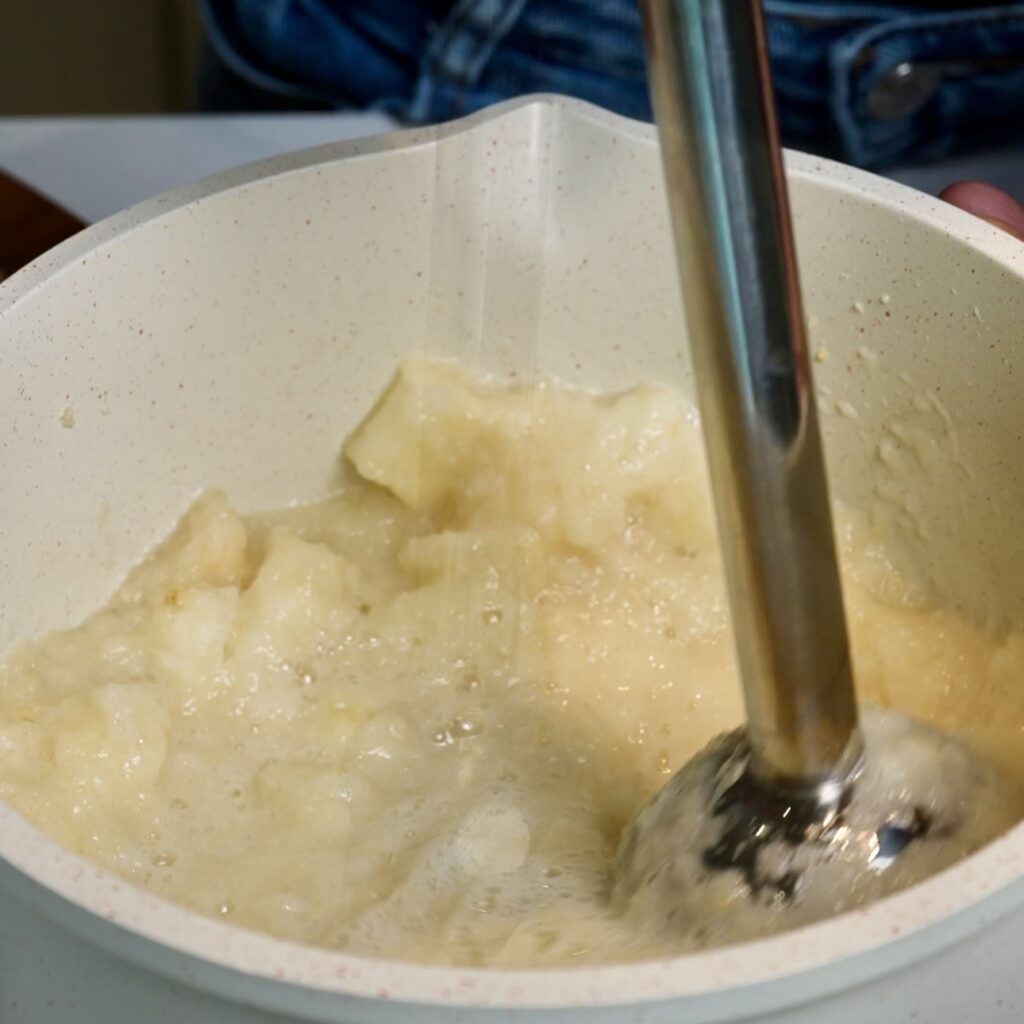
Place the peeled, cored and cubed pears in a large saucepan. Using an immersion blender, blend them until completely smooth. Take your time here, as we want a silky purée without any noticeable pieces of fruit.
Fresh pears blended into a silky-smooth purée to create the light and fluffy base for Pear Cloud Cubes.
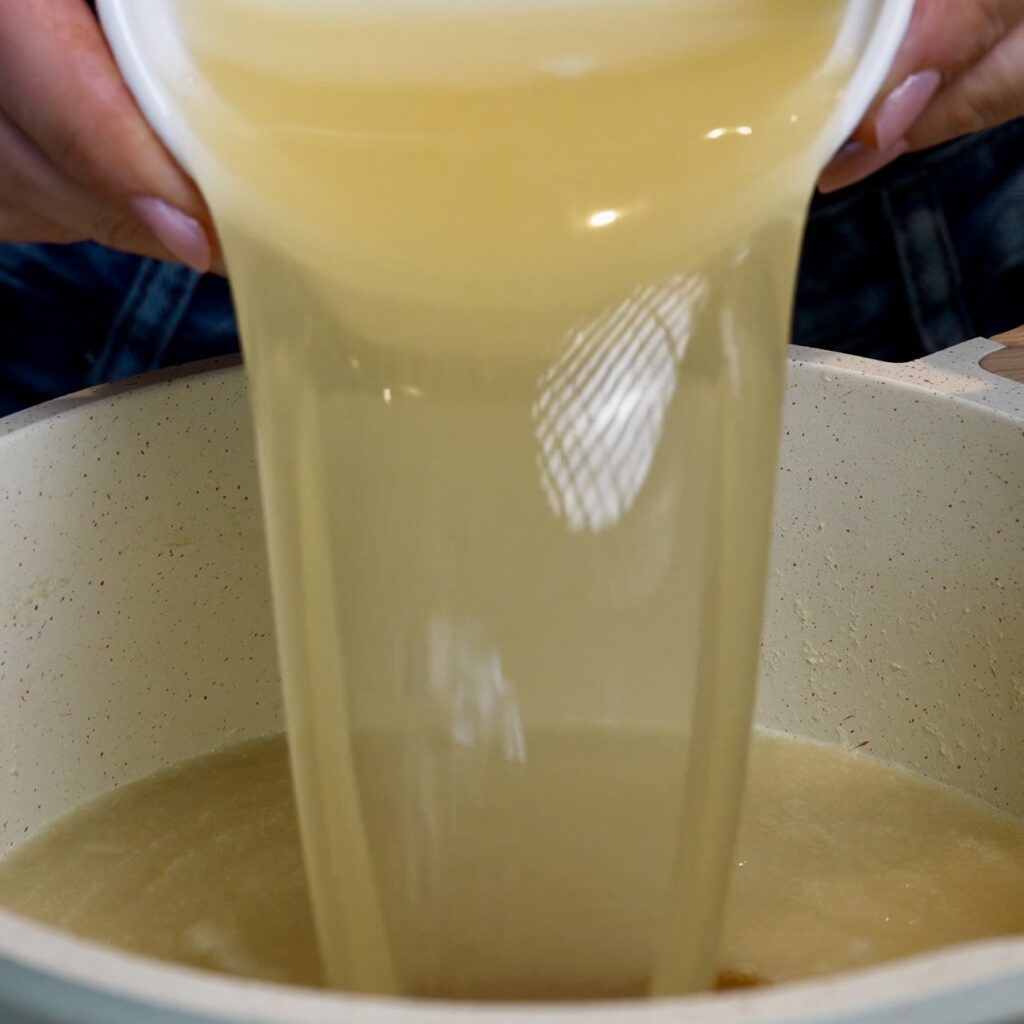
Place the saucepan over medium heat and bring the purée just to the point of boiling, but don't let it actually boil. As soon as you notice the first bubbles appearing, remove it from the heat. Add the honey and stir until well combined. Now take the bloomed gelatine out of the fridge. It should look quite firm and spongy at this stage, which is exactly what we want. Place the bowl in the microwave and heat in short intervals, checking and stirring between each one. We're only trying to melt the gelatine back into a liquid, so be careful not to overheat it. Once completely liquid, pour the melted gelatine into the warm pear purée and stir thoroughly until everything is evenly incorporated.
Melted gelatine is added to the warm pear purée to help create the dessert's signature fluffy, marshmallow-like texture.
Whip Until Light and Fluffy
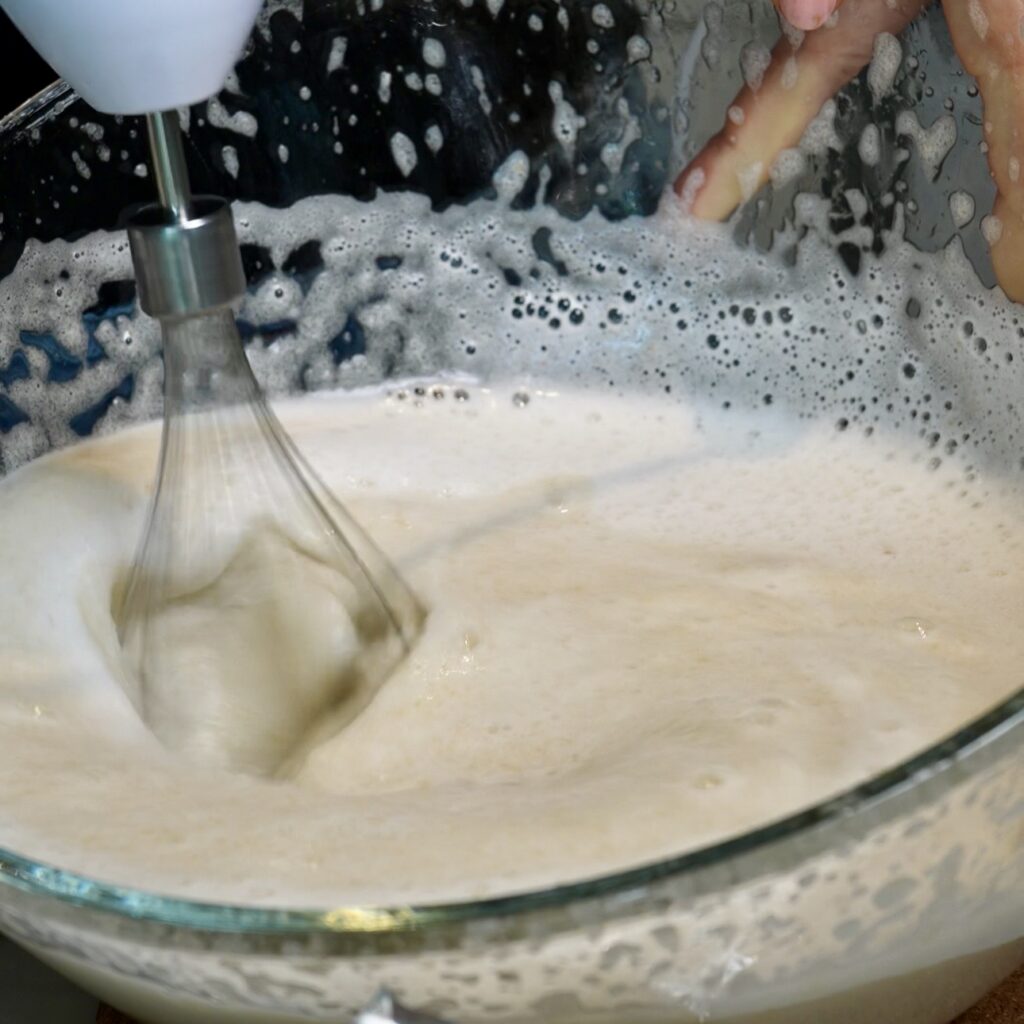
Here's where the magic happens! Transfer the pear mixture to a large mixing bowl or, even better, the bowl of a stand mixer if you have one. A stand mixer will make this part much easier, but an electric hand mixer will also do the job. Start whisking the mixture continuously. At first, it will still look quite liquid, and you might wonder whether anything is actually happening. Don't worry, that's completely normal! Just keep whisking. As the mixture gradually cools, you'll notice it starting to change. It will become paler, thicker and increasingly airy. The volume will also begin to increase, eventually doubling in size.
Whipping the pear mixture until pale, thick and airy to achieve its signature cloud-like texture.
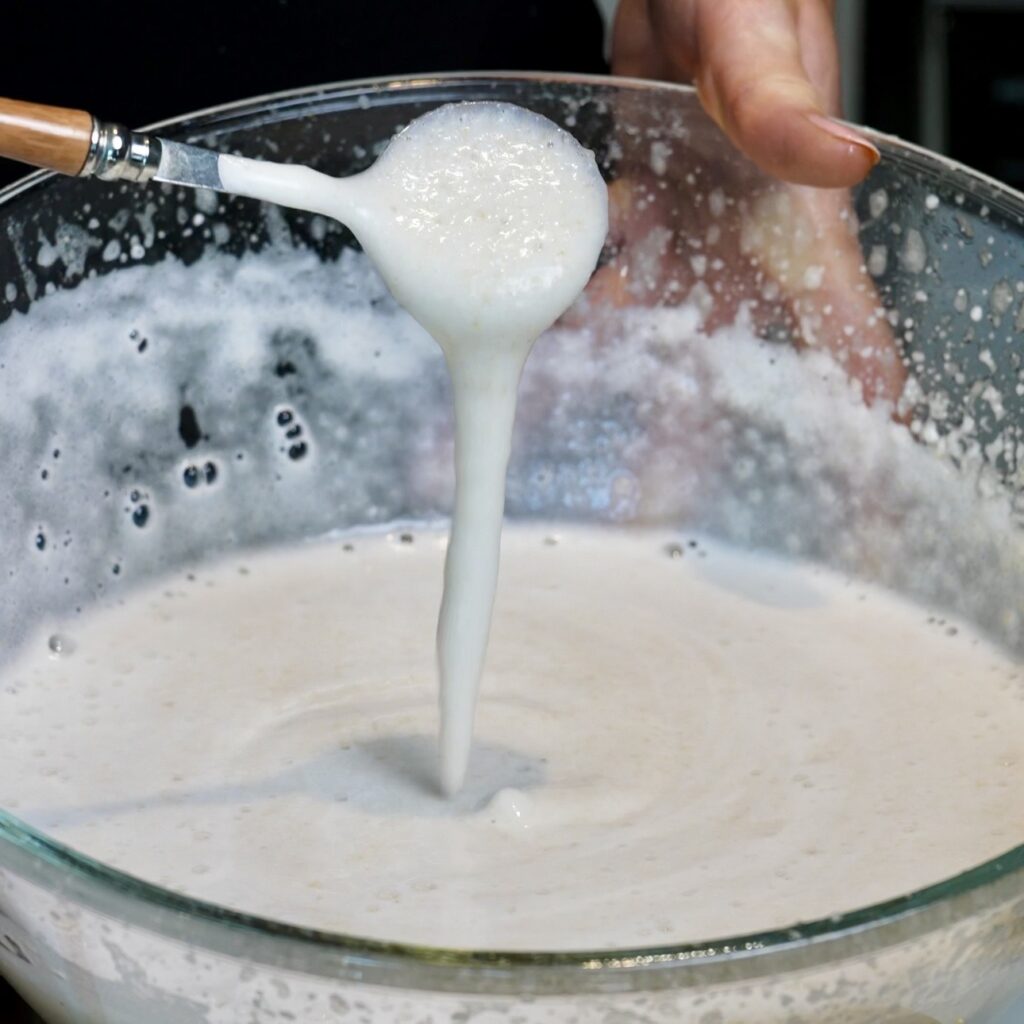
The most important thing here is to be patient and not stop too early. By the time it's ready, the mixture should feel completely cool, look noticeably lighter in colour and have a thick, fluffy, marshmallow-like consistency.
The pear mixture has doubled in volume, becoming pale, thick and beautifully fluffy with a marshmallow-like consistency.
Assemble the Pear Cloud Cubes
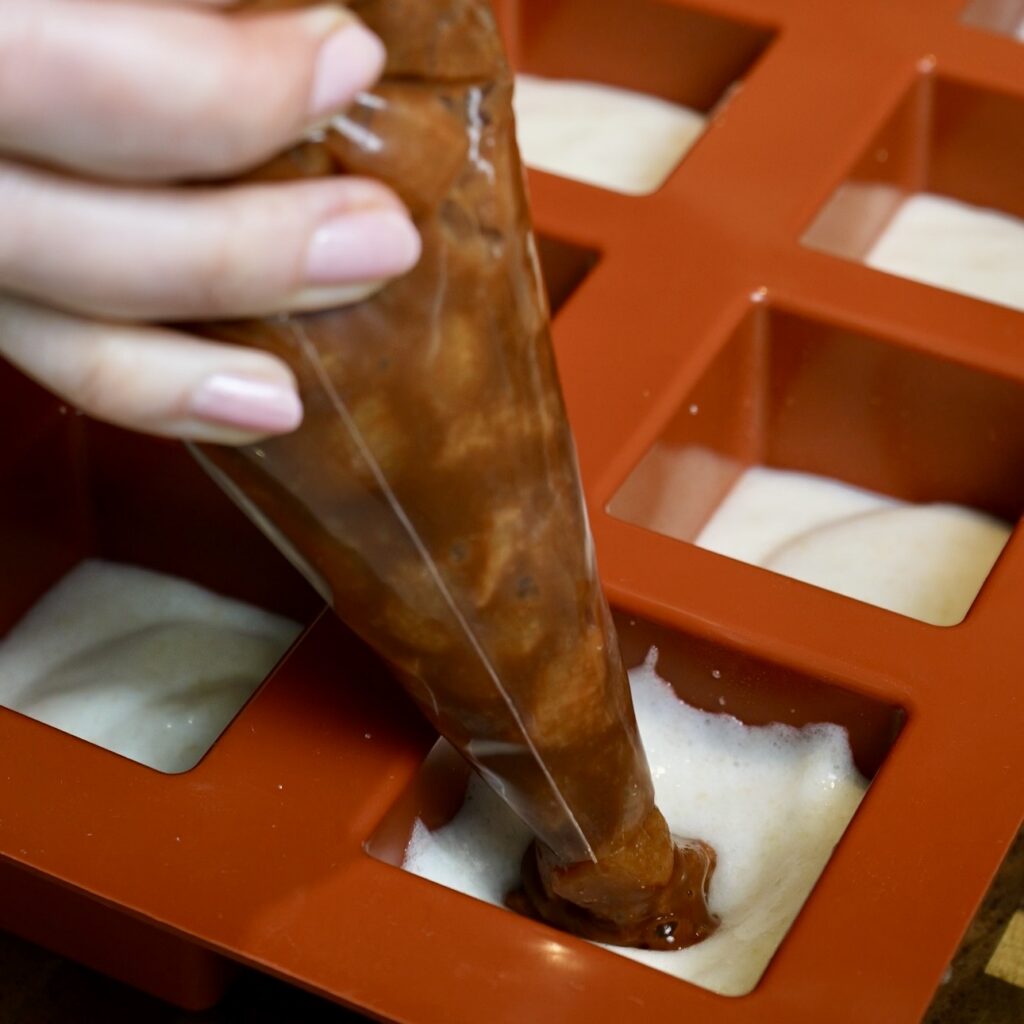
Once your pear mixture is beautifully whipped, it's time to assemble the cubes. Lightly grease a square silicone mould with a little neutral oil, such as coconut oil or light olive oil. Make sure to cover the sides and corners, as this will help release the cubes later without damaging their delicate texture. Spoon the whipped pear mixture into each cavity, filling it approximately halfway. Next, take a small spoon and gently create a hollow in the centre of each portion. Try not to press too hard, as we want to keep as much of that lovely airy texture as possible. Now pipe a little of the cooled cinnamon pear filling into each hollow. If you're using a spoon instead of a piping bag, carefully add the filling to the centre. Make sure not to overfill, as we still need enough room to cover it completely.
Spoon or pipe the cinnamon-spiced pear filling into the centre of each fluffy pear cube before covering with the remaining mixture.
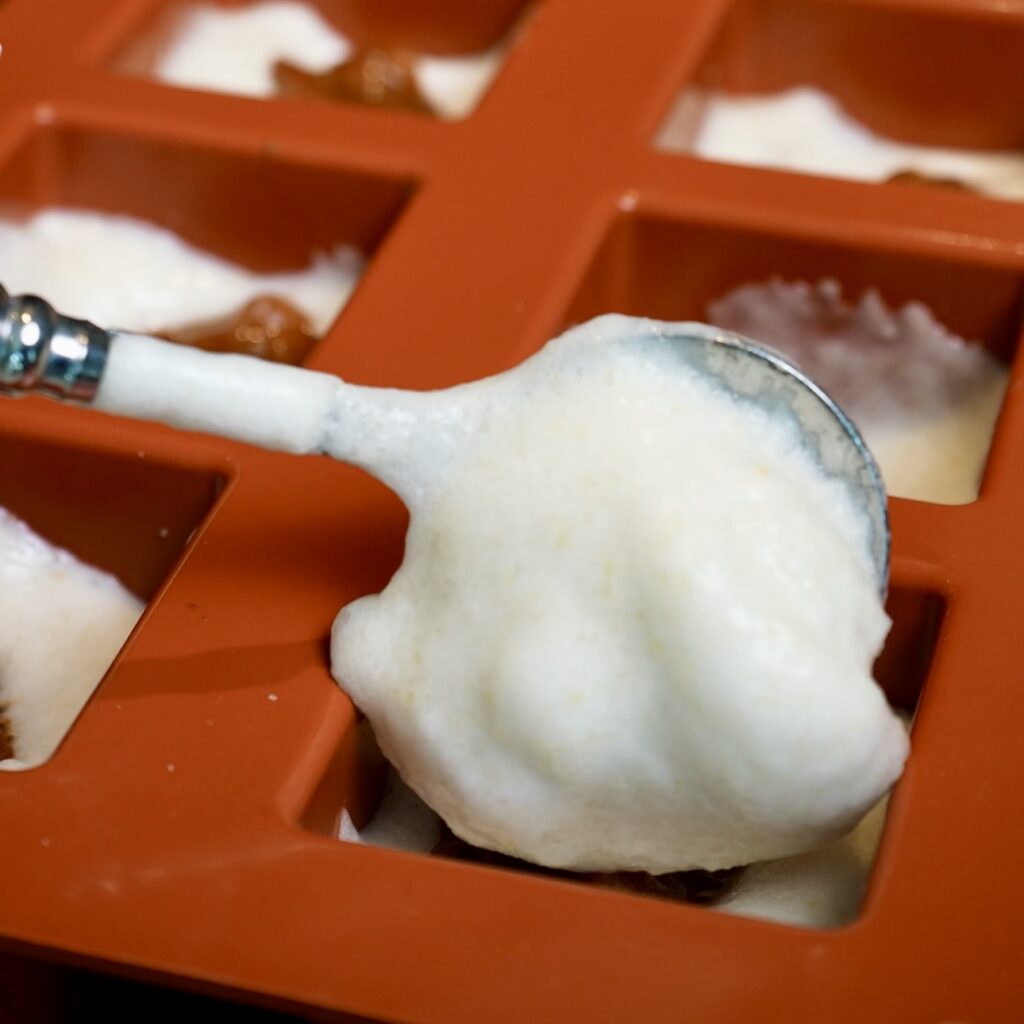
Spoon the remaining whipped pear mixture over the filling, making sure it's fully enclosed and hidden inside each cube. Gently smooth the tops with the back of a spoon if needed.
Adding the remaining fluffy pear mixture over the cinnamon filling, completely enclosing the delicious hidden centre.
Transfer the mould to the fridge and leave the cubes until completely set. Personally, I recommend leaving them overnight if you can. This gives them plenty of time to firm up and makes removing them from the mould much easier.
Unmould and Coat with Cocoa Powder
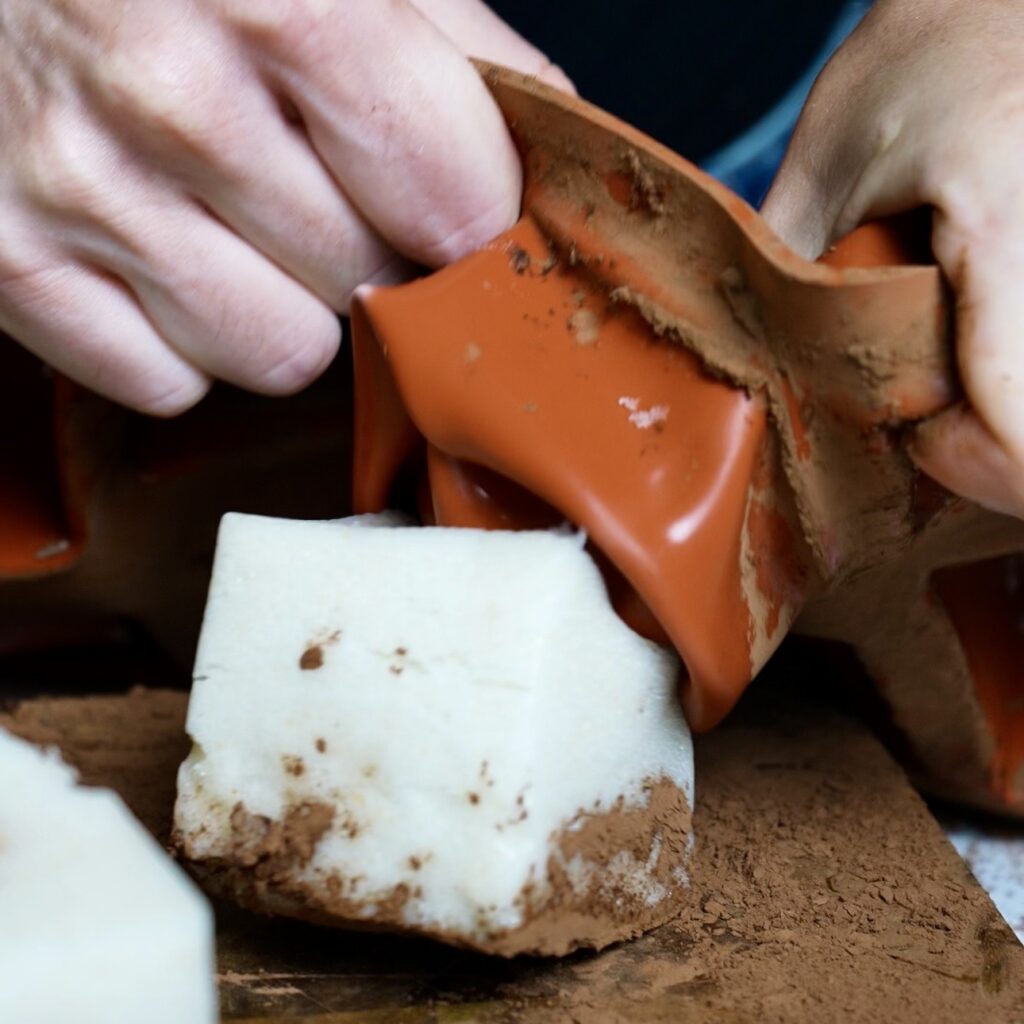
Once the cubes are completely set, we're ready for the final touch! Spread the unsweetened cocoa powder evenly over a shallow plate. Take the silicone mould out of the fridge and carefully run a thin knife around the upper edges and corners of each cube. This will help loosen them from the mould and prevent the delicate edges from tearing. Turn the mould upside down over the plate of cocoa powder and gently press the bottom of each cavity to release the cubes. Take your time here, as they're beautifully soft and fluffy.
Carefully releasing the chilled Pear Cloud Cubes from the silicone mould, ready for their final cocoa powder coating.
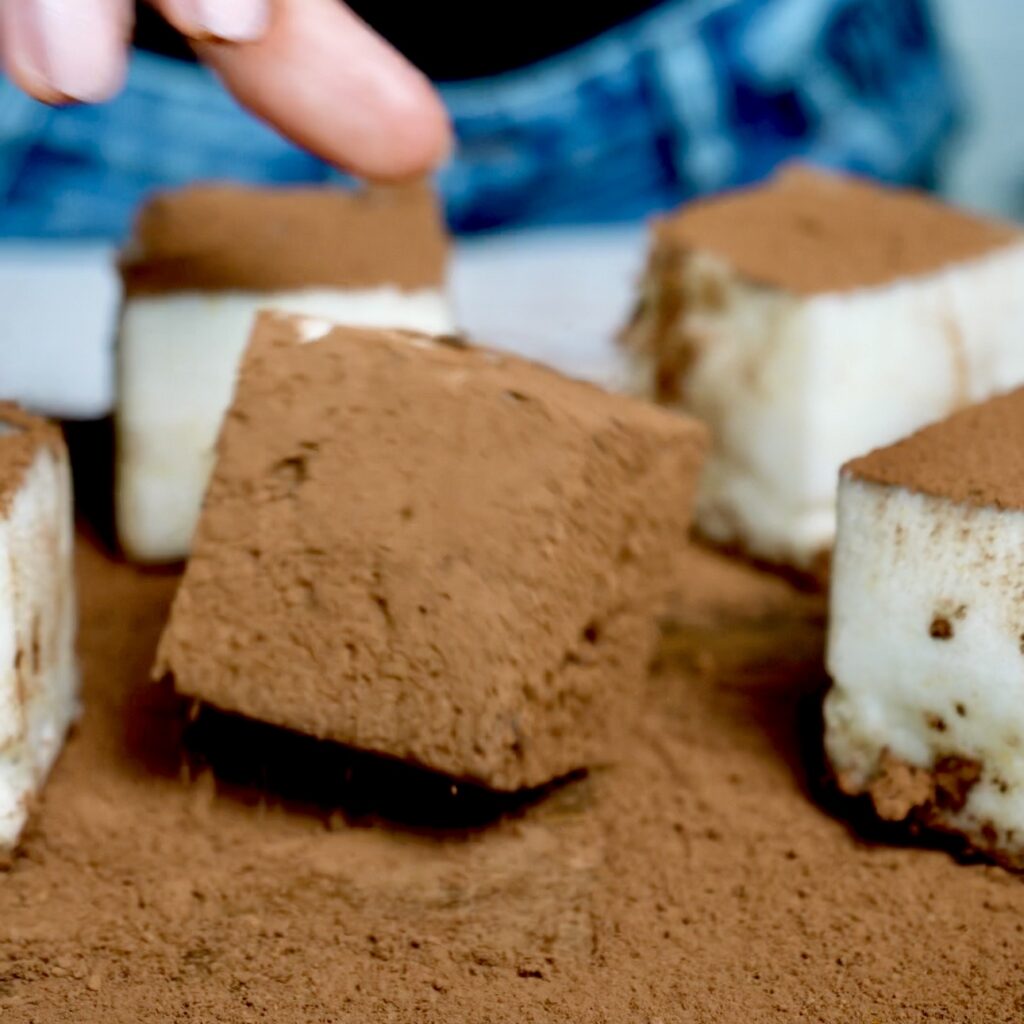
Once a cube lands on the cocoa powder, carefully turn it to coat all sides evenly. The cocoa adds a lovely chocolatey finish and makes the pale, fluffy interior look even more beautiful when you cut into it.
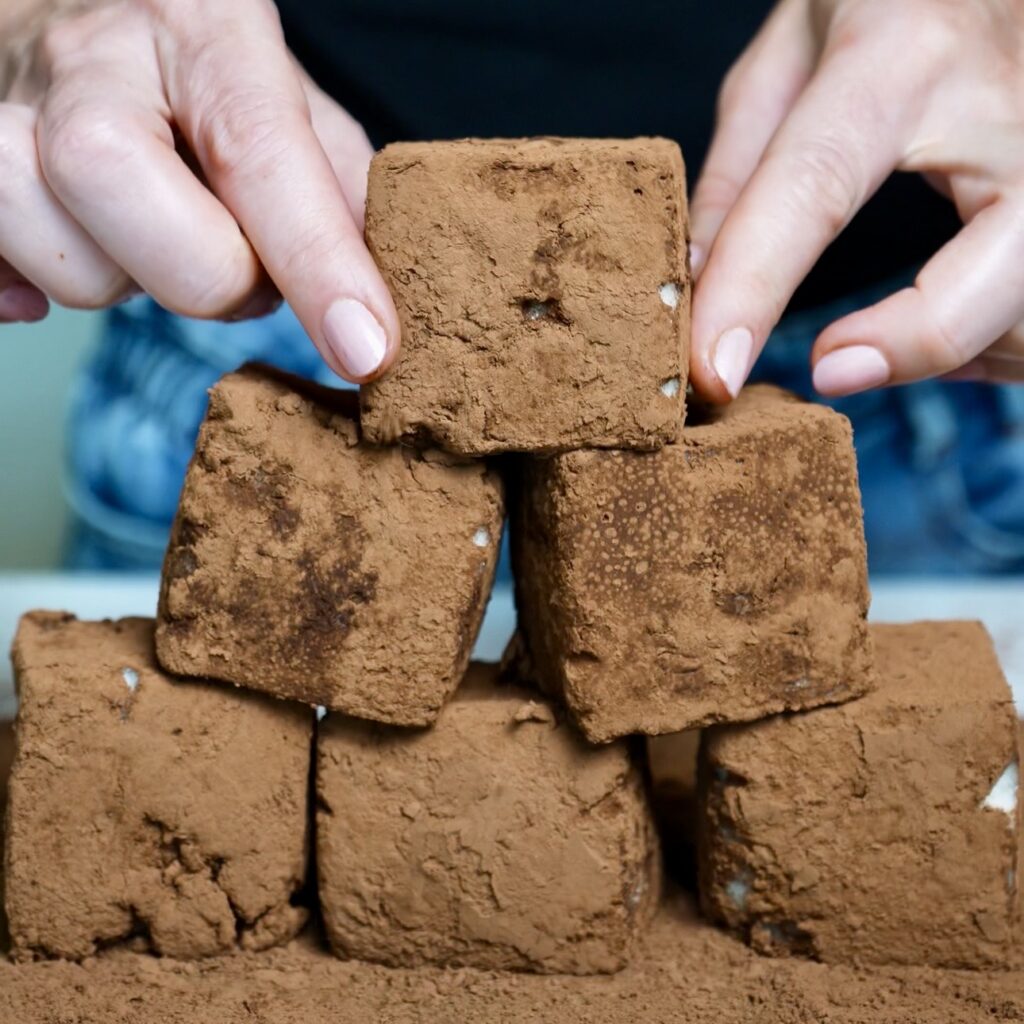
Soft and airy Pear Cloud Cubes evenly coated in cocoa powder for a delicious chocolatey finish.
Transfer the coated cubes to a serving plate and repeat with the remaining ones. And that's it! Your Pear Cloud Cubes with Cinnamon Filling are ready to enjoy. Serve them chilled, cut one open to reveal that delicious cinnamon-spiced centre, and enjoy their wonderfully light, melt-in-your-mouth texture.
Breaking open a soft, airy Pear Cloud Cube to reveal its delicious cinnamon-spiced pear centre.
Scroll down for the full printable recipe card with exact ingredient measurements and detailed instructions.
Why We Love Pear Cloud Cubes with Cinnamon Filling
There is something incredibly satisfying about taking a familiar ingredient like a pear and transforming it into a dessert with an entirely unexpected texture. These cubes look like little chocolate-dusted cakes, but inside they're wonderfully soft, light and almost marshmallow-like. The cinnamon filling creates a lovely contrast, adding warmth and a more pronounced fruit flavour to the delicate exterior. What makes the recipe particularly appealing is its nutritional profile: approximately 85 calories per cube when prepared with regular pears, very little fat and no flour, butter or cream. It's naturally gluten-free when made with suitable ingredients, although it does contain gelatine and is therefore not vegetarian. I also love that you can make a batch in advance and keep it ready in the fridge. If you like creative desserts that make the most of fresh fruit, you'll also enjoy my High-Protein Cherry Cottage Cheese Chocolate Bars and Frozen Mango Yogurt Bars, both delicious no-bake treats with their own interesting textures.
Soft and airy Pear Cloud Cubes evenly coated in cocoa powder for a delicious chocolatey finish.
Perfect for Any Occasion
These Pear Cloud Cubes are one of those desserts that look impressive enough for a dinner party but are easy enough to make whenever you're craving something sweet. Their delicate cocoa-dusted exterior and hidden cinnamon filling make them particularly lovely for entertaining, and because they're served in individual portions, there's no slicing or messy serving involved. They're perfect for afternoon tea, family gatherings, celebrations or as a light dessert after a hearty dinner. I especially love making desserts like this ahead of time because it means everything is ready when guests arrive. They also work beautifully throughout the year, with comforting cinnamon flavours for the colder months and a refreshing chilled texture for warmer days. If you're putting together a dessert platter, try pairing them with my Banana Coconut Truffles or Pistachio Snowballs for a beautiful selection of homemade, bite-sized treats.
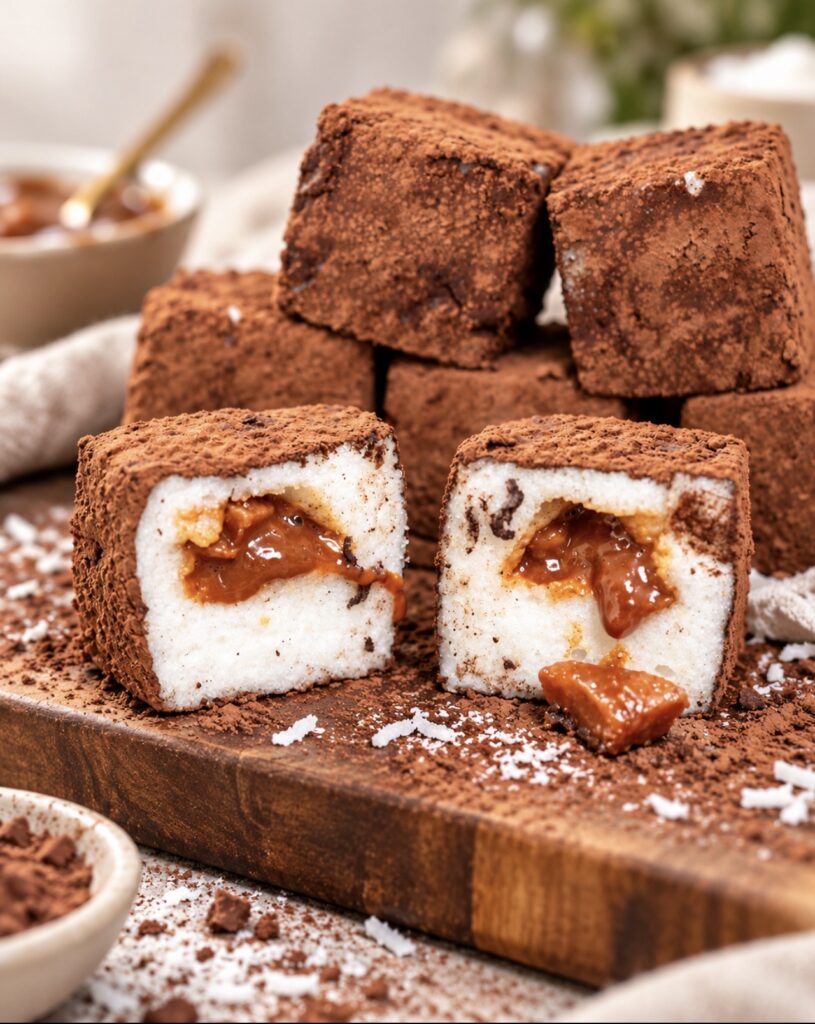
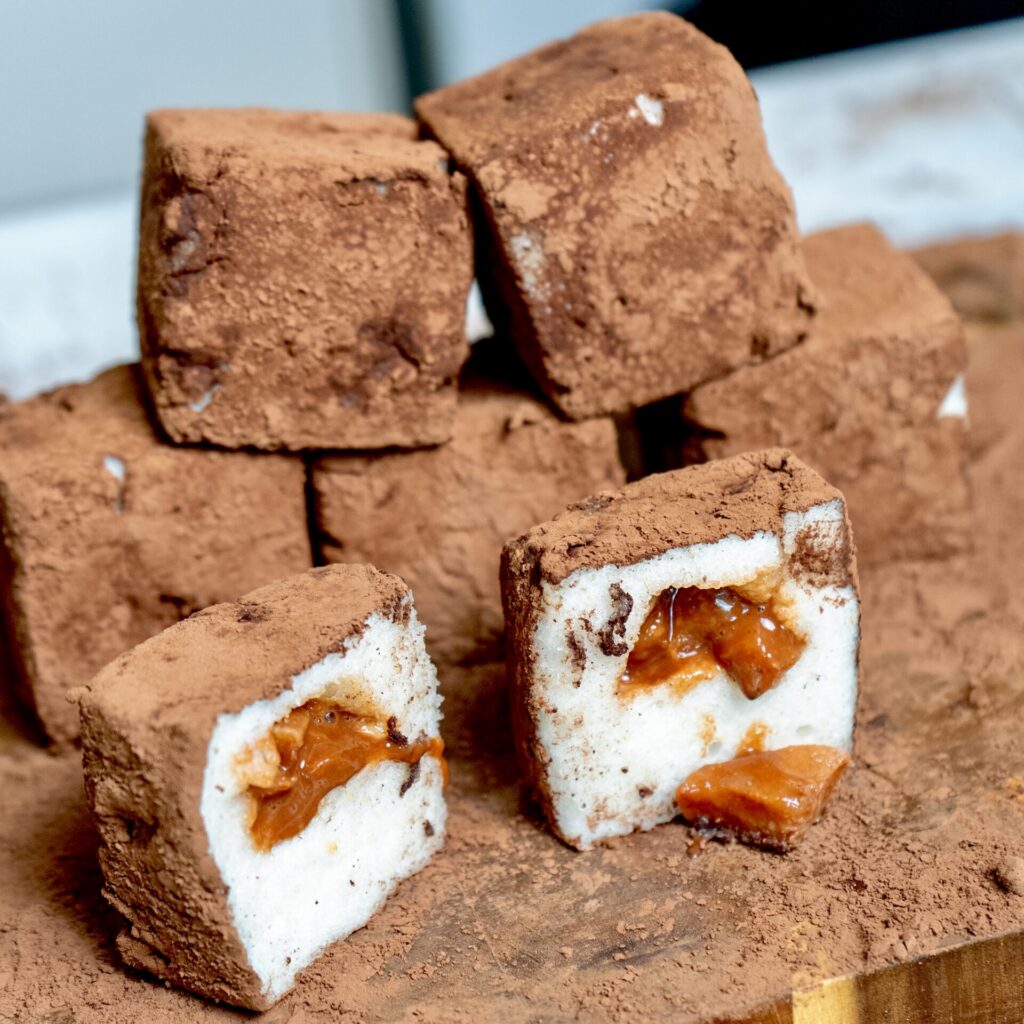
Soft, fluffy Pear Cloud Cubes coated in cocoa powder and served on a wooden board, each with a delicious cinnamon-spiced pear centre.
Instagram Tutorial & More
Want to see how these fluffy Pear Cloud Cubes with Cinnamon Filling come together? Watch our quick video tutorial on Instagram, and don't miss our other easy and delicious no-bake treats:
Best Season:
Suitable throughout the year, Fall, Winter
Description
Who knew pears could turn into something this dreamy? These Pear Cloud Cubes are made by whipping fresh pear purée with gelatine until beautifully airy, then hiding a delicious cinnamon-spiced fruit filling inside. Once chilled, each cube is coated in cocoa powder for a delicate chocolatey finish. Made without butter, cream or flour, this naturally gluten-free, low-fat dessert contains under 100 calories per cube. It's the perfect make-ahead treat when you're craving something sweet without a heavy dessert. You can also swap the pears for apples for an equally delicious variation.
Ingredients
For the base
600g peeled, cored and cubed pears or apples (approximately 4¾ cups)
1tbsp honey (or to taste)
30g gelatine powder (1 oz)
150ml ice-cold water (⅔ cup)
For the filling
125g peeled, cored and cubed pears or apples (approximately 1 cup)
½tbsp brown sugar
½tbsp ground cinnamon
½tsp cornflour (cornstarch)
240ml water (1 cup, plus 1 tbsp for mixing with the cornflour)
For the coating
2tbsp unsweetened cocoa powder
Other
1tsp neutral oil (such as coconut oil or light olive oil, for greasing the mould)
The fruit weights refer to pears or apples that have already been peeled, cored and cubed. Measure the prepared fruit, not the whole fruit.
Instructions
1
Prepare the filling first, as it needs time to cool. Place the cubed pears in a frying pan, add the brown sugar, cinnamon and water, and stir to combine. Bring to the boil, then simmer for approximately 10 minutes, stirring occasionally, until the pears have softened and most of the liquid has reduced. If the mixture becomes too dry before the pears are tender, add another splash of water. In a small bowl, mix the cornflour with 1 tablespoon of water until smooth and lump-free. Pour the mixture into the pan, stirring constantly, and cook for another 2 minutes, or until the filling thickens. Remove from the heat and set aside to cool completely. Once cooled, transfer to a piping bag for easier assembly. If you don't have a piping bag, you can simply use a spoon.
2
Prepare the base. Start by blooming the gelatine. Place the gelatine powder in a medium bowl, pour over the ice-cold water and refrigerate for 5–10 minutes, until it has absorbed the water and developed a thick, spongy consistency. Meanwhile, place the cubed pears in a large saucepan and blend with an immersion blender until completely smooth. Heat the pear purée until it just reaches boiling point, but do not allow it to boil. Remove from the heat, add the honey and stir well. Microwave the bloomed gelatine in 5-second intervals, checking and stirring between each interval, until it becomes liquid again. Be careful not to overheat it; you only need to melt it. Pour the melted gelatine into the warm pear purée and mix thoroughly until fully incorporated. Transfer to a large mixing bowl or the bowl of a stand mixer, if you have one, as this will make the process much easier. Using an electric mixer, whisk continuously for approximately 10–15 minutes. Be patient with this step! As the mixture cools, it will gradually become paler, thicker and much more voluminous. It is ready when it has approximately doubled in volume, feels completely cool and has a thick, airy, fluffy consistency.
3
Assemble the cubes. Lightly grease an 8-cavity square silicone mould with the oil, making sure to coat the corners and sides. I used a mould with cavities measuring 5.5 × 5.5 × 4.5 cm (approximately 2.2 × 2.2 × 1.8 inches), with 4.5 cm (1.8 inches) being the height. Fill each cavity halfway with the whipped pear mixture. Using the back of a spoon, gently create a small hollow in the centre of each one. Pipe or spoon a little of the cooled cinnamon-pear filling into each hollow, then cover with the remaining whipped pear mixture, making sure the filling is completely enclosed. Smooth the tops if needed, then transfer the mould to the fridge for at least 4 hours, preferably overnight, until the cubes are fully set.
4
Unmould and coat. When ready to serve, spread the cocoa powder over a shallow plate. Gently run a thin knife around the upper edges and corners of each cube to help release them from the mould. Turn the mould upside down and carefully push each cube out onto the cocoa powder. Gently turn and dust the cubes on all sides until evenly coated, then transfer to a serving plate. Repeat with the remaining cubes. Serve and enjoy!
Choosing the fruit: Both pears and apples work beautifully in this recipe. I used snow pears (Asian pears), which have a delicate sweetness and high water content. Regular pears are also suitable. If using apples, choose a naturally sweet variety and adjust the honey to taste.
Measuring the fruit: Always weigh the pears or apples after peeling, coring and cubing. The weights listed in the ingredients refer to the prepared fruit, not the whole fruit. Cup measurements are approximate, as the amount will depend on the size of the cubes.
Blooming the gelatine: Use powdered gelatine and make sure the water is ice-cold. Allow the gelatine to bloom in the fridge for 5–10 minutes, until it has absorbed the water and developed a thick, spongy consistency. This step is essential for achieving a smooth, evenly set dessert. Gelatine strength can vary between brands, which may affect the final texture.
Melting the gelatine: Microwave the bloomed gelatine in short, 5-second intervals, stirring between each interval until completely liquid. Avoid overheating it, as excessive heat can affect its setting properties. The gelatine should be fully dissolved before adding it to the warm fruit purée.
Whipping the mixture: This is the most important step for achieving the signature cloud-like texture. Whisk continuously for approximately 10–15 minutes, until the mixture has doubled in volume, become noticeably paler and developed a thick, airy consistency. It should also feel completely cool. The exact whipping time will depend on your mixer and the temperature of the mixture. A stand mixer makes this process much easier, although an electric hand mixer will also work.
Preparing the cinnamon filling: Cook the fruit until tender and allow most of the liquid to reduce before adding the cornflour mixture. The filling should be thick enough to hold its shape without spreading. Make sure it has cooled completely before assembling the cubes, as warm filling may soften the whipped mixture.
Choosing the mould: I used an 8-cavity silicone mould, with each cavity measuring 5.5 × 5.5 × 4.5 cm (approximately 2.2 × 2.2 × 1.8 inches). The last measurement refers to the height. Lightly grease the mould, including the corners, to make unmoulding easier. You can use a different silicone mould, but the number and size of the portions may vary.
Assembling the cubes: Work gently when creating the cavities and adding the filling to avoid deflating the whipped pear mixture. Make sure the cinnamon filling is completely enclosed so it stays hidden in the centre of each cube.
Setting time: Refrigerate the cubes for at least 4 hours, although overnight is recommended for the best texture and easier unmoulding. Make sure they are fully set before attempting to remove them from the mould.
Cocoa coating: Use unsweetened cocoa powder for a delicate chocolatey finish that balances the sweetness of the fruit. Gently roll each cube in the cocoa powder until evenly coated on all sides.
Storage: Keep the cocoa-dusted cubes refrigerated in an airtight container for up to 3 days. They can be stored with their cocoa coating, although the powder may darken slightly as it absorbs moisture. Keep refrigerated until ready to serve.
Calories and dietary information: Each cube contains approximately 85 calories when calculated using regular pears. These cubes are low in fat and naturally gluten-free when prepared with suitable ingredients. However, they are not vegetarian or vegan because they contain gelatine.