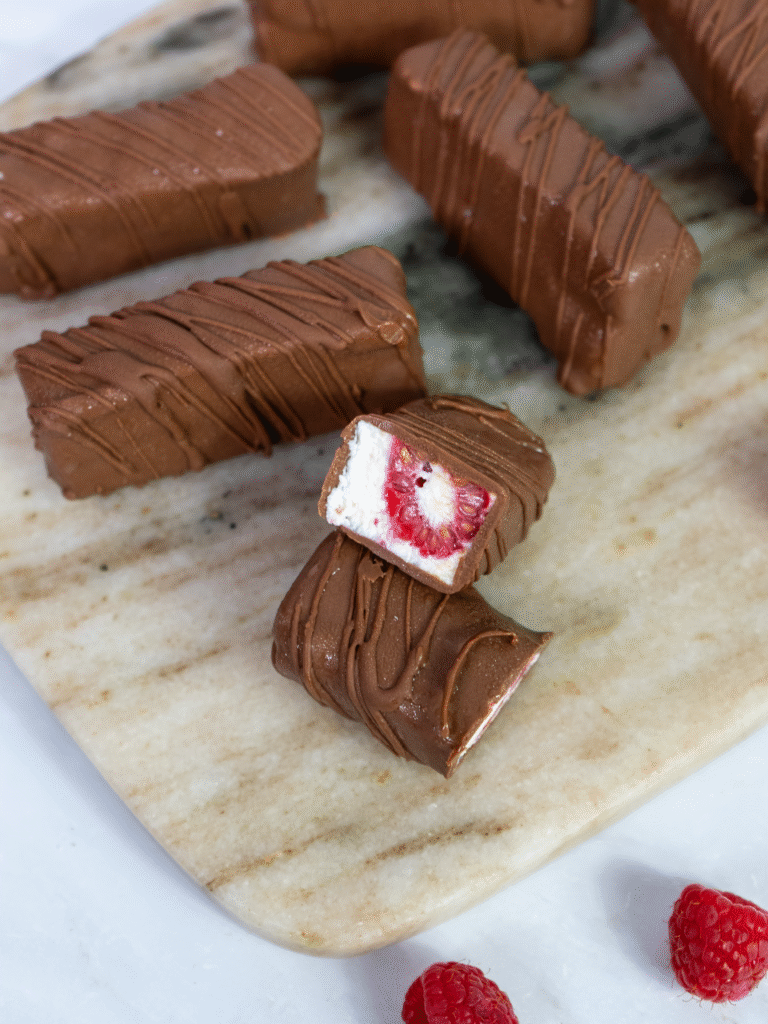

Raspberry Cottage Cheese Bars: Creamy, Fruity, and Dipped in Chocolate
Looking for a dessert that’s creamy, satisfying, and a little bit indulgent—without turning on the oven? These Raspberry Cottage Cheese Bars are smooth, lightly sweet, and finished with a crisp chocolate shell. They’re the perfect combination of creamy filling, tangy berries, and rich chocolate coating. High in protein and easy to prepare, these no-bake bars are ideal for keeping in the fridge or freezer for a chilled treat anytime.
Scroll down or tap ‘Jump to Recipe’ to get started!
Simple Ingredients, Irresistible Texture
You only need a few ingredients to create these cottage cheese bars, but each one plays a key role in the flavour and texture:
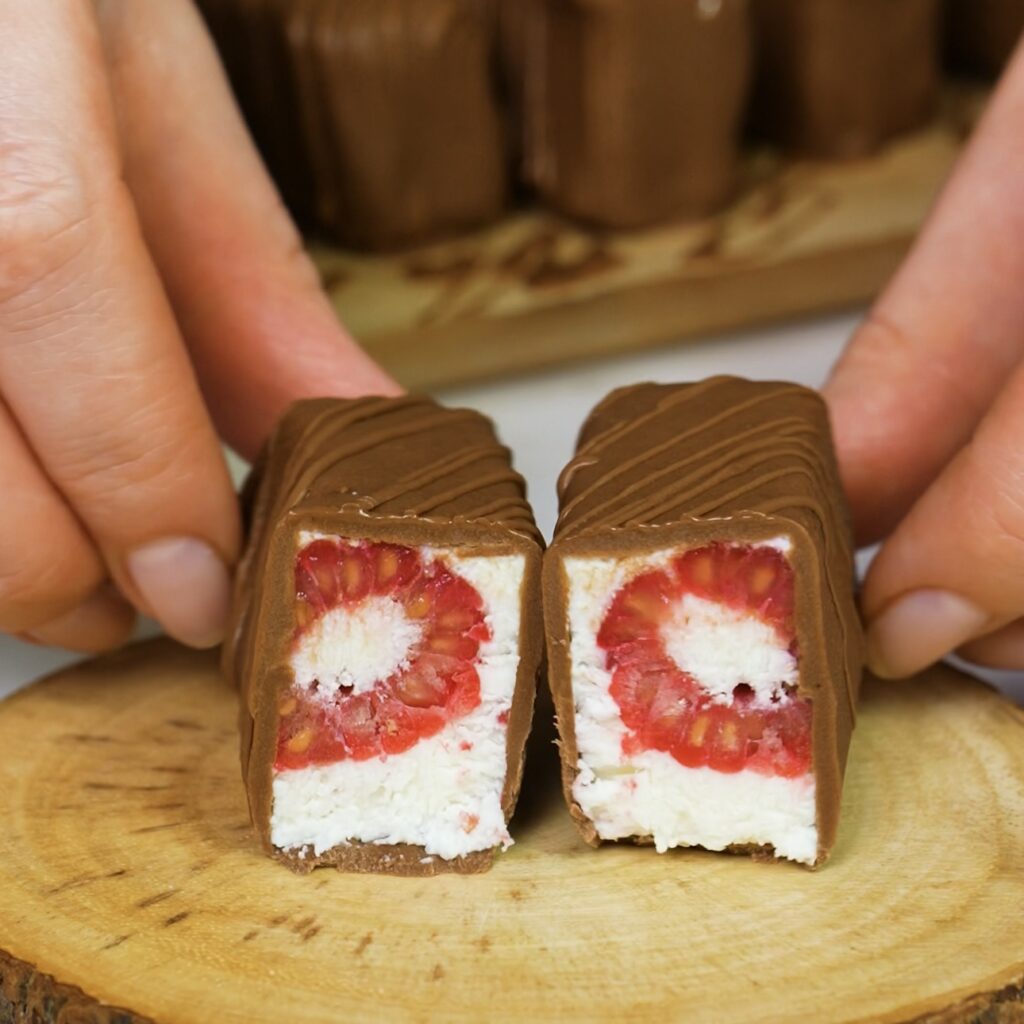
- Cottage cheese: The base of the bars—sieved or blended to become smooth and creamy, with a light, mousse-like texture once set.
- Raspberries: Their bright, juicy tang cuts through the richness, adding both flavour and colour.
- Icing sugar: Gives the cottage cheese just the right amount of sweetness—easily adjustable to taste.
- Vanilla powder: Rounds out the flavour and pairs beautifully with the berries and chocolate.
- Chocolate: Use your favourite—dark, milk, or white—for dipping the bars and adding a snap of richness.
- Neutral oil: Helps the chocolate set with a glossy finish and smooth texture.
The result is a bar that feels indulgent, yet light enough to enjoy any time of day.
How to Make Raspberry Cottage Cheese Bars
This no-bake recipe is wonderfully simple, with just a few key steps and some chill time in the freezer. It’s a refreshing, fuss-free treat that’s as pretty as it is delicious.
Make the Filling
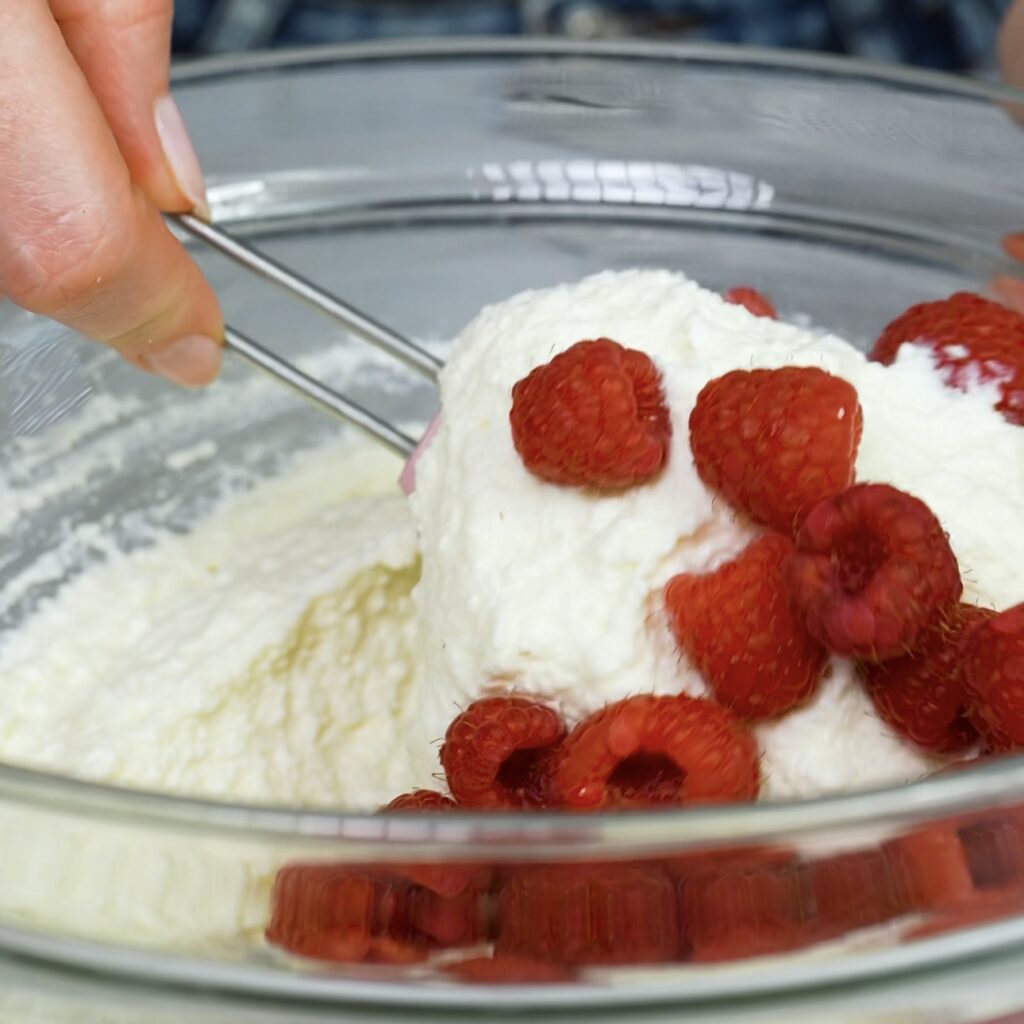
Start by passing the cottage cheese through a fine mesh sieve or blending it in a food processor until smooth and creamy. Stir in the icing sugar and vanilla powder until fully combined. Gently fold in the raspberries, trying not to crush them too much so they hold their shape and colour.
Set and Slice the Bars
Line a 15 x 15 cm square tin with cling film, allowing some overhang for easy removal. Spoon the cottage cheese mixture into the tin, smooth the top, and cover with another layer of cling film. Freeze for 2–3 hours, or until firm.

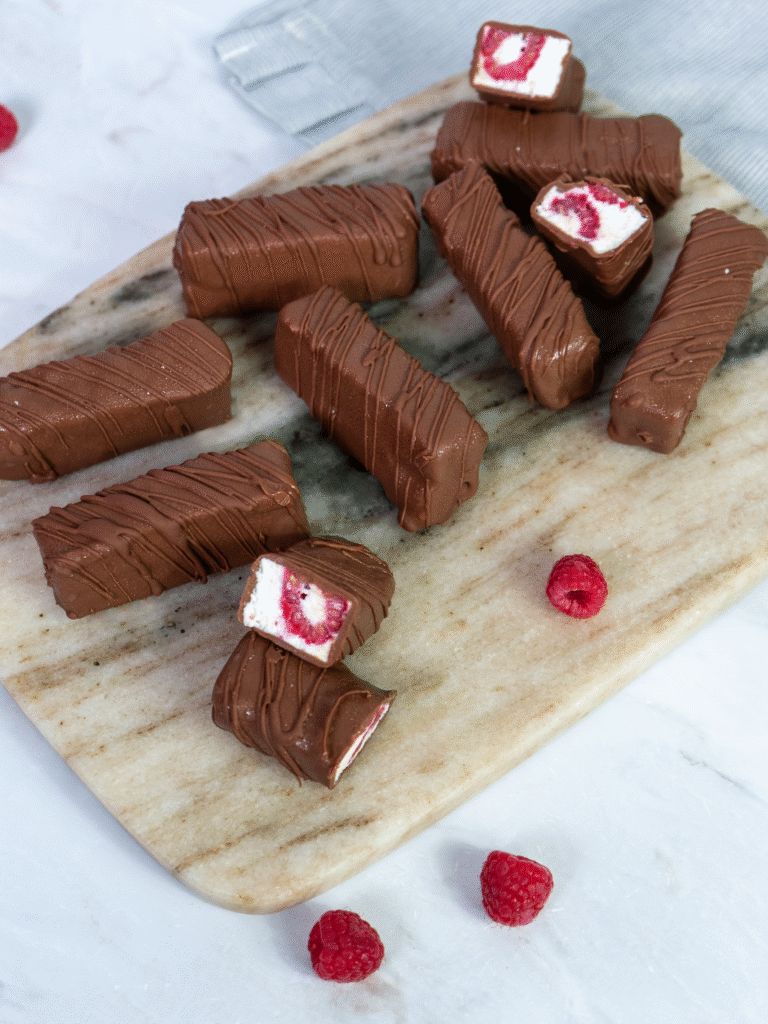
Once set, remove the top layer of cling film and lift the block from the tin. Peel off all remaining cling film. Slice into approximately 14 bars (each about 2 x 7 cm). Insert a toothpick or skewer into each bar and return them to the freezer while you prepare the chocolate glaze.

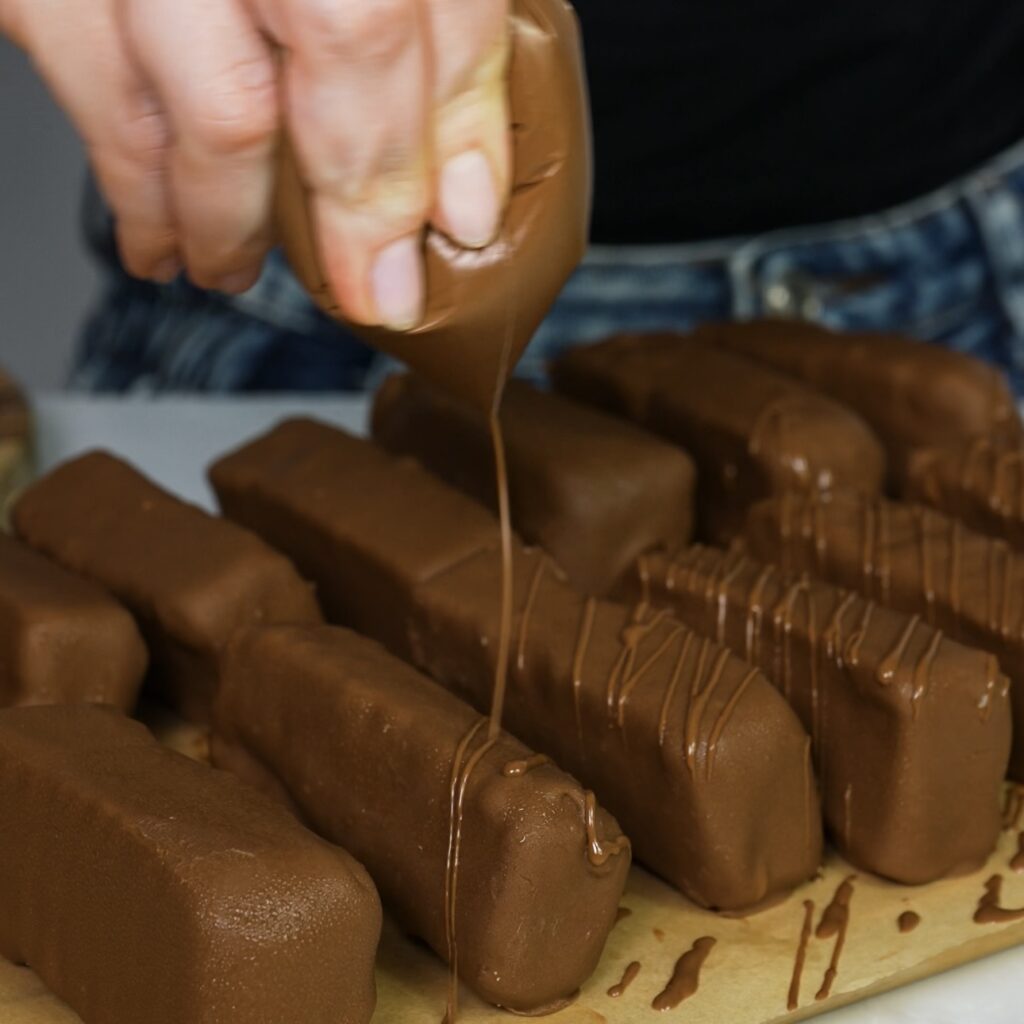
Dip in Chocolate
When you’re ready to coat the bars, melt the chocolate (using the microwave or double boiler method), then stir in the oil until smooth and glossy.
For the microwave method, break the chocolate into pieces and place it in a microwave-safe bowl. Heat in short 10-second bursts, stirring well between each, until the chocolate is fully melted. Be careful not to overheat it, as chocolate can burn easily in the microwave.

For the double boiler method, place the chocolate in a heatproof bowl set over a pot of gently simmering water, ensuring the bowl doesn’t touch the water. Stir continuously until the chocolate has melted completely, then remove from the heat and stir in the oil.
Let the chocolate sit for 10–15 minutes to cool slightly and thicken—this will help it coat the bars more evenly.
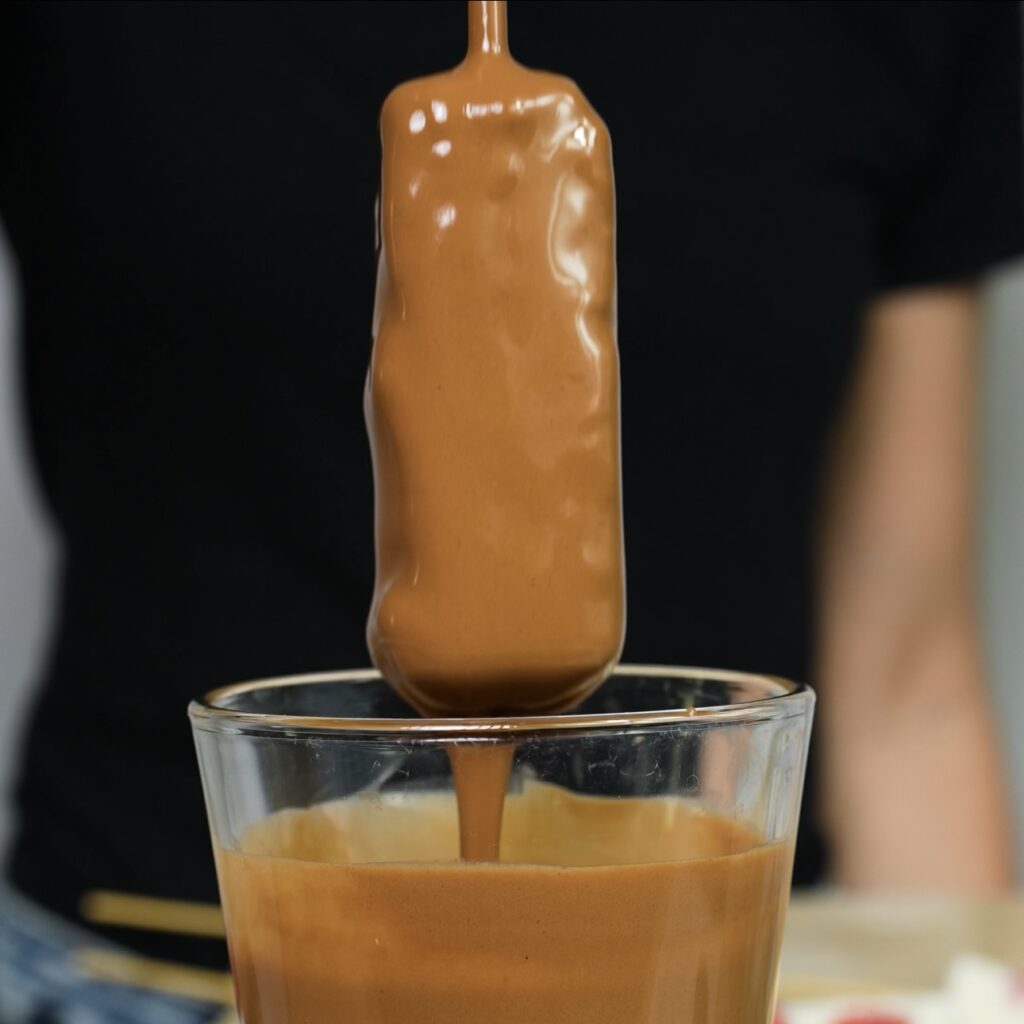
Dip each frozen bar into the melted chocolate and place on a parchment-lined tray.
Carefully twist and remove the toothpicks or skewers, then drizzle over any remaining chocolate.
Chill the bars in the fridge until the chocolate is fully set. Store in an airtight container in the fridge for up to 3 days, or freeze for up to 1 month.
Optional: Make It Refined Sugar-Free
If you’d like to skip refined sugar, here’s how to adapt the recipe:
- In the filling: Replace icing sugar with a natural liquid sweetener like honey, maple syrup, or date syrup. Start with 2 tablespoons and adjust to taste.
- For the glaze: Use a refined sugar-free dark chocolate or make your own using cocoa powder, coconut oil, and maple syrup.
Note: Natural sweeteners will change the flavour slightly and may soften the set texture—especially when using runnier ingredients like maple syrup.
Make-Ahead, Freezer-Friendly, and High in Protein
These bars are easy to store and perfect for meal-prepping or keeping in the fridge for a ready-to-eat treat. They last:
- Up to 3 days in the fridge
- Up to 1 month in the freezer
They’re a great option for:
- Light afternoon desserts
- High-protein snacks
- Healthier alternatives to ice cream or cheesecake bars
For the best texture, enjoy them chilled from the fridge or let them soften slightly at room temperature if frozen.
You May Also Like
If you love this recipe, be sure to check out other no-bake and cottage cheese-based treats:
- Cottage Cheese Date Bites
- Cottage Cheese Berry Tartlets
- Baked Nectarines with Honeyed Cottage Cheese & Almonds
- Dubai Chocolate on a Budget
- Frozen Strawberry Yogurt Gems
- Pistachio Stuffed Raspberries
- Frozen Blueberry Ricotta Pops
- Passion Fruit Ricotta Dessert (Syrok)
Watch our quick video tutorial on Instagram and don’t miss out on our other cottage cheese creations.
Happy no-baking,
Izabella
Description
These Raspberry Cottage Cheese Bars are everything you want in a summer dessert—creamy, tangy, and finished with a smooth chocolate coating. Made with just a handful of ingredients, they’re naturally high in protein and can be stored in the fridge or freezer for a fuss-free treat anytime. The whipped cottage cheese filling is light and fluffy, dotted with juicy raspberries, then set and sliced into bars before being dipped in your favourite chocolate. No baking needed—just blend, freeze, and enjoy!
Ingredients
For the filling:
For the chocolate glaze:
Instructions
-
Pass the cottage cheese through a fine sieve or blend in a food processor until smooth. Transfer to a bowl and mix in the icing sugar and vanilla powder. Gently fold in the raspberries, being careful not to crush them.
-
Line a 15 x 15 cm loose-bottom square tin with cling film, leaving some overhang. Add the cottage cheese mixture, smooth the top, cover with another layer of cling film, and freeze for 2–3 hours, or until firm.
-
Once set, lift the block from the tin using the cling film, then remove all cling film completely. Slice into approximately 14 bars (each about 2 x 7 cm). Insert a toothpick or small wooden skewer into each bar and return them to the freezer while you prepare the glaze.
-
Melt the chocolate in the microwave in 10-second intervals, stirring after each one. Once fully melted, stir in the oil until smooth. Let the glaze cool for 10–15 minutes before dipping.
-
Dip each bar into the chocolate glaze and place on a parchment-lined tray or board that fits in your fridge. Carefully twist out the skewers or toothpicks. Pour the remaining chocolate into a piping bag or ziplock bag, snip off a small corner, and drizzle over the bars. Chill until the glaze is set.
Nutrition Facts
Servings: 14 ServingCalories:186.71kcalTotal Fat:10.99gSaturated Fat: 4.64gTrans Fat: 0.01gCholesterol:6.07mgSodium:115.06mgPotassium:131.84mgTotal Carbohydrate:20.47gDietary Fiber: 1.96gSugars: 17.31gProtein:4.99gVitamin A: 13.42IUVitamin C: 2.8mgCalcium: 39.23mgIron: 0.77mgVitamin D: 0.03IUVitamin E: 0.69IUVitamin K: 4.14mcgThiamin: 0.02mgRiboflavin: 0.08mgNiacin: 0.19mgVitamin B6: 0.02mgFolate: 9.32mcgVitamin B12: 0.15mcgPhosphorus: 88.18mgMagnesium: 29.87mgZinc: 0.53mg
Note
- Alternative method for melting chocolate: If you prefer not to use a microwave, melt the chocolate using a double boiler. Place a heatproof bowl over a saucepan of gently simmering water (ensuring the bottom of the bowl doesn’t touch the water) and stir until smooth. Then add the oil and mix until fully combined.
- Sweetness level: Adjust the sweetness of the filling based on your taste and the tartness of the raspberries. Taste the mixture before freezing and add more natural sweetener if needed.
- Type of chocolate: These bars work well with dark, milk, or white chocolate—choose your favourite or combine a few for variety.
- No loose-bottom tin? A regular square tin will work just fine—just be sure to line it generously with cling film or parchment so you can lift the set bars out easily.
- Freezing tip: If the bars are too firm to cut, let them sit at room temperature for a few minutes before slicing.
- Serving suggestion: For the best texture, enjoy slightly chilled—firm but not frozen solid.
- Make it refined sugar-free: Use a natural sweetener like honey, maple syrup, or date syrup in place of icing sugar. Start with 2–3 tablespoons and adjust to taste. For the glaze, opt for a high-quality refined sugar-free chocolate (many dark chocolate bars or raw chocolate brands offer this) or make your own simple chocolate coating using cocoa powder, coconut oil, and maple syrup.


User Reviews
Didn’t make it yet but I will hen I come back from buying the ingredients
I have these in my freezer – just in time for the hot weather. Easy to make, tasty and tangy no no taste of cottage cheese 🙂
Thank you so much for your feedback! So glad you like them!😊