


Cheesy Beef Ragù Filo Rolls: Golden, Crinkled and Packed with Flavour
These Cheesy Beef Ragù Filo Rolls combine delicate, buttery filo pastry with a rich, slow-cooked beef ragù and plenty of melted mozzarella. As they bake, the filo becomes golden and crisp while the filling stays deeply savoury, juicy and cheesy. The simple chopstick technique gives each roll a cute crinkled shape and creates extra pastry ridges that turn beautifully crisp in the oven. Because the ragù can be prepared in advance, the rolls are easy to assemble when you are ready to bake, making them ideal for a relaxed lunch, party spread or family dinner. If you enjoy recipes such as Cheesy Beef Filo Parcels and Cheesy Beef Filo Swirls, these rolls are another delicious way to bring together beef, mozzarella and filo pastry.
Scroll down or tap the ‘Jump to Recipe’ button for the full printable recipe card.
Simple Ingredients, Big Flavours
These crinkled filo rolls are easy to adapt depending on what you already have in the fridge. The slow-cooked beef ragù gives the filling plenty of depth, but you do not have to prepare a full ragù every time. You can replace it with simply fried minced beef, another type of minced meat or any cooked minced-meat filling left over from another meal. Just make sure the mixture is completely cool and not too wet before adding it to the filo. If you enjoy savoury meat and pastry combinations such as Cheesy Beef Puffs and Puff Stick Bites, this recipe is another simple way to transform familiar ingredients into something golden, cheesy and easy to share.
- Filo pastry – Thin sheets of filo create the light, crisp layers and distinctive crinkled shape. Keep the unused sheets covered with a slightly damp tea towel while you work so they do not dry out.
- Beef ragù or cooked minced meat – Slow-cooked beef ragù works beautifully, but you can also use simply fried minced beef or another cooked minced-meat filling. Whichever option you choose, make sure it is cool, thick and not watery.
- Mozzarella – Shredded mozzarella melts into the meat filling and gives the rolls a soft, cheesy centre. Avoid very wet fresh mozzarella, as it may release too much liquid into the filo.
- Butter – Melted butter is brushed over the filo before shaping and again before baking, helping the pastry turn evenly golden and crisp.
- Sesame seeds – Sprinkled over the rolls before baking, they add a decorative finish and a little extra texture.
- Fresh coriander – This is completely optional and is used only as a final garnish to add colour before serving. It can be skipped without affecting the recipe.
How to Make Cheesy Beef Ragù Filo Rolls
These rolls are prepared in two stages: first, cook and cool the beef ragù, then fill, crinkle and bake the filo. The shaping method is simple, but keeping the filling cool and the unused filo covered will make the entire process much easier.
Prepare the Beef Ragù
Prepare the beef ragù first, as it needs time to cool completely before assembling the rolls. You can make it a day in advance and keep it covered in the fridge until needed. Heat the olive oil in a large pan over medium heat, then add the finely chopped shallot, carrot and celery. Cook for about 5 minutes, stirring occasionally, until the vegetables begin to soften.
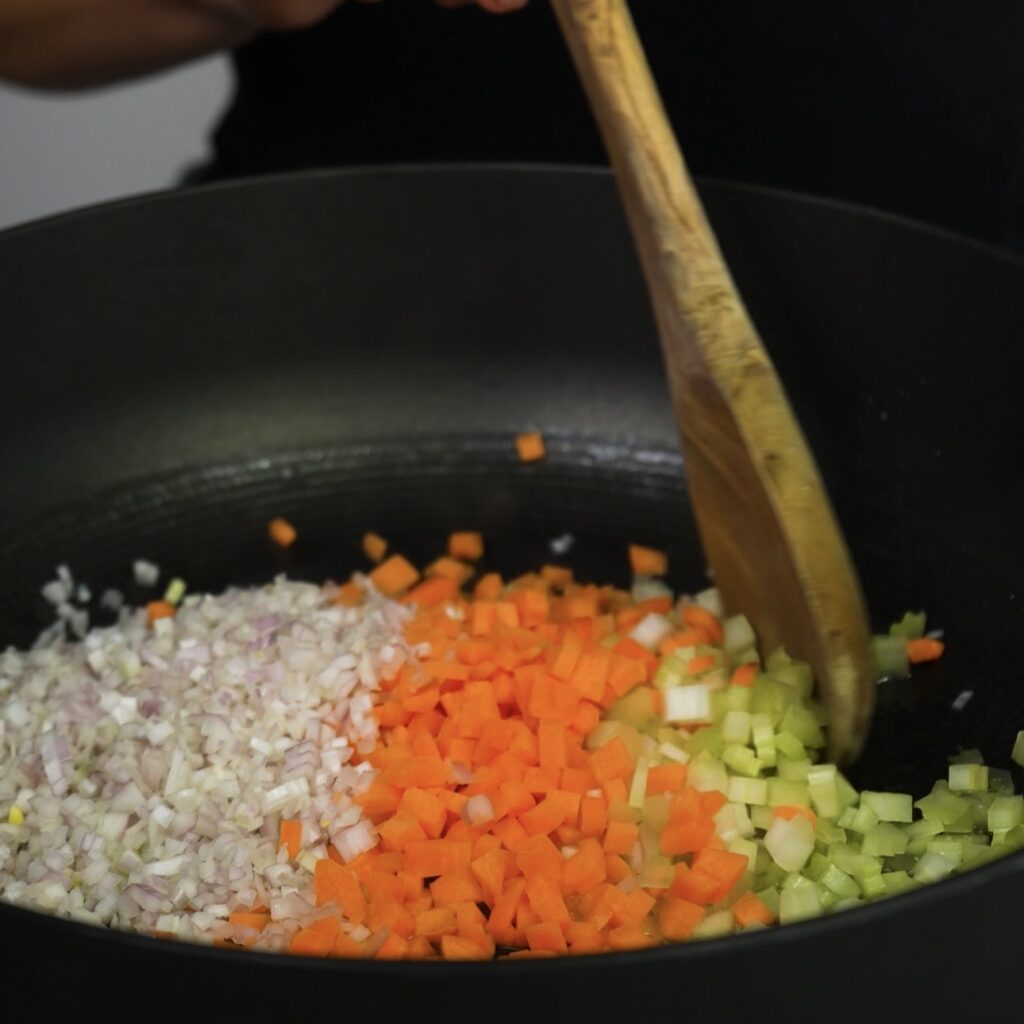
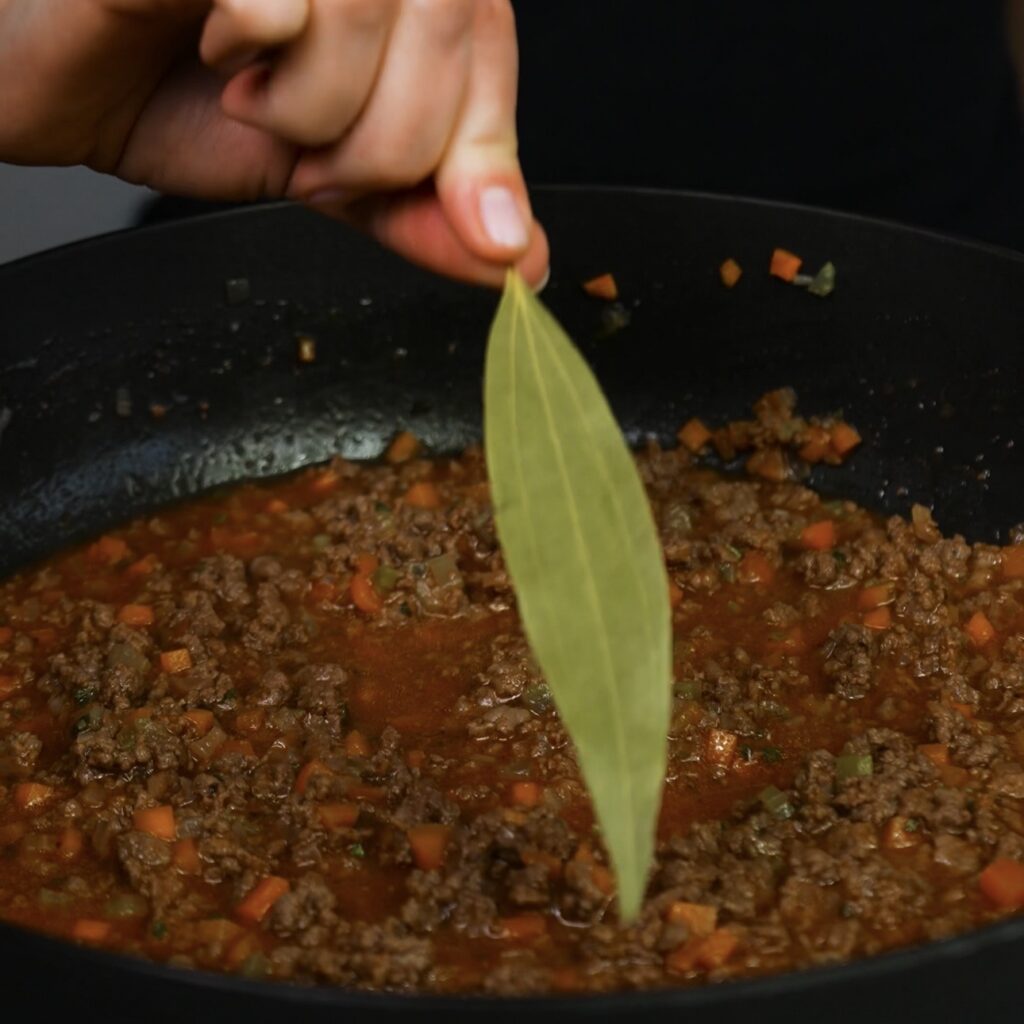
Add the minced beef, season with salt and black pepper, and cook until browned, breaking it apart as it cooks. Stir in the tomato paste, dried basil, passata, beef stock and white wine vinegar, then add the bay leaf. Cover the pan with a lid, reduce the heat to low and simmer for 2–3 hours, stirring occasionally, until the ragù has thickened.
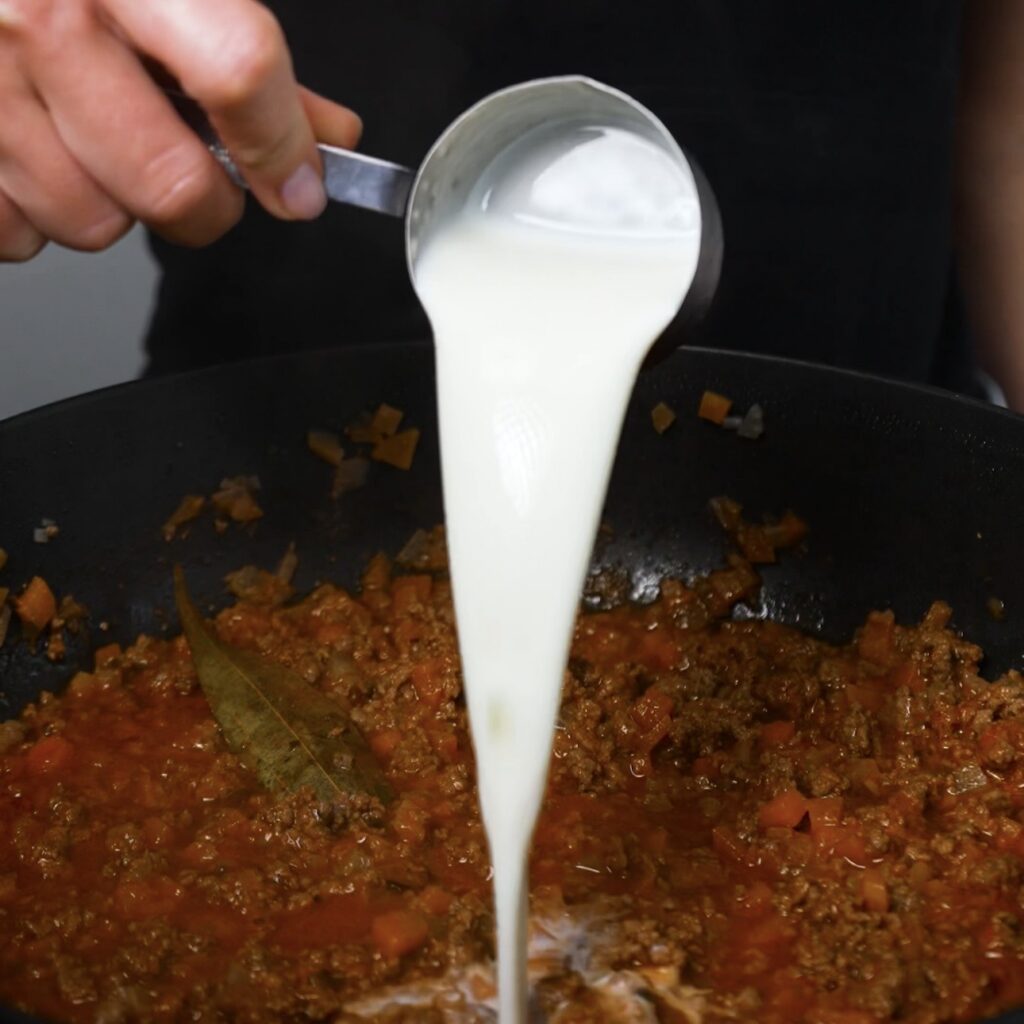
Towards the end of cooking, stir in the milk and simmer for a further 10 minutes. Remove the bay leaf, take the pan off the heat and leave the ragù to cool completely.
Prepare the Filo Pastry
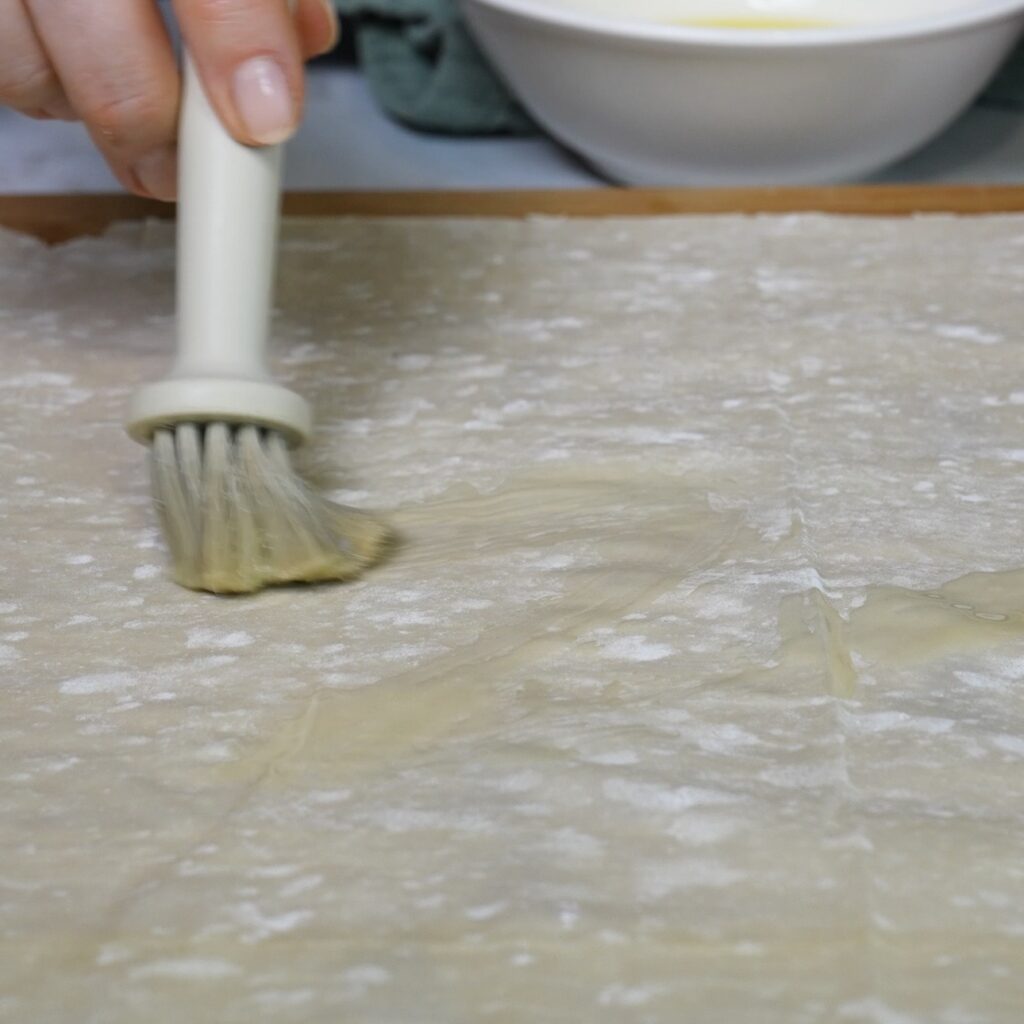
Preheat the oven to 190°C/375°F fan and line a large baking tray with baking parchment. Place one filo sheet on a clean work surface and keep the remaining sheets covered with a clean, slightly damp tea towel while you work, as filo pastry dries out very quickly. Lightly brush the filo sheet with some of the melted butter.
Fill and Roll the Filo
Spoon approximately 3 generous tablespoons of the cooled beef ragù in a line along one of the shorter edges of the filo sheet. Sprinkle some of the shredded mozzarella over the filling, then roll the filo over the beef and cheese once so that the filling is completely enclosed.
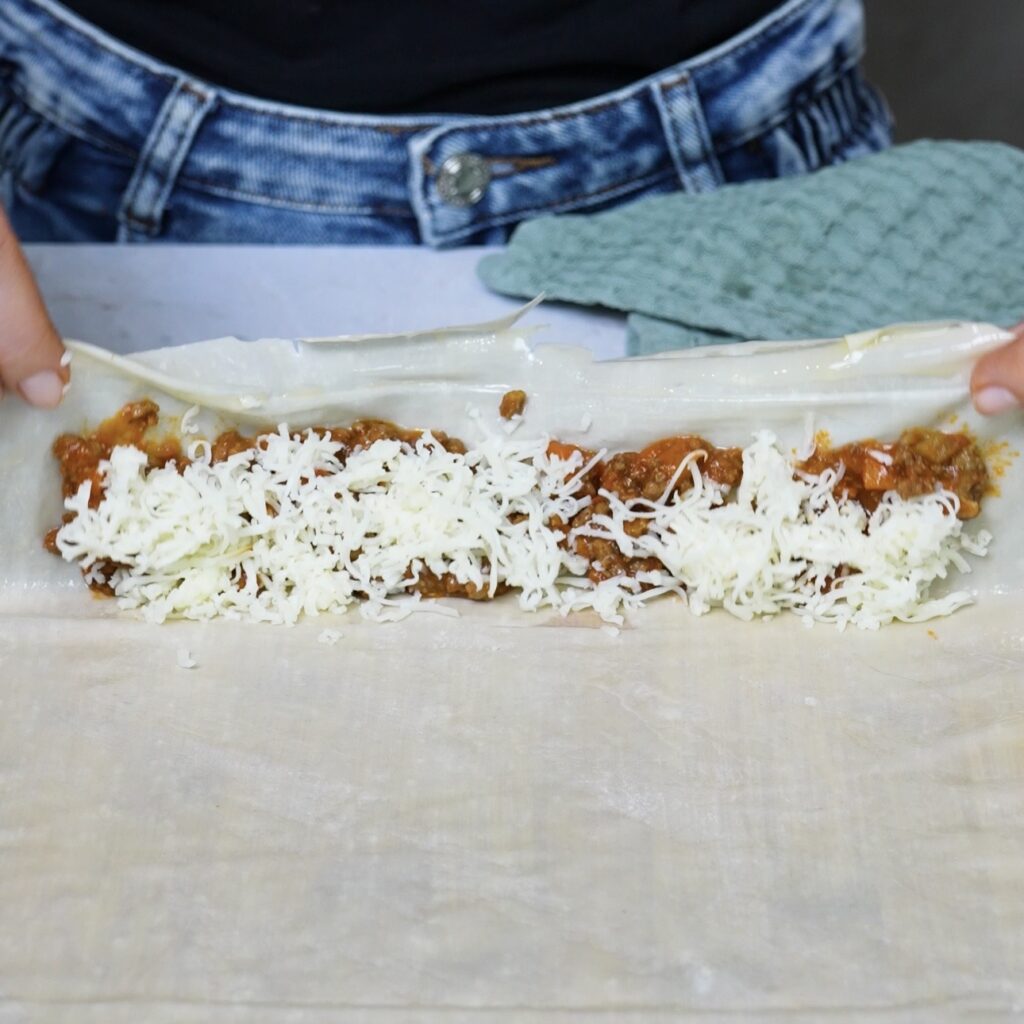
Create the Crinkled Shape
Place a chopstick horizontally along the enclosed filling, then continue rolling the filo around the filling with the chopstick inside.
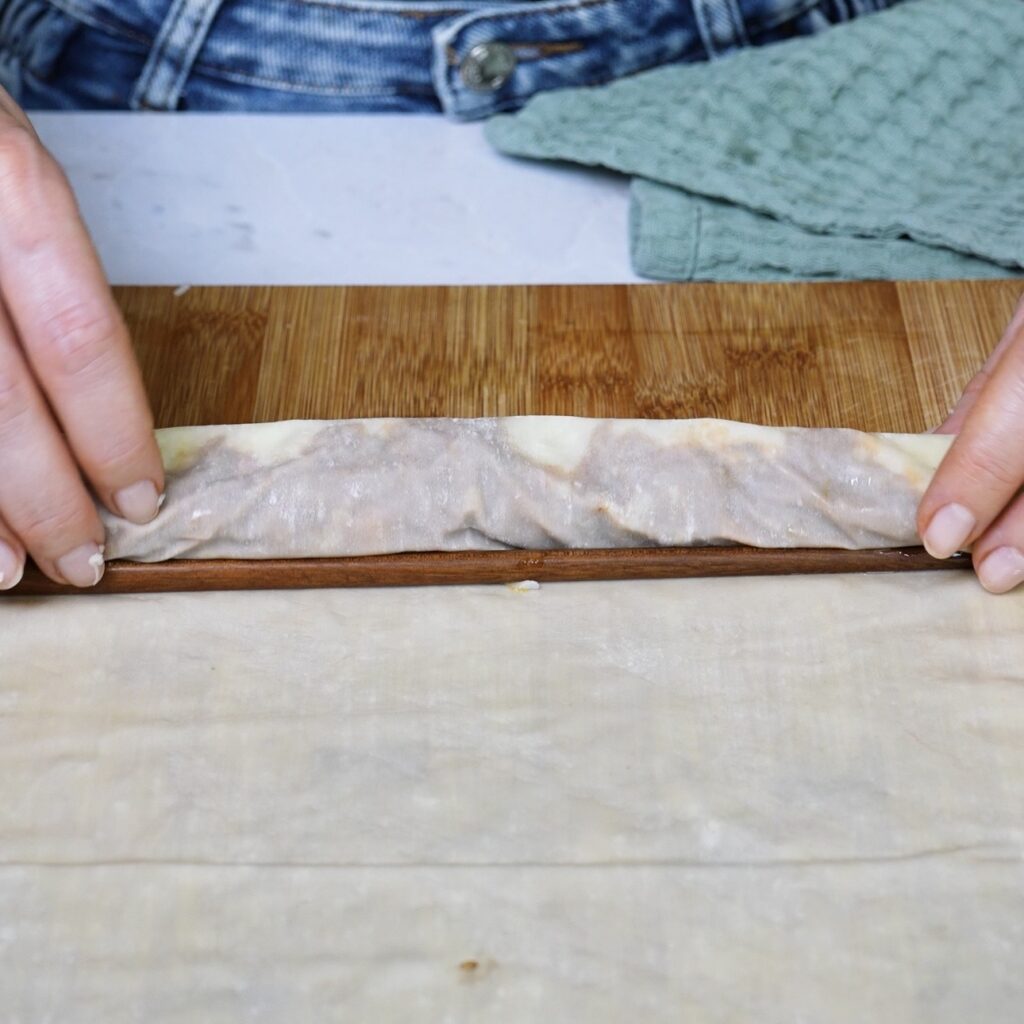
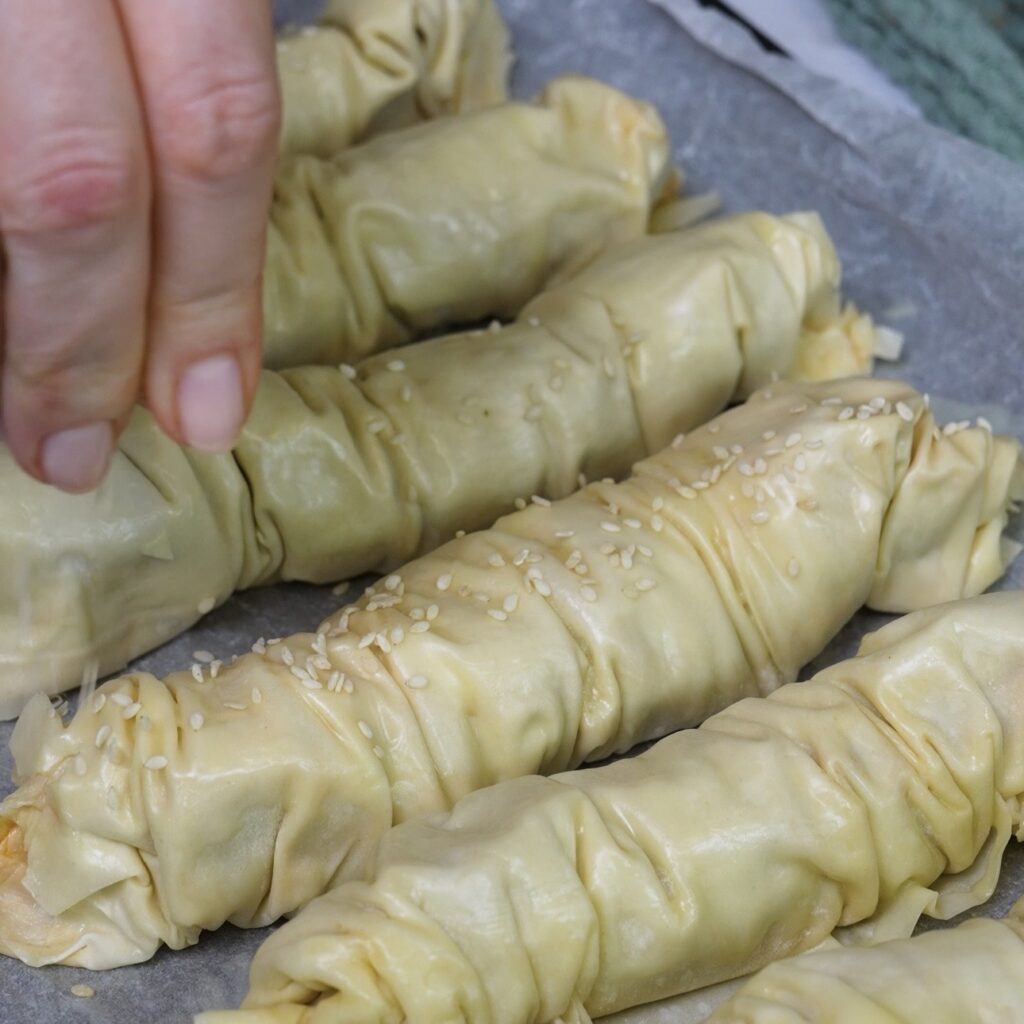
Once the filo is fully rolled, use both hands to gently push the pastry inwards from both ends towards the centre. This gathers the filo and creates its crinkled shape.
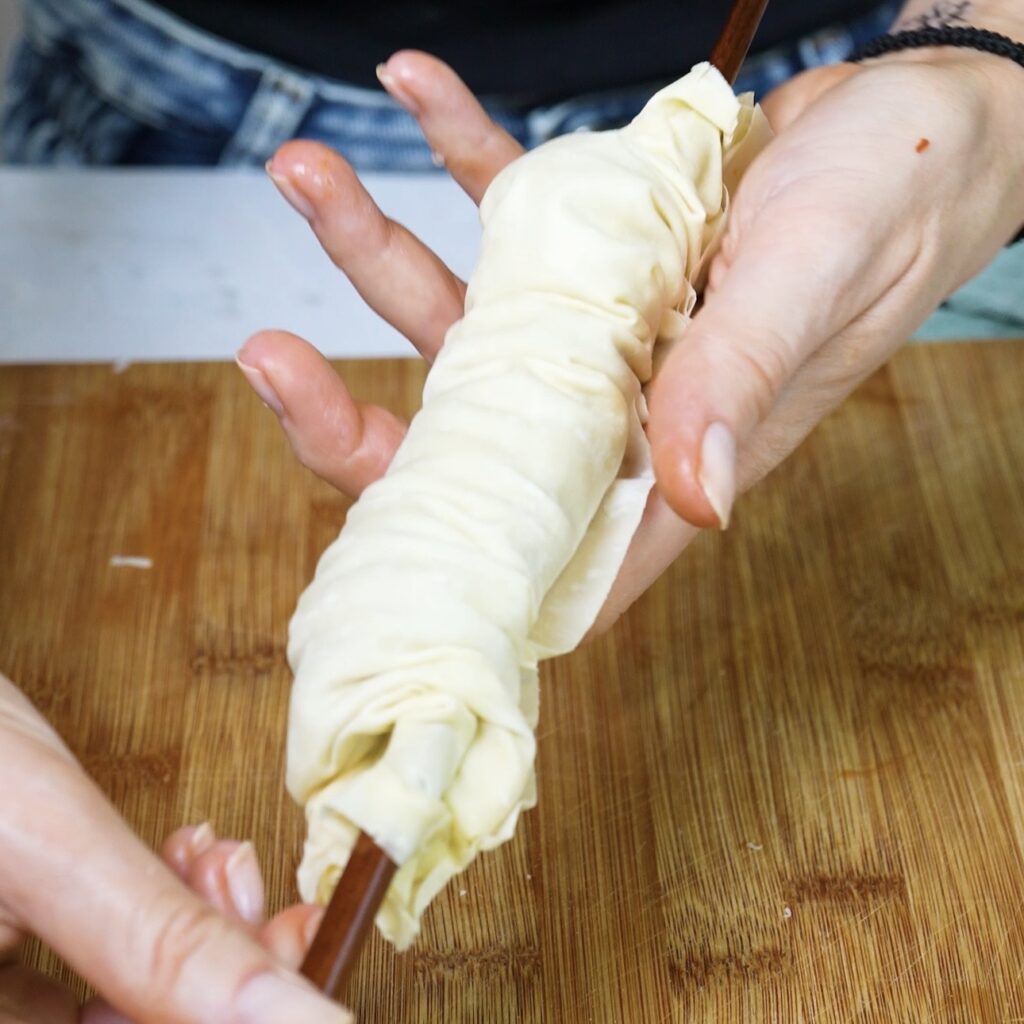
Carefully slide out the chopstick, transfer the roll to the prepared baking tray and tuck the ends underneath to help secure the filling. Repeat with the remaining filo sheets, beef ragù and mozzarella, remembering to keep the unused filo covered as you work.
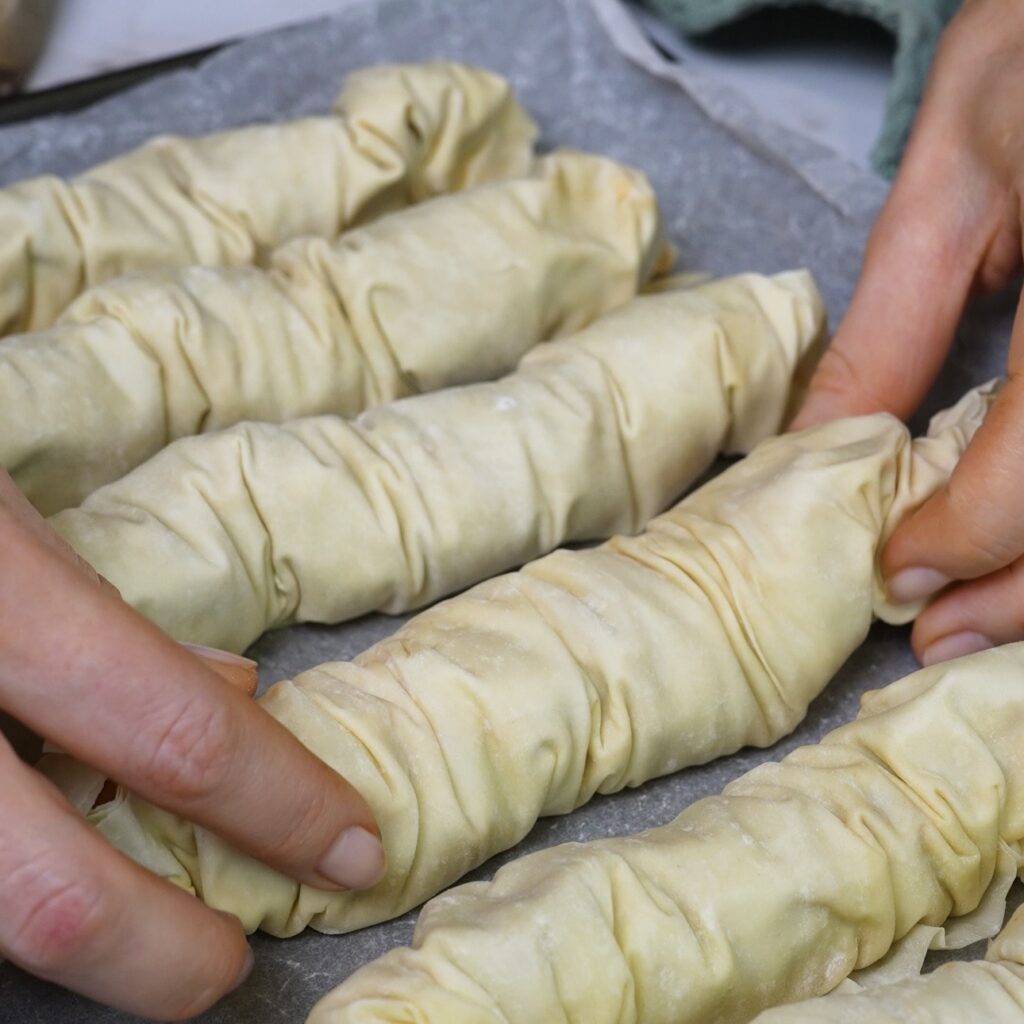
Butter and Bake
Brush the assembled filo rolls with the remaining melted butter and sprinkle them with sesame seeds. Bake for 30–35 minutes, or until the pastry is evenly golden and crisp.
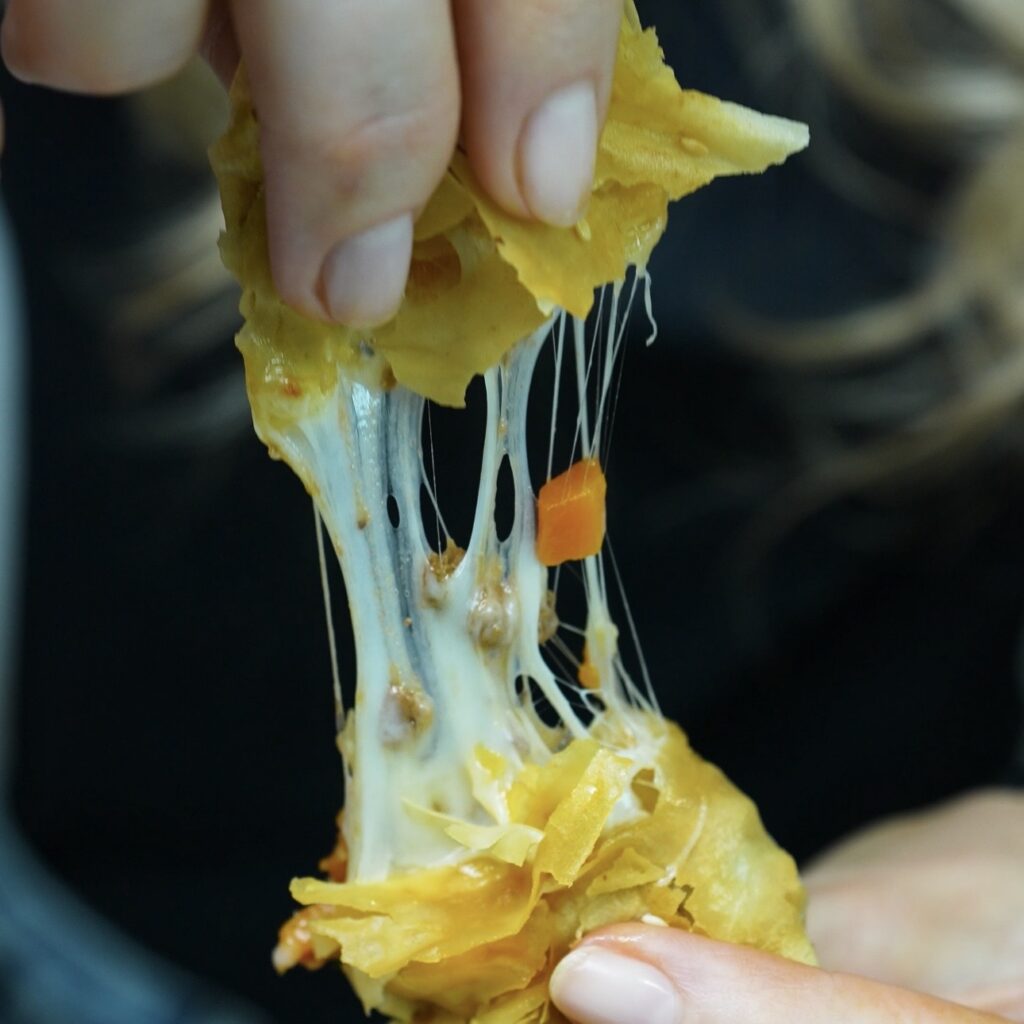
Once baked, sprinkle the rolls with chopped fresh coriander, if using, and serve them warm while the filo is crisp and the mozzarella is still melted.
Scroll down to the printable recipe card with exact measurements.
Why We Love Cheesy Beef Ragù Filo Rolls
These Cheesy Beef Ragù Filo Rolls turn a familiar meat and cheese filling into something much more fun to serve. The contrast between the delicate, golden filo and the rich, melted centre makes every bite satisfying, while the simple chopstick technique creates a cute crinkled shape without requiring complicated pastry skills. The recipe is also flexible, as you can use prepared beef ragù or replace it with any cooked minced-meat filling you already have. If you enjoy creative filo recipes such as Harissa Chicken Filo Nests and Feta and Spinach Filo Twist, these rolls are another delicious way to transform everyday ingredients into a golden savoury bake.
Perfect for Any Occasion
These filo rolls work just as well for a relaxed family lunch as they do for a party, picnic or sharing table. Serve them warm with a fresh salad, roasted vegetables or your favourite dipping sauce, or arrange them on a platter alongside other savoury bites. The ragù can be prepared in advance, leaving only the quick filling, shaping and baking to do before serving. Any leftovers can be reheated in the oven or air fryer to bring back the crisp texture. Pair them with Mozzarella Puff Pastry Boats or Cheesy Pesto Puff Squares when you want to create a varied selection of cheesy pastries for guests.
Instagram Tutorial & More
Want to see how this recipe comes together? Watch our quick video on Instagram, and don’t miss our other easy and delicious recipes:
- Mini Blueberry Filo Pies
- Courgette & Brie Filo Bake
- Filo Tubes
- Filo Cups with Whipped Tomato Ricotta and Tuna Tartare
- Pesto Mozzarella Filo Buns
- Filo Pistachio Buns
Happy cooking,
Izabella

Cheesy Beef Ragù Filo Rolls
Description
These Cheesy Beef Ragù Filo Rolls combine rich, slow-cooked beef ragù with melted mozzarella and delicate layers of buttery filo pastry. The filling is deeply savoury, while the cheese adds a creamy, stretchy contrast to the crisp pastry. A simple chopstick technique creates the distinctive crinkled shape, making the rolls look impressive without requiring any complicated pastry skills. They are ideal for serving as a warm appetiser, party snack or part of a relaxed family meal. The beef ragù can be prepared a day ahead, which makes assembling the filo rolls much quicker. You will also have some ragù left over to serve with pasta or use in another easy dinner.
Ingredients
For the filo rolls
For the beef ragù (This recipe makes more ragù than you will need for the filo rolls. Keep the leftovers for pasta or another recipe)
Instructions
-
Prepare the beef ragù: Prepare the ragù first, as it must cool completely before assembling the filo rolls. You can also make it one day in advance and keep it refrigerated until needed. Heat the olive oil in a large pan over medium heat, then add the shallot, carrot and celery and cook for about 5 minutes, stirring occasionally, until they begin to soften. Add the minced beef, season with salt and black pepper, and cook until browned, breaking it apart with a wooden spoon. Stir in the tomato paste, dried basil, passata, beef stock and white wine vinegar, then add the bay leaf. Cover with a lid, reduce the heat to low and simmer for 2–3 hours, stirring occasionally, until the ragù is rich and thick. Towards the end of cooking, stir in the milk and simmer for a further 10 minutes. Remove the bay leaf and leave the ragù to cool completely.
-
Assemble the filo rolls: Preheat the oven to 190°C/375°F fan and line a large baking tray with baking parchment. Place one filo sheet on a clean work surface and keep the remaining sheets covered with a clean, slightly damp tea towel so they do not dry out. Lightly brush the filo with melted butter, then spoon approximately 3 generous tablespoons of the cooled beef ragù in a line along one of the shorter edges. Sprinkle some of the shredded mozzarella over the ragù, then roll the filo over the filling once to enclose the beef and cheese. Place a chopstick horizontally along the covered filling, then continue rolling the filo with the chopstick inside. Using both hands, gently push the filo inwards from each end towards the centre to gather and crinkle the pastry. Carefully slide out the chopstick, transfer the roll to the prepared baking tray and tuck the ends underneath to help secure the filling. Repeat with the remaining filo sheets, ragù and mozzarella.
-
Brush the assembled filo rolls with the remaining melted butter and sprinkle with sesame seeds. Bake for 30–35 minutes, or until deeply golden and crisp. Sprinkle with chopped fresh coriander, if using, and serve warm.
Nutrition Facts
Servings: 6 ServingCalories:442.38kcalTotal Fat:22.73gCholesterol:131.4mgSodium:450.61mgPotassium:969.56mgTotal Carbohydrate:18.93gDietary Fiber: 2.05gSugars: 4.45gProtein:41.58gVitamin A: 203.52IUVitamin C: 6.7mgCalcium: 185.85mgIron: 5.1mgVitamin D: 0.38IUVitamin E: 1.89IUVitamin K: 12.35mcgVitamin B6: 1mgVitamin B12: 4.03mcgPhosphorus: 479.91mgMagnesium: 58.73mgZinc: 9.29mg
Note
- Make sure the beef ragù is completely cool before assembling the rolls. Warm filling can soften the filo and make it more difficult to shape.
- The ragù should be thick rather than saucy. If it contains too much liquid, cook it uncovered for a little longer before cooling.
- Keep the unused filo sheets covered with a clean, slightly damp tea towel while you work, as filo pastry dries out very quickly.
- Brush the filo lightly with butter. Using too much can make the pastry heavy and greasy rather than crisp.
- Do not overfill the rolls, or the filling may spill out while you shape and bake them.
- Gently push the filo towards the centre while the chopstick is inside. Pressing too firmly may tear the delicate pastry.
- Tuck the ends underneath each roll before baking to help keep the filling securely inside.
- The beef ragù recipe makes more than you need for the filo rolls. Store the leftovers in the fridge for up to 3 days or freeze them for another meal.
- The rolls are best served warm, while the filo is crisp and the mozzarella is still melted.
- Reheat leftovers in the oven or air fryer rather than the microwave to help restore the crisp texture.





User Reviews
It’s delicious