

Cherry Rice Paper Mochi: A Creamy No-Bake Cherry Dessert
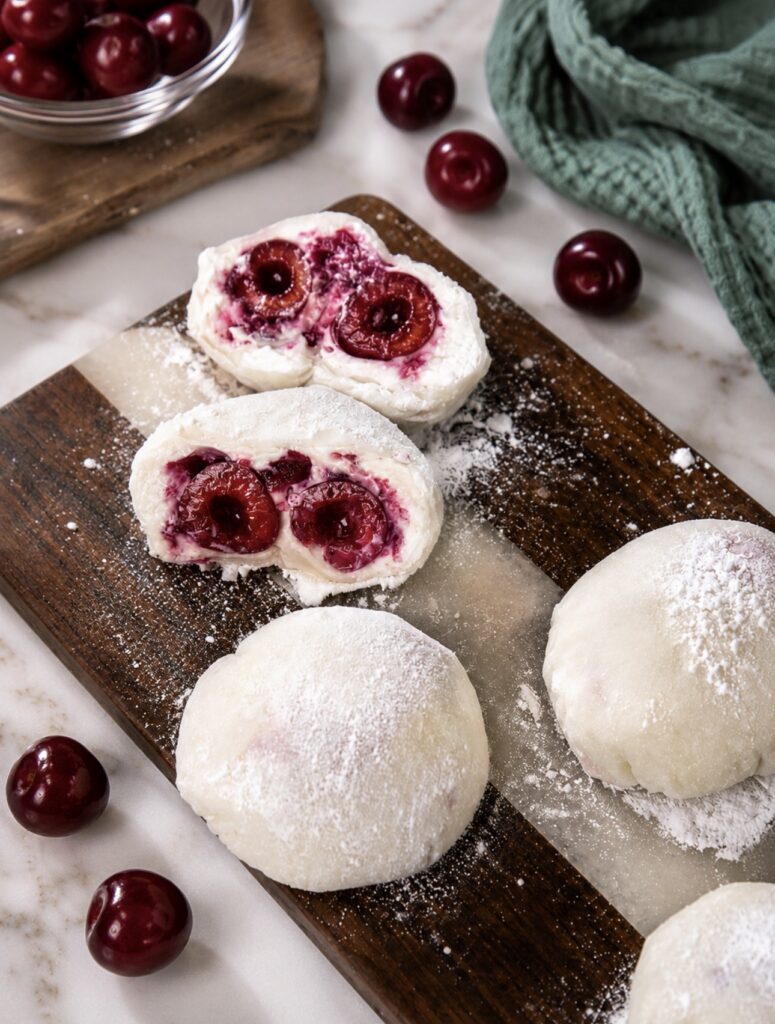
These Cherry Rice Paper Mochi are soft, creamy and filled with some of summer’s best flavours. Delicate rice paper surrounds a whipped vanilla cheesecake-style filling, homemade cherry sauce, fresh cherries and hidden pistachio kernels. Each mochi has a lovely contrast of textures, from the soft wrapper and fluffy cream to the juicy fruit and gentle crunch in the centre. They look elegant enough for a special occasion, yet the method is surprisingly simple and requires no baking. If you enjoy playful rice paper desserts, you may also love my No-Cook Mango Mochi (Rice Paper Dessert) and Cottage Cheese Strawberry Rice Paper Dessert (Air Fryer)
This easy cherry mochi recipe uses everyday round rice paper sheets instead of traditional glutinous rice dough, making the preparation much quicker and more approachable. Once briefly dipped in water, the rice paper becomes soft, flexible and slightly chewy, creating the perfect wrapper for the chilled cream filling. There is no kneading, steaming or complicated dough shaping involved. For another creative way to pair rice paper with seasonal fruit, try my Cherry Ricotta Rice Paper Dumplings or explore a savoury version with my Feta and Spinach Rice Paper Rolls (Air Fryer, Gluten-Free).
Scroll down or tap ‘Jump to Recipe’ for the full printable recipe card, exact ingredient measurements and detailed instructions.
Simple Ingredients, Beautiful Flavours
The ingredient list is short, but every element adds something important. The cherries bring freshness and natural sweetness, the cream cheese gives the filling a gentle tang, and the pistachios add a nutty surprise inside. It is the same kind of fruity, creamy combination that makes my Cherry Cottage Cheese Ice Cream (High Protein) so refreshing and my Picota Cherry Pistachio Chocolate Bar so indulgent.
- Rice paper sheets – Use round rice paper sheets measuring approximately 16 cm (6¼ in) in diameter. They soften quickly in water and create a thin, flexible wrapper without the need to prepare traditional mochi dough.
- Double cream and cream cheese – Whipped together, these form a smooth, light cheesecake-style filling that is rich enough to hold its shape without feeling too heavy.
- Icing sugar and vanilla – Icing sugar dissolves easily into the cream, while vanilla adds warmth and rounds out the sharpness of the cream cheese.
- Homemade cherry sauce – The sauce is made by gently cooking cherries with honey, lemon juice, water and cornflour before straining it until smooth. Only 60 ml (¼ cup) is needed for the mochi, leaving extra sauce for another dessert.
- Fresh cherries – Two whole pitted cherries are placed inside each mochi, giving the centre a juicy bite and making the cherry flavour much more pronounced.
- Pistachio kernels – A pistachio kernel is tucked inside each cherry for a small but delicious crunchy centre. Pistachio also pairs naturally with the sweetness and acidity of cherries.
- Cornflour and icing sugar – This simple dusting prevents the softened rice paper from sticking to the plate or your hands while giving the finished mochi a delicate appearance.
How to Make Cherry Rice Paper Mochi
Prepare the Homemade Cherry Sauce
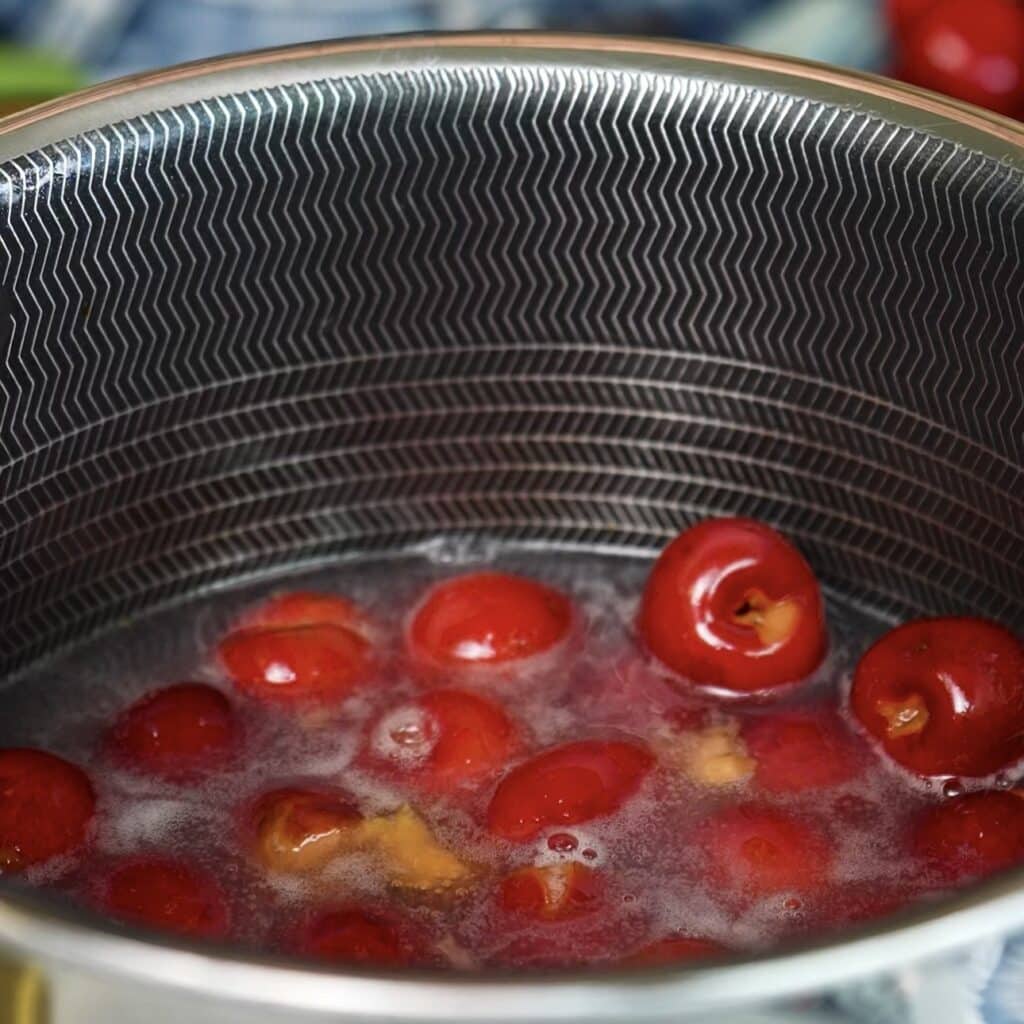
Prepare the cherry sauce first, as it needs enough time to cool completely before you assemble the mochi. Add the pitted cherries, cornflour, water, honey and a squeeze of lemon juice to a saucepan. Stir everything together thoroughly until the cornflour has completely dissolved and there are no visible lumps. Place the saucepan over a medium-low heat and bring the mixture to the boil. Once it starts boiling, cook for about 10 minutes, stirring regularly to prevent the sauce from catching on the bottom of the pan. The cherries should soften and release their juices while the mixture gradually thickens.
Set a fine sieve over a bowl and pour in the cooked cherry mixture. Use a spatula or the back of a spoon to press the softened cherries firmly against the sieve, extracting as much smooth cherry sauce as possible. Transfer the strained sauce to a bowl and leave it to cool at room temperature, then place it in the fridge until completely chilled.
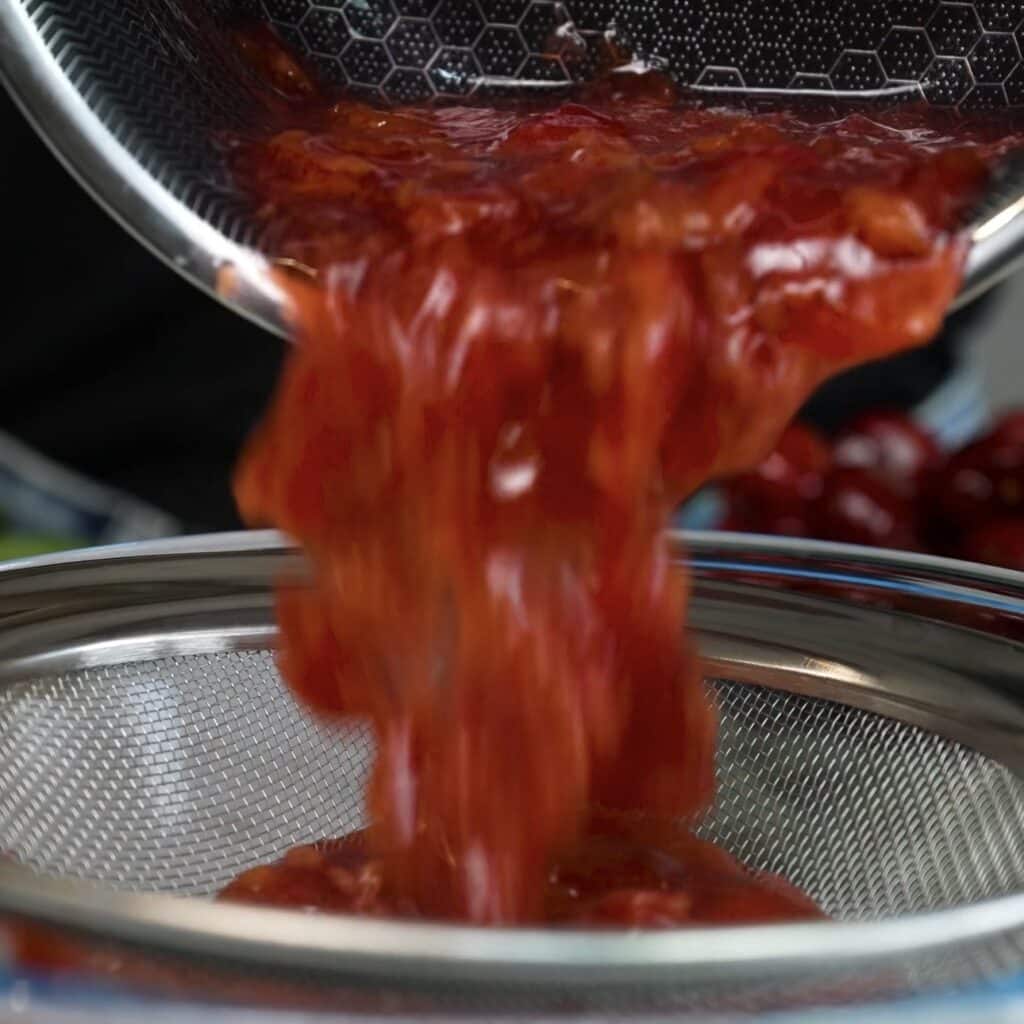
I like to make the cherry sauce the day before so it is ready to use when I assemble the mochi. You will need 60 ml (¼ cup) of the chilled sauce for this recipe. Transfer the remaining sauce to an airtight jar and store it in the fridge for up to 5 days.
Make the Vanilla Cream Filling
Add the double cream, cream cheese, icing sugar and vanilla extract to a mixing bowl. Using a hand mixer, whisk the ingredients together until the filling becomes thick, smooth and able to hold its shape. Be careful not to overwhip the mixture. It should be firm enough to stay in place around the cherries and sauce, but still smooth and easy to spoon. Keep the filling refrigerated while you prepare the remaining ingredients, particularly if your kitchen is warm.
Prepare the Dusting Mixture
Add the cornflour and icing sugar to a small bowl and mix until evenly combined. Sieve half of the mixture over a clean plate, creating a light, even coating. Reserve the remaining dusting mixture for coating the tops and sides of the finished mochi. This helps prevent the softened rice paper from sticking to the plate, your hands or the other mochi.
Prepare the Shaping Bowl
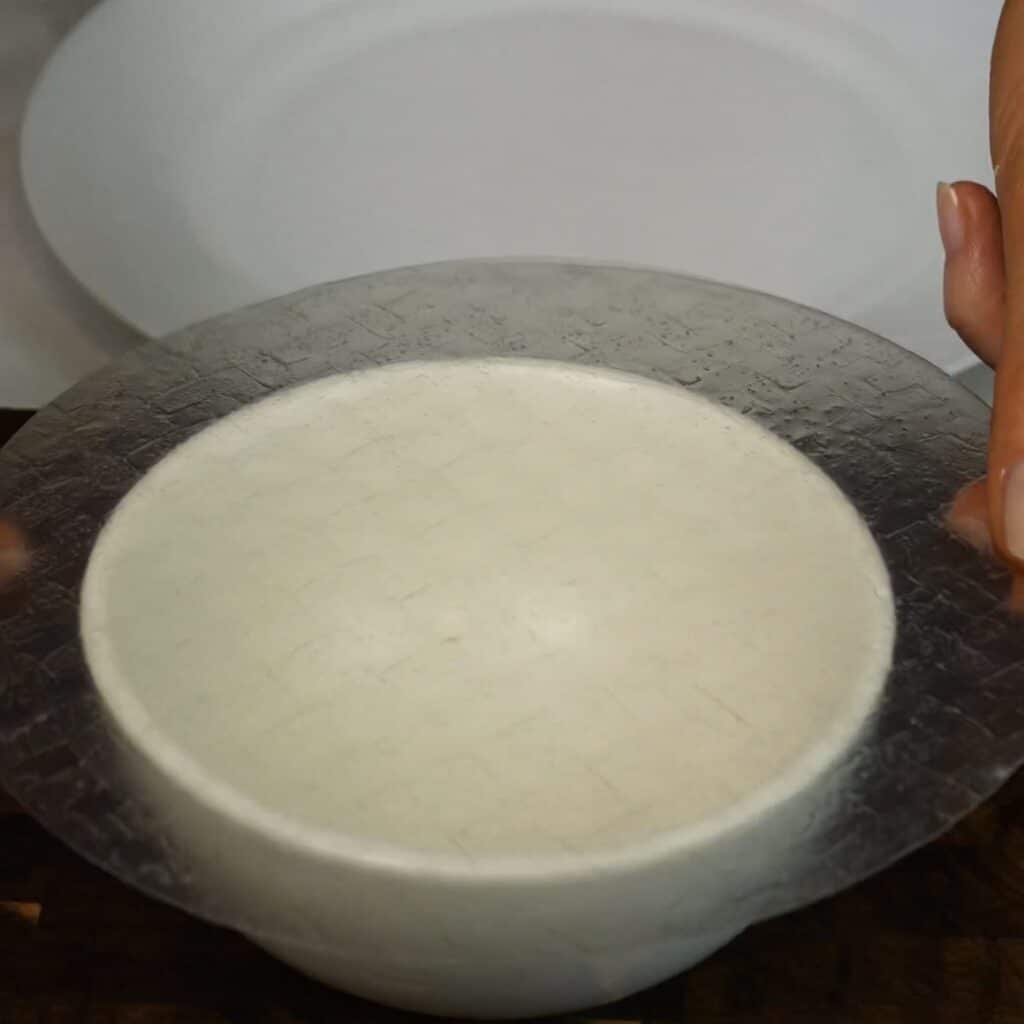
Choose a small bowl that is narrower than the rice paper sheets. The rice paper needs to extend beyond the edges of the bowl so there is enough excess wrapper to fold over the filling and seal the mochi. Lightly grease the inside of the bowl with a small amount of vegetable oil. This prevents the softened rice paper from sticking and makes it much easier to lift out once the mochi has been filled and sealed.
Soften the Rice Paper
Pour a little water into a shallow plate. Work with one rice paper sheet at a time, keeping the remaining sheets dry until you are ready to use them. Briefly dip one sheet into the water, making sure both sides are moistened. Do not leave it soaking or wait for it to become completely soft. It should still feel slightly firm when you remove it from the water, as it will continue to soften while you shape and fill it. Immediately place the moistened rice paper over the greased bowl. As it softens, it will naturally mould itself to the shape of the bowl.
Add the Cream and Cherry Filling
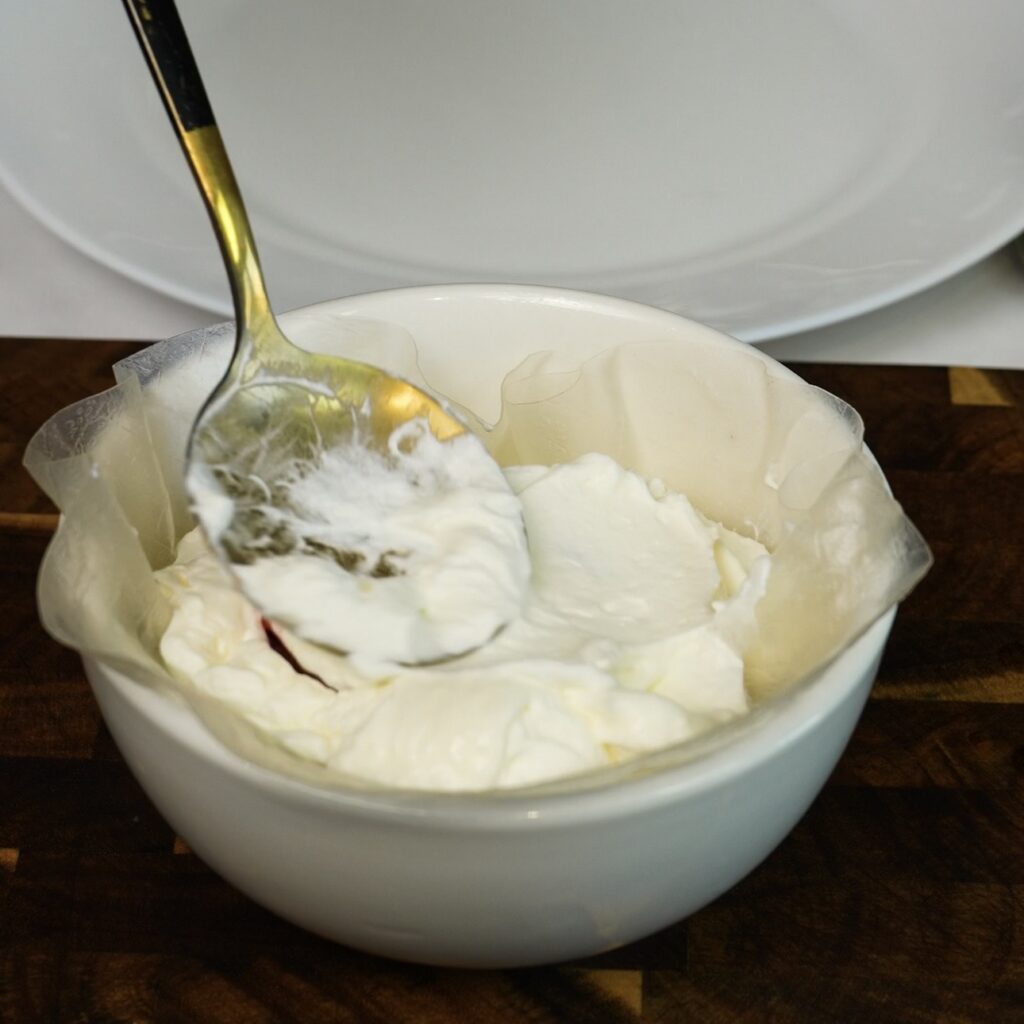
Spoon a portion of the vanilla cream filling into the centre of the rice paper and spread it slightly over the base. Add approximately 1 tablespoon of the chilled cherry sauce, keeping it in the centre rather than spreading it too close to the edges. Place two pitted cherries on top of the sauce. Insert one pistachio kernel into the centre of each cherry, where the stones were removed. This creates a small nutty surprise inside every mochi.
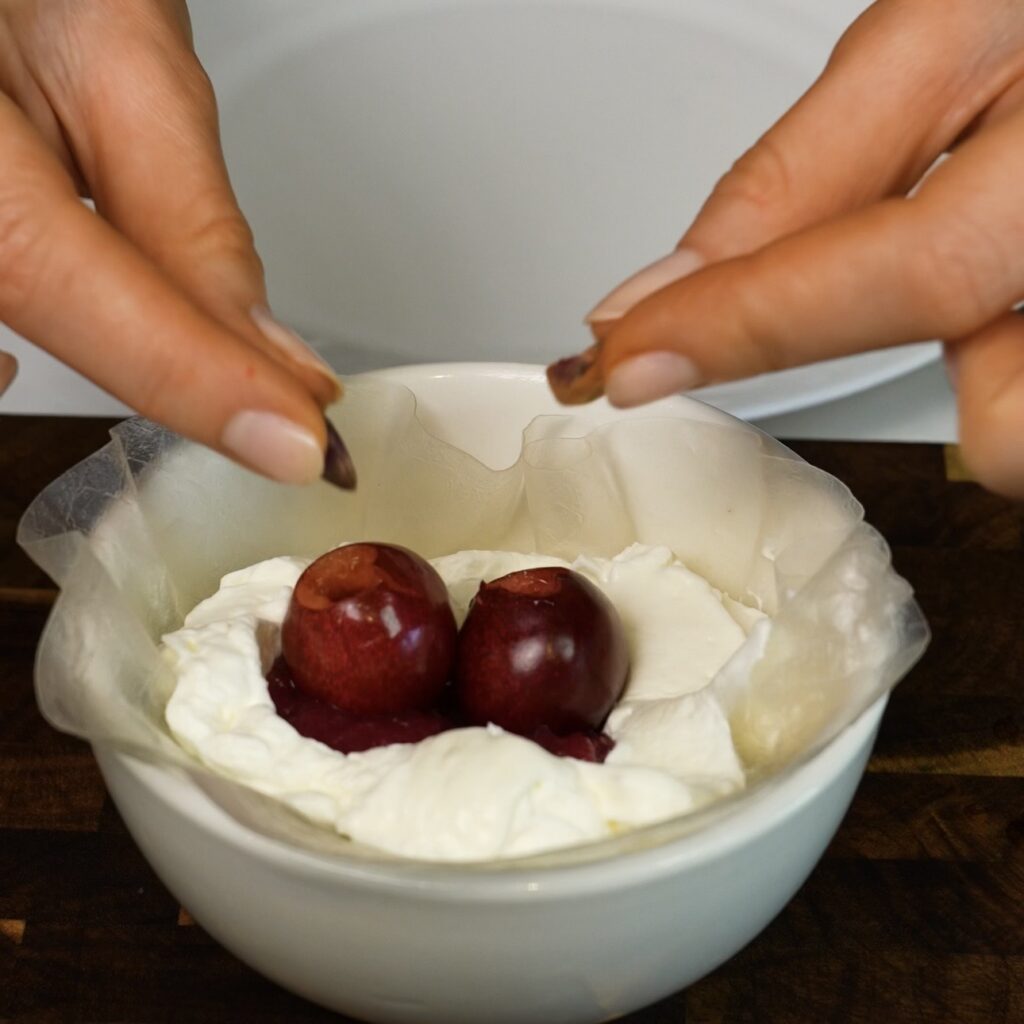
Spoon more of the cream filling over the cherries and sauce. Make sure the fruit and sauce are completely covered with cream before sealing the rice paper. Fully enclosing the wetter ingredients helps prevent the filling from leaking through the wrapper. Avoid adding too much filling. You need enough space around the top of the bowl to bring the edges of the rice paper together comfortably.
Seal the Mochi
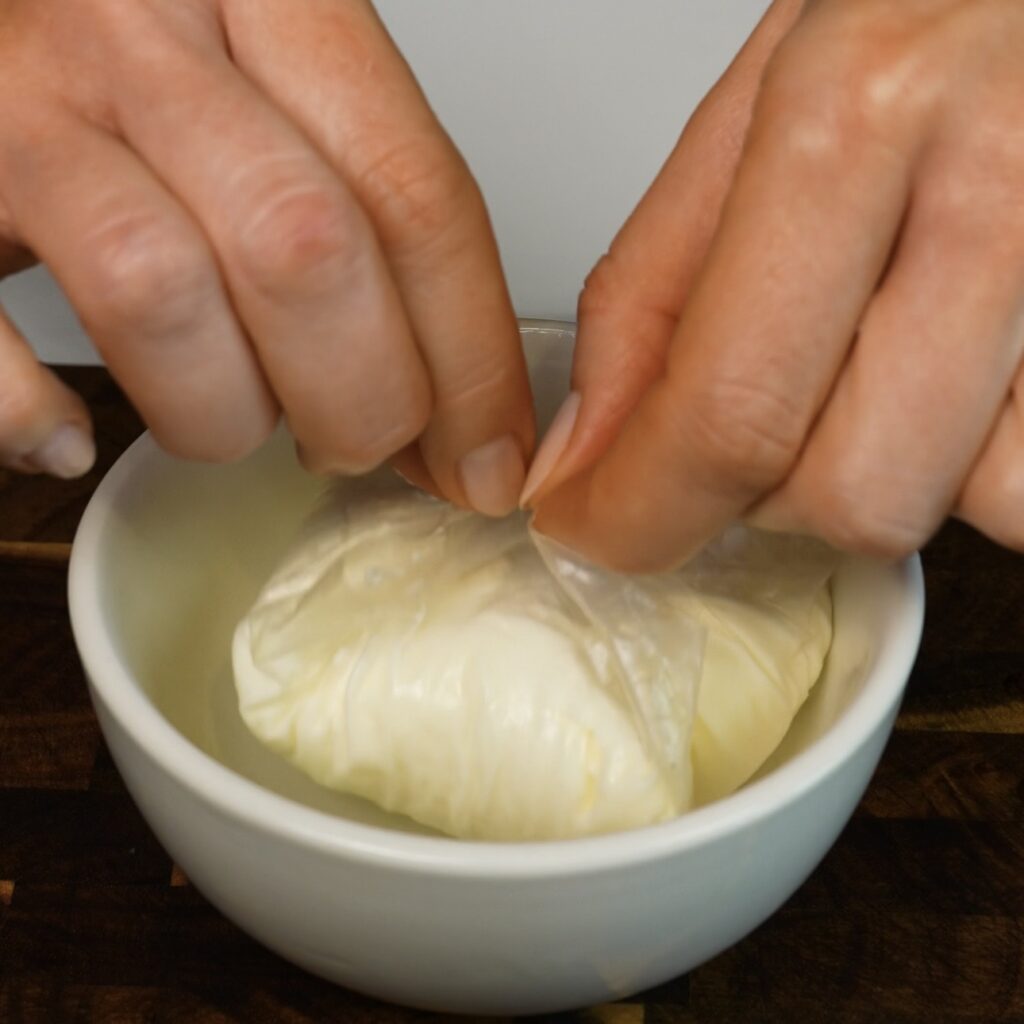
Bring the edges of the softened rice paper towards the centre, overlapping them over the filling. Gently press the overlapping sections together to create a sealed pouch. Make sure there are no open gaps where the cream or cherry sauce could escape. The rice paper will be soft and sticky at this stage, so the overlapping edges should naturally adhere to one another.
Turn Out and Coat
Carefully lift the sealed mochi from the bowl, then turn it upside down and place it seam-side down on the plate coated with the cornflour and icing sugar mixture. The folded edges should remain hidden underneath, leaving a smooth, rounded surface on top. Sieve a little of the reserved dusting mixture over the top. Using clean, dry hands, gently coat the top and sides of the mochi, being careful not to press too firmly or damage the delicate rice paper.
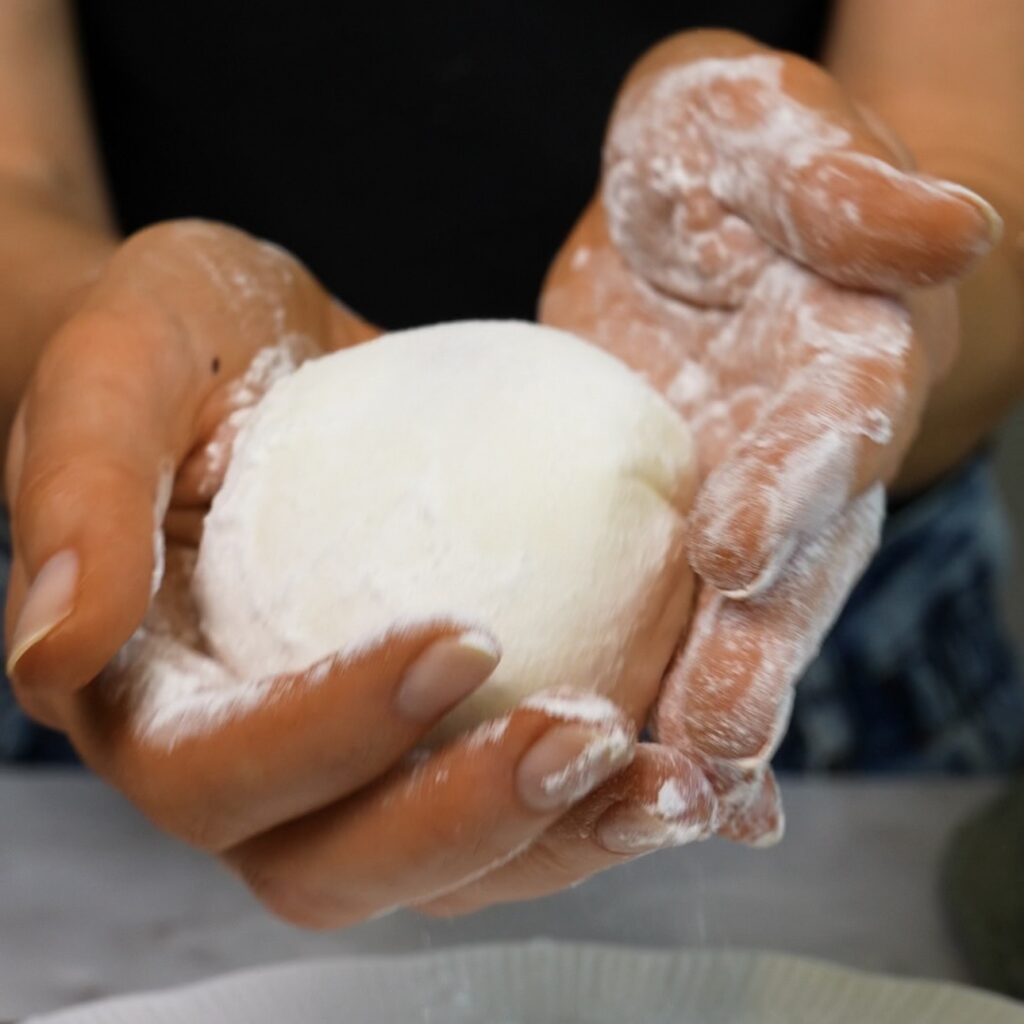
Repeat the same process with the remaining rice paper sheets, cream filling, cherry sauce, cherries and pistachio kernels. Work with one rice paper sheet at a time for the easiest handling.
Serve Immediately
Serve the Cherry Rice Paper Mochi immediately after assembling. The rice paper will continue to absorb moisture from the cream and cherry filling as it rests, becoming softer and stickier over time.
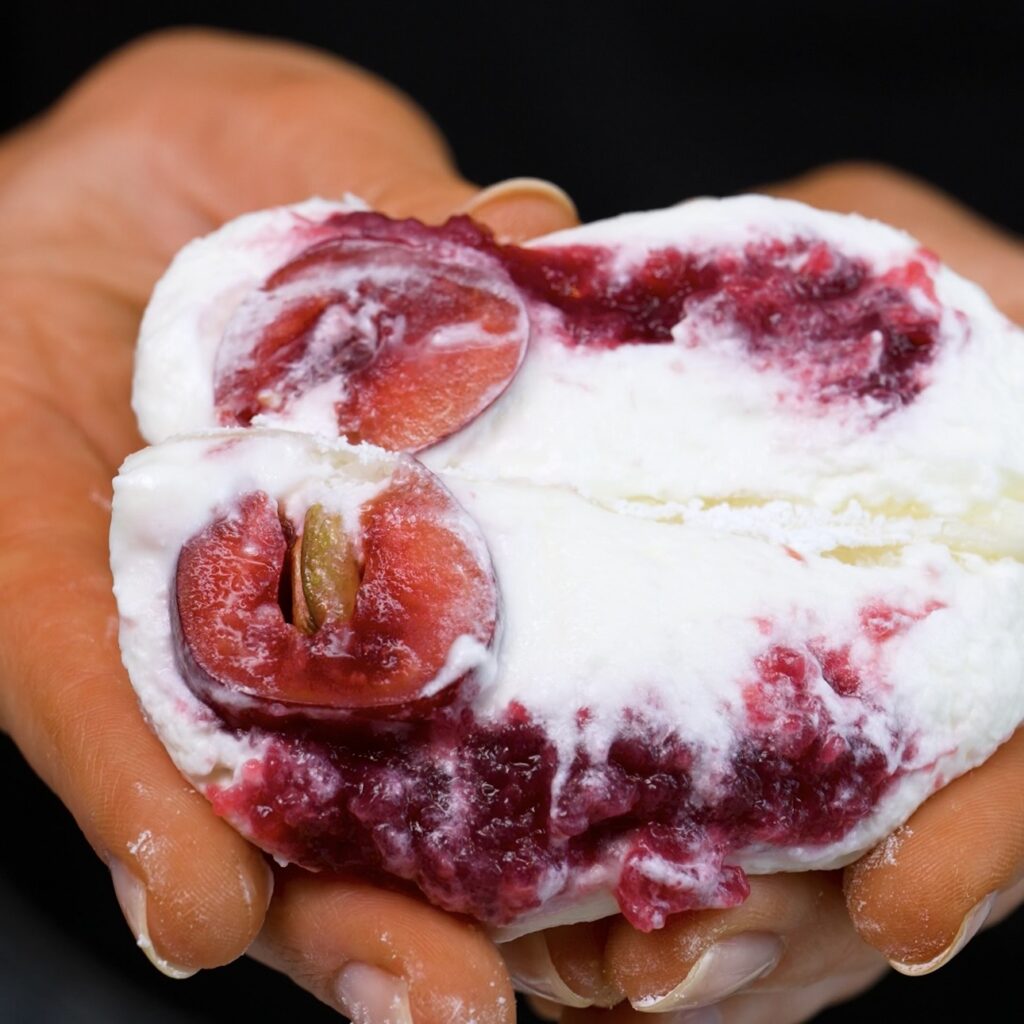
For the best texture, prepare the cherry sauce and cream filling in advance, keep them chilled, and assemble the mochi shortly before you plan to serve them.
Why You Will Love This Recipe
These Cherry Rice Paper Mochi combine the flavours of cherry cheesecake with a soft, slightly chewy rice paper wrapper and a hidden pistachio centre. The vanilla cream is smooth and gently tangy, the homemade sauce brings concentrated cherry flavour, and the fresh cherries add a juicy burst in every bite. They look impressive but are surprisingly straightforward to make, with most of the components easy to prepare ahead. Only the final assembly needs to be done shortly before serving, making them a practical choice when you want a dessert that feels a little special without spending hours in the kitchen. For more cherry-filled treats, try my Cherry and Pistachio Yogurt Puffs and Picota Cherry Pistachio Chocolate Bar.
Perfect for Summer Entertaining
Cherry Rice Paper Mochi are ideal for summer gatherings, afternoon treats or individual dinner-party desserts. Their delicate appearance makes them beautiful enough for a special occasion, while their small size means they are easy to serve without plates or complicated presentation. The chilled cream, fresh cherries and fruity sauce feel light and refreshing in warm weather, and the whole cherries hidden inside create a lovely surprise when the mochi are cut open. Prepare the sauce and filling in advance, then assemble the mochi shortly before serving so the rice paper remains soft, smooth and easy to handle. For a colourful summer dessert selection, serve them alongside my Strawberry Fluff Squares (Gluten-Free) and Easy Strawberry Tiramisu (No Eggs, No Baking Dish).
Instagram Tutorial & More
Want to see how these Cherry Rice Paper Mochi come together? Watch our quick video on Instagram, and don’t miss our other easy and delicious recipes:
- Rice Paper Chicken Nori Rolls
- Crispy Air Fryer Rice Paper Cheese Balls
- Air Fryer Pesto Parmesan Rice Paper Rings
- Air Fryer Salmon Sushi Parcels
- Air Fryer Rice Paper Salmon en Croûte
- Rice Paper Cheeseburger Rolls
Happy summer,
Izabella
Description
These Cherry Rice Paper Mochi are an easy no-bake dessert with a creamy cheesecake-style centre and plenty of fresh cherry flavour. Each one is filled with homemade cherry sauce, juicy cherries and pistachio kernels for a lovely combination of fruity, creamy and nutty flavours. Rice paper makes a quick and simple alternative to traditional mochi dough while still creating a delicate, pleasantly chewy wrapper. The homemade sauce can be prepared in advance, making the mochi quick to assemble when you are ready to serve them. They are ideal for cherry season and make a beautiful individual dessert for summer gatherings or afternoon treats. Serve them immediately after assembling, while the filling is chilled and the rice paper is at its best.
Ingredients
For the cherry sauce. (You will need 60 ml (¼ cup) for the mochi; reserve the remaining sauce for another recipe)
For the mochi
For dusting
You will also need
Instructions
-
Prepare the cherry sauce first, as it needs time to cool. Add the pitted cherries, cornflour, water, honey and lemon juice to a saucepan and mix well until the cornflour has completely dissolved. Place over a medium-low heat and bring to the boil, then cook for about 10 minutes, stirring frequently once boiling, until the cherries have softened and the sauce has thickened. Pass the mixture through a fine sieve, pressing the cherries firmly with a spatula to extract as much sauce as possible. Transfer the sauce to a bowl, leave it to cool, then refrigerate until completely chilled. I like to prepare it the day before.
-
You will need 60 ml (¼ cup) of the sauce for this recipe. Transfer the remaining sauce to an airtight jar and keep it in the fridge for up to 5 days. You can use it for other recipes, such as my Cherry Ricotta Rice Paper Dumplings or High-Protein Cherry Cottage Cheese Chocolate Bars.
-
To prepare the filling, add the double cream, cream cheese, icing sugar and vanilla extract to a mixing bowl. Whisk with a hand mixer until thick and able to hold its shape. In a separate small bowl, combine the cornflour and icing sugar for dusting. Sift half of the mixture evenly over a plate and reserve the rest for coating the mochi.
-
Lightly grease the inside of a small bowl with vegetable oil. The bowl should be smaller than the rice paper sheets, as it will help you shape the mochi. Pour a little water into a shallow plate. Working with one sheet at a time, briefly dip the rice paper into the water to moisten both sides, but do not wait for it to soften completely. Immediately place it over the greased bowl and gently press it down inside. It will continue to soften and naturally take the shape of the bowl.
-
Add a spoonful of the cream filling and spread it slightly over the base. Spoon approximately 1 tablespoon of chilled cherry sauce into the centre, then place two pitted cherries on top. Insert one pistachio kernel into the centre of each cherry, then cover with more cream, making sure the cherries and sauce are fully enclosed. Bring the edges of the rice paper together over the filling, overlapping and gently pressing them to seal the mochi into a pouch.
-
Carefully turn the mochi upside down and place it seam-side down on the prepared plate. Sift a little of the reserved cornflour and icing sugar mixture over the top, then gently coat the entire mochi with your hands. Repeat with the remaining ingredients, then serve immediately and enjoy.
Nutrition Facts
Servings: 4 ServingCalories:285.51kcalTotal Fat:14.34gCholesterol:41.41mgSodium:56.1mgPotassium:235.65mgTotal Carbohydrate:38.81gDietary Fiber: 2.1gSugars: 24.88gProtein:2.77gVitamin A: 147.66IUVitamin C: 6.08mgCalcium: 44.89mgIron: 0.75mgVitamin D: 0.44IUVitamin E: 0.43IUVitamin K: 2.69mcgVitamin B6: 0.09mgVitamin B12: 0.06mcgPhosphorus: 56.82mgMagnesium: 16.21mgZinc: 0.27mg
Note
- Prepare the cherry sauce in advance and chill it completely before assembling the mochi. A warm sauce can soften the cream filling and make the rice paper harder to handle.
- The cherry sauce recipe makes more than you will need. Use 60 ml (¼ cup) for the mochi and store the remainder in an airtight jar in the fridge for up to 5 days.
- Briefly dip each rice paper sheet into water, but do not leave it to soak. It will continue to soften as you shape and fill it.
- Lightly grease the shaping bowl, as softened rice paper can stick easily.
- Use a bowl that is smaller than the rice paper sheets so there is enough rice paper around the edges to fold over and seal the filling.
- Make sure the cherries and sauce are fully covered with cream before sealing. This will help prevent the filling from leaking through the rice paper.
- Assemble the mochi shortly before serving. Rice paper becomes increasingly soft and sticky as it sits, so these are best enjoyed immediately.
- The pistachio kernels can be omitted or replaced with chopped pistachios.