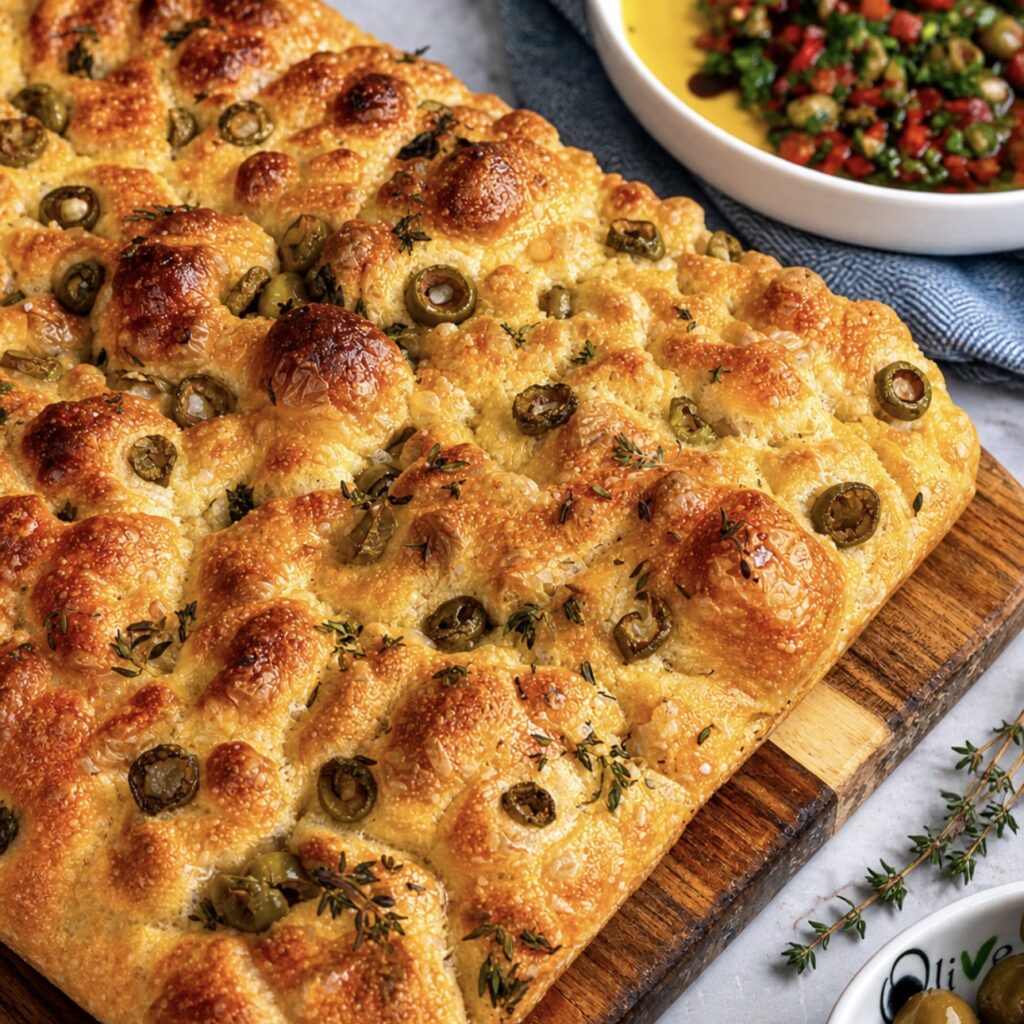
Overnight Olive and Thyme Focaccia: Light, Airy, and Effortlessly Impressive
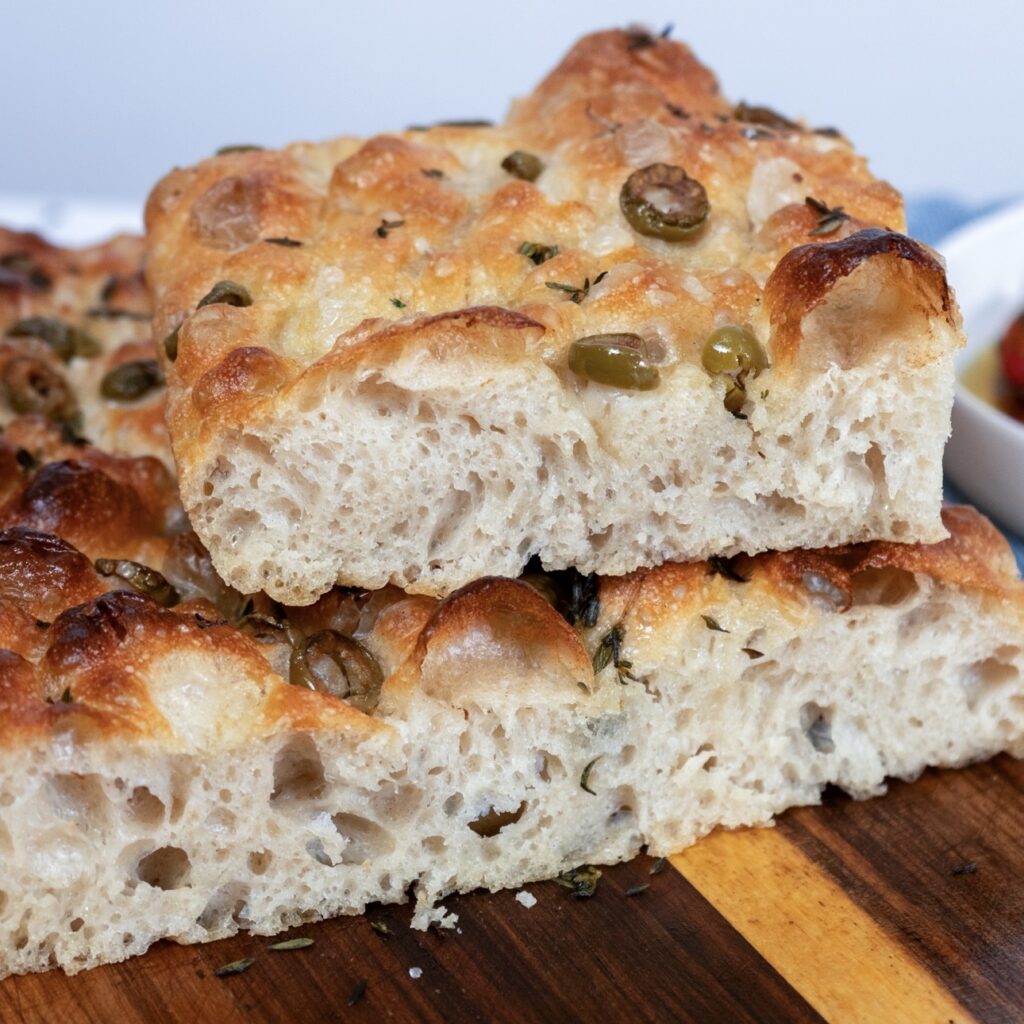
There’s something incredibly satisfying about pulling a tray of freshly baked focaccia out of the oven. Crisp edges, a golden, oil-kissed surface, and that soft, airy crumb inside. This Overnight Olive and Thyme Focaccia is exactly that kind of recipe. It looks impressive, tastes like it came straight from a bakery, yet requires minimal effort thanks to a no-knead method and slow overnight fermentation. If you’ve loved recipes like No-Knead Sun-Dried Tomato and Rosemary Bread Twists or Easy No-Knead Ciabatta (4 Ingredients), this one takes that same simplicity and elevates it into something truly special. The beauty of this focaccia lies in its balance. The richness of olive oil, the saltiness of olives, and the gentle aroma of thyme all come together in a way that feels both rustic and refined. It pairs perfectly with comforting dishes like Roasted Squash and Tomato Soup or something lighter like Easy Roasted Pepper Hummus, making it incredibly versatile for everyday meals or entertaining.
Scroll down or tap “Jump to Recipe” to get started.
Simple Ingredients, Big Flavours
What makes this focaccia so reliable is how a handful of simple ingredients transform into something full of depth and character. Each one plays a specific role in creating that signature texture and flavour:
- Bread flour – The high protein content gives structure and helps create those beautiful air pockets.
- Yeast and water – These bring the dough to life. The long fermentation allows the flavour to develop slowly, much like in artisan bread recipes.
- Salt – Essential for both flavour and controlling the fermentation process.
- Olive oil – Not just for flavour, but also for that crisp, golden crust. It’s what gives focaccia its signature richness.
- Olives and thyme – A simple combination that adds depth, saltiness, and a fresh, herby finish.
With such a short ingredient list, the quality really matters. Good olive oil and fresh herbs will take this from good to unforgettable. And if you enjoy dipping your bread, it’s perfect served alongside something like Roasted Garlic Dip or Delicious Roasted Red Pepper and Feta Dip Recipe.
How to Make Overnight Olive and Thyme Focaccia
Preparing the Dough
Start by preparing the dough. In a large bowl, combine the lukewarm water, yeast, and salt, then add the flour. Mix with a spoon until fully incorporated and no dry patches remain. Cover the bowl with a lid or cling film and let it rest for 30 minutes.
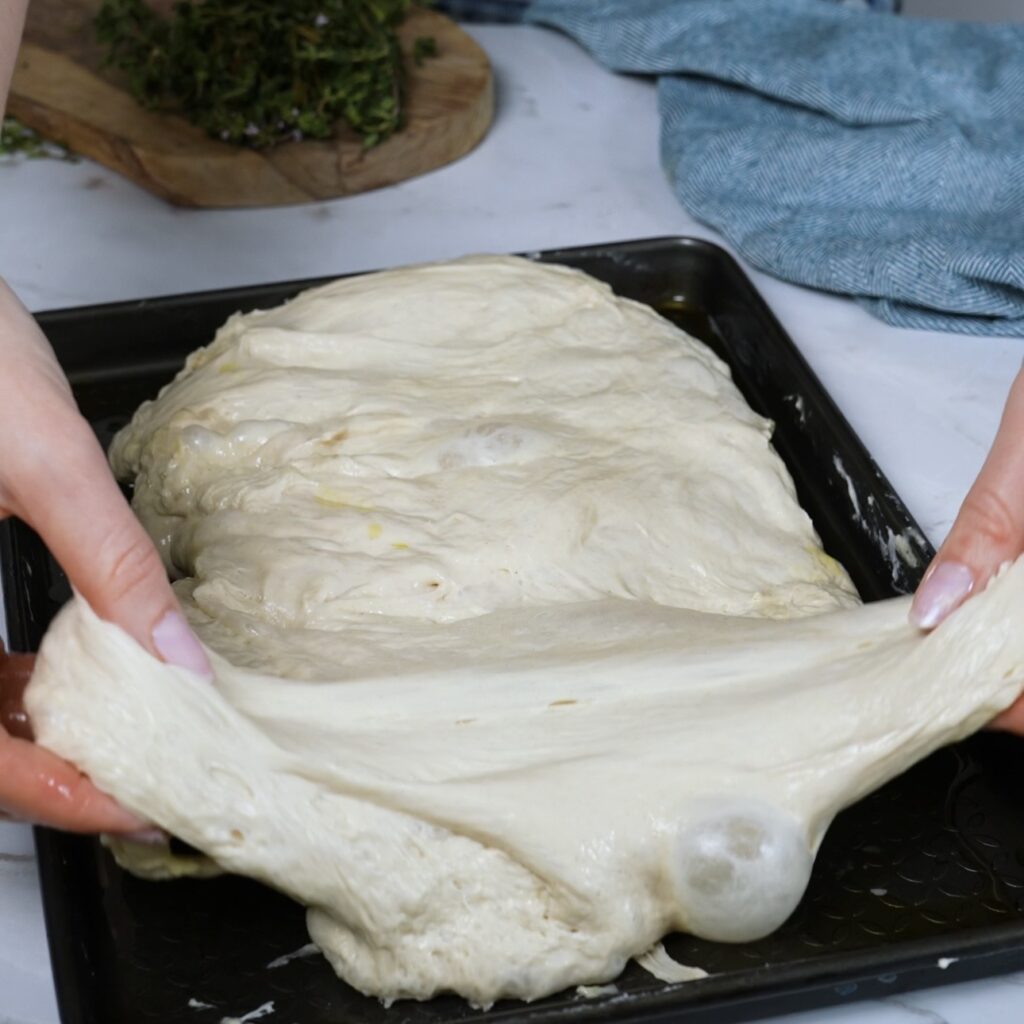
Stretch and Fold Process
Begin the stretch and fold process by taking one side of the dough, gently stretching it upwards, then folding it over to the opposite side. Rotate the bowl and repeat until all sides have been stretched and folded. Cover and let it rest for another 30 minutes. Repeat this process 3 more times, for a total of 4 rounds, resting the dough for 30 minutes between each round.
Overnight Fermentation
After the final round, cover the dough and transfer it to the fridge to rest overnight, or for at least 8 hours. This slow fermentation develops flavour and improves the texture of the dough.
Shaping and Final Proof
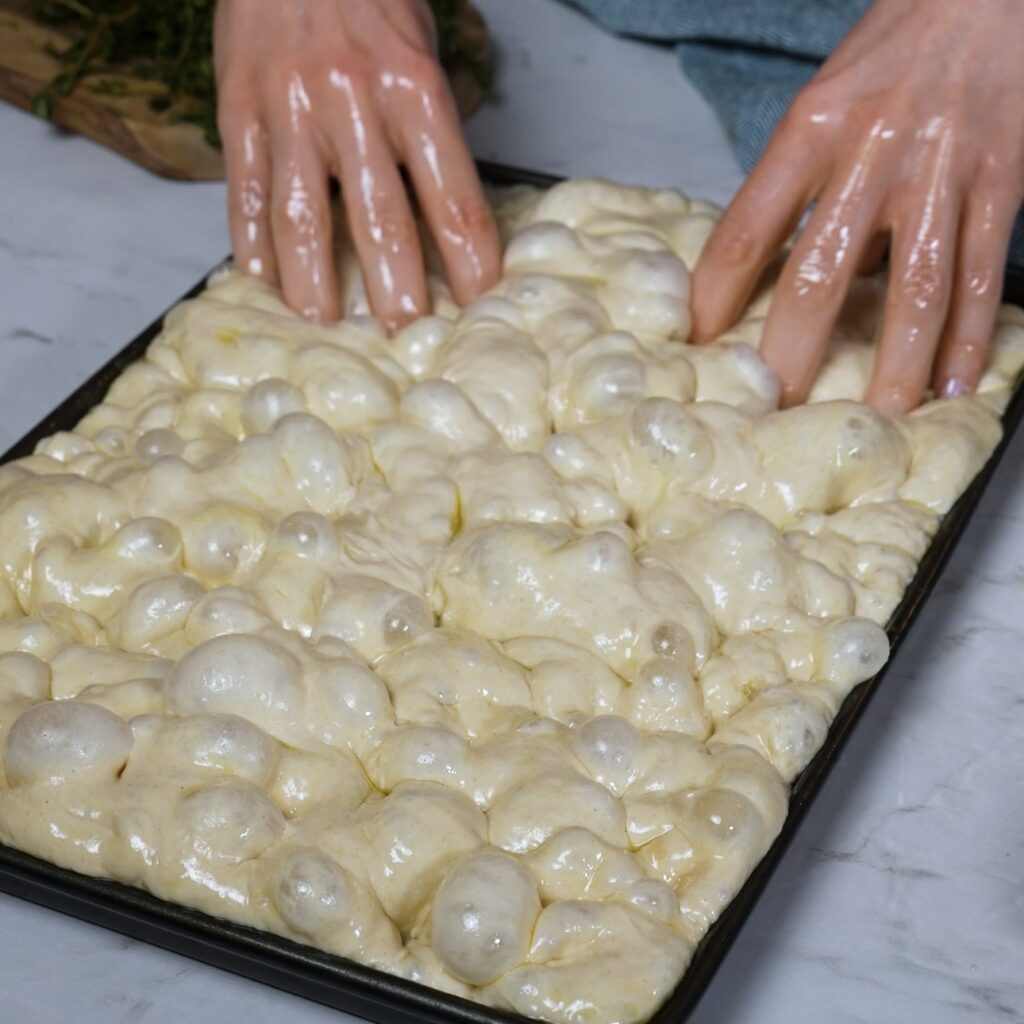
The next day, generously oil a baking tray measuring approximately 24 x 34 cm (9½ x 13½ inches) and at least 3 cm (1¼ inch) deep. Transfer the dough to the tray. If you turn the bowl upside down, the dough should release easily, just give it a moment. Gently stretch the dough with your hands so it fills the tray evenly without deflating it.
Cover the tray with another tray on top, or place it in a switched-off oven for the final proof.
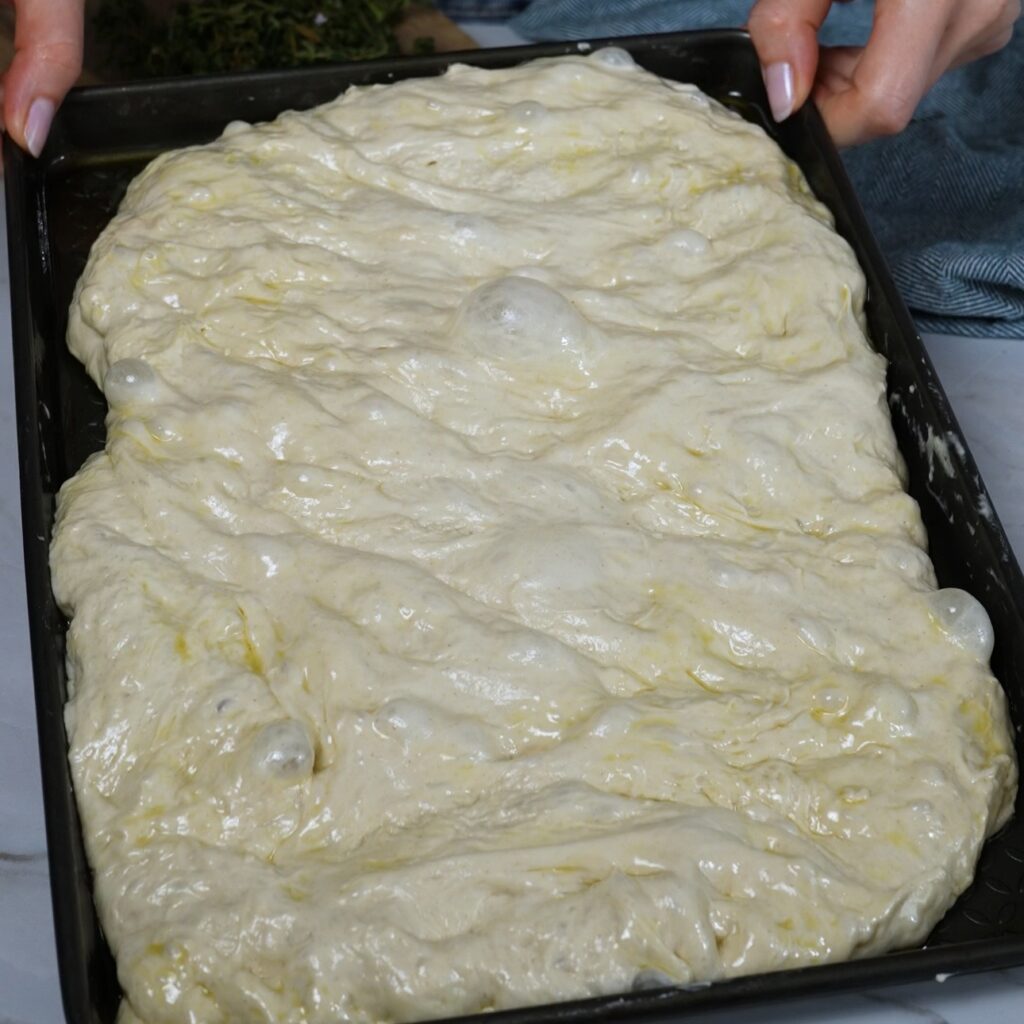
Leave the dough to rise for 2 to 3 hours, or until it has doubled in size and looks soft and puffy.
Dimpling and Topping
Preheat the oven to 220°C/425°F and place an empty baking tray on the bottom shelf of the oven. Once the dough has risen, grease your hands well with olive oil and begin dimpling the surface, pressing your fingers all the way down to the base. You will see plenty of air bubbles forming.
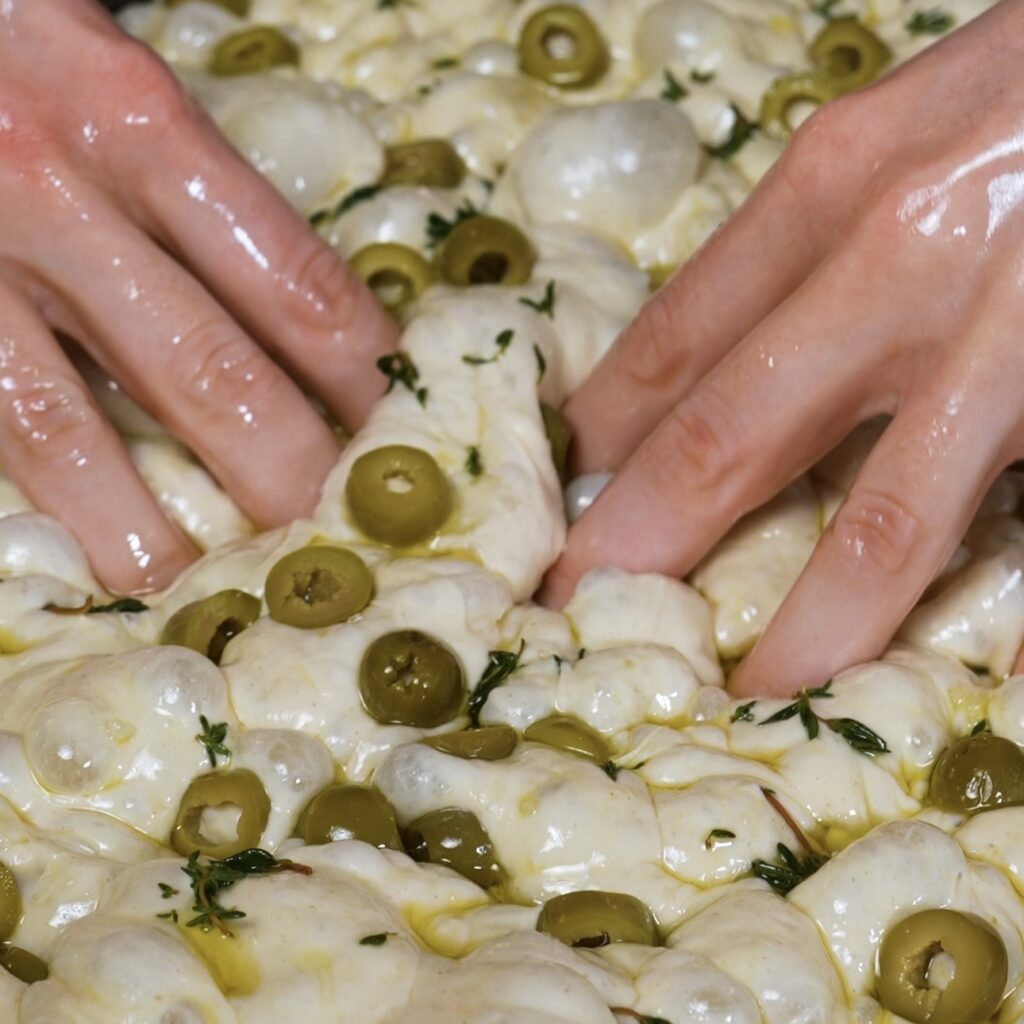
Drizzle generously with olive oil, then scatter over the sliced olives, thyme leaves, and flaky salt. Lightly press the toppings into the dough as you dimple again so they sit slightly embedded.
Baking
Transfer the focaccia to the oven and carefully add a handful of ice cubes or a cup of cold water to the tray at the bottom to create steam. Bake for 20 to 25 minutes, or until deeply golden and crisp on top. Allow the focaccia to cool slightly before slicing, as it will continue to cook inside once removed from the oven.
Scroll down for the printable recipe card with exact measurements.
Why This Focaccia Works Every Time
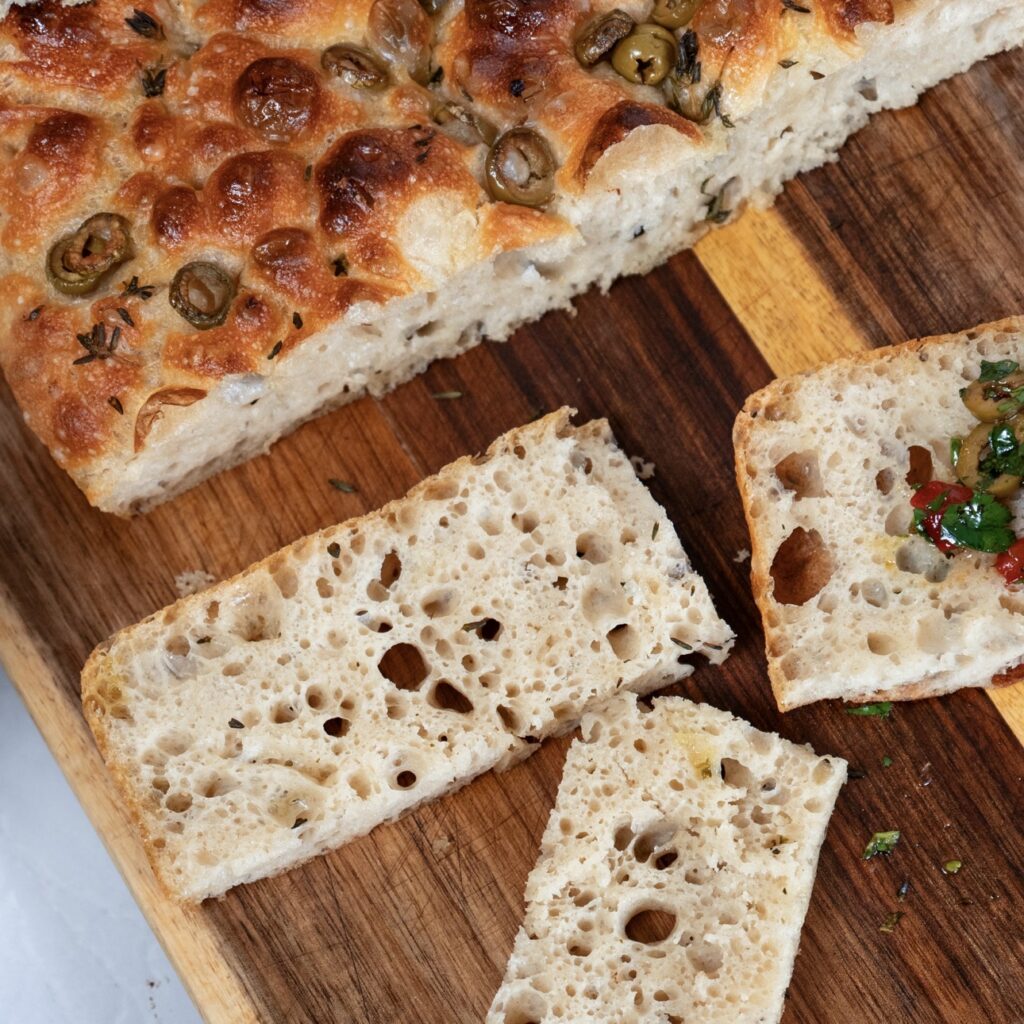
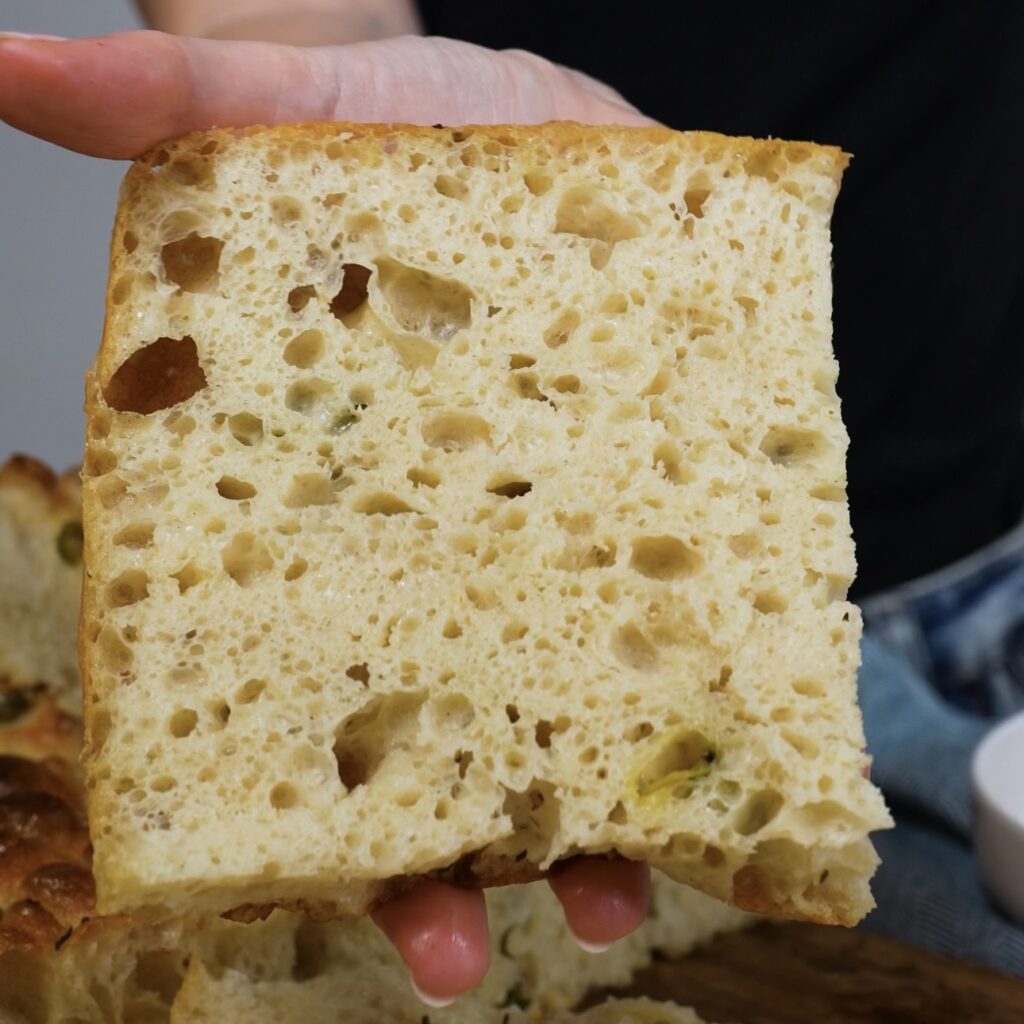
This focaccia delivers consistently because it focuses on technique rather than effort. The high-hydration dough creates that signature light and airy crumb, while the stretch and fold method builds structure without any kneading. The overnight fermentation is what truly elevates it, developing a deeper flavour and giving you that slightly tangy, bakery-style result. Generous olive oil ensures a crisp, golden base and edges, while the olives and thyme bring balance and depth. It’s a very forgiving recipe too, making it ideal whether you’re experienced or just starting out with bread. Serve it warm with something like a High-Protein Cauliflower Basil Soup or a Beetroot and Feta Dip, and you’ll see how easily it turns into a complete, comforting meal.
Perfect for Any Occasion
This focaccia is one of those recipes that fits effortlessly into any setting. It works beautifully as a side for cosy soups, a base for sandwiches, or simply served on a board with dips for sharing. Whether you’re putting together a relaxed dinner or hosting friends, it always feels just right. Pair it with something like a Chilled Avocado Soup or a Roasted Butternut Squash and Pear Soup with Gorgonzola to create a simple but satisfying spread that feels both comforting and elevated. It’s also perfect to prepare ahead, as the overnight dough fits easily into your schedule and allows you to bake it fresh when you need it most. Once you make it, it quickly becomes one of those go-to recipes you rely on again and again.
You May Also Like
Watch our quick video tutorial on Instagram and don’t miss out on our other delicious recipes:
- Pea and Mint Soup
- Roasted Parsnip Soup
- Twice-Baked Aubergine Dip Recipe
- Potato Roses with Spinach Feta
- Baby Potatoes with Whipped Feta
Happy baking,
Izabella
Description
This no-knead overnight focaccia is soft and airy inside with a crisp, golden crust. The dough develops deep flavour as it rests, then bakes up beautifully with plenty of olive oil, juicy olives, and fragrant thyme. It’s simple to make with minimal hands-on time, yet delivers that bakery-style texture every time. Perfect for serving warm, slicing for sandwiches, or enjoying on its own with a drizzle of olive oil.
Ingredients
Instructions
-
Start by preparing the dough. In a large bowl, combine the lukewarm water, yeast, and salt, then add the flour. Mix with a spoon until fully incorporated and no dry patches remain. Cover the bowl with a lid or cling film and let it rest for 30 minutes. Begin the stretch and fold process by taking one side of the dough, gently stretching it upwards, then folding it over to the opposite side. Rotate the bowl and repeat until all sides have been stretched and folded. Cover and let it rest for another 30 minutes. Repeat this process 3 more times, for a total of 4 rounds, resting the dough for 30 minutes between each round.
-
After the final round, cover the dough and transfer it to the fridge to rest overnight, or for at least 8 hours. The next day, generously oil a baking tray measuring approximately 24 x 34 cm (9½ x 13½ inches) and at least 3 cm (1¼ inch) deep. Transfer the dough to the tray. If you turn the container upside down, the dough should release easily, just give it a moment. Gently stretch the dough with your hands so it fills the tray evenly.
-
Cover the tray with another tray on top, or place it in a switched-off oven for the final proof. Leave the dough to rise for 2 to 3 hours, or until it has doubled in size. Meanwhile, preheat the oven to 220°C/425°F and place an empty baking tray on the bottom shelf of the oven.
-
Once the dough has risen, grease your hands well with olive oil and begin dimpling the surface. You will see lots of beautiful air bubbles forming. Drizzle generously with olive oil, then scatter over the sliced olives, thyme leaves, and flaky salt. Lightly press the toppings into the dough as you dimple again so they sit slightly embedded in the surface.
-
Transfer the focaccia to the oven and carefully add a handful of ice cubes or a cup of cold water to the tray at the bottom to create steam. Bake for 20 to 25 minutes, or until golden and crisp on top. Allow the focaccia to cool slightly before slicing, as it will continue to cook inside once removed from the oven.
Nutrition Facts
Servings: 8 ServingCalories:284.27kcalTotal Fat:2.2gCholesterol:0mgSodium:353.35mgPotassium:89.45mgTotal Carbohydrate:55.44gDietary Fiber: 2.3gSugars: 0.23gProtein:9.58gVitamin A: 2.05IUVitamin C: 0.55mgCalcium: 21.99mgIron: 3.88mgVitamin D: 0IUVitamin E: 0.43IUVitamin K: 0.34mcgVitamin B6: 0.04mgVitamin B12: 0mcgPhosphorus: 81.26mgMagnesium: 20.9mgZinc: 0.76mg
Note
Hydration and dough texture: This is a high-hydration dough, so it will feel quite sticky and loose compared to standard bread dough. That’s exactly what gives focaccia its airy, open crumb. Resist the urge to add extra flour, the dough will strengthen during the stretch and fold process.
Stretch and fold technique: Each round of stretch and folds helps build structure without kneading. Be gentle and avoid tearing the dough. If it feels tight, let it rest a bit longer before continuing. You should notice it becoming smoother and more elastic with each round.
Cold fermentation (overnight rest): The overnight rest in the fridge is key for flavour development. The dough will develop a deeper, slightly tangy taste and better texture. If needed, you can extend this up to 24 hours.
Handling the dough: When transferring the dough to the tray, oil your hands well. The dough should release easily if properly fermented. Avoid pressing out the air, those bubbles are what create the signature focaccia texture.
Final proof matters: Don’t rush the final rise. The dough should look visibly puffy and jiggly before baking. If under-proofed, the focaccia will be dense rather than light and airy.
Dimpling technique: Press your fingers all the way down to the base of the tray when dimpling. This helps create those classic pockets that hold olive oil and toppings. If the dough springs back quickly, let it rest a bit longer before dimpling again.
Olive oil, be generous: Focaccia loves olive oil. Use plenty in the tray and on top. This is what creates that crispy, golden crust and rich flavour. Skimping here will give you a drier result.
Steam for better crust: Adding ice cubes or water to the tray at the bottom of the oven creates steam, which helps the focaccia rise better and develop a crisp exterior. Work quickly when opening the oven to keep the heat stable.
Baking cues: The focaccia is ready when deeply golden on top and crisp at the edges. If it looks pale, give it a few more minutes. The bottom should also be nicely browned.
Cooling before slicing: Let it cool slightly before cutting. It continues to cook inside after baking, and slicing too early can make the crumb gummy. Warm is perfect, just not straight out of the oven.
Storage and reheating: Best enjoyed fresh on the day, but leftovers can be stored in an airtight container at room temperature for up to 2 days. Reheat in the oven to bring back the crispness. Avoid the microwave unless you want it soft.
Variations: You can easily customise this focaccia. Try adding cherry tomatoes, caramelised onions, garlic, or swap thyme for rosemary. Just don’t overload it, too many toppings can weigh the dough down.