

Strawberry Ricotta Tartlets – Buttery Pastry with Creamy Ricotta and Fresh Strawberries
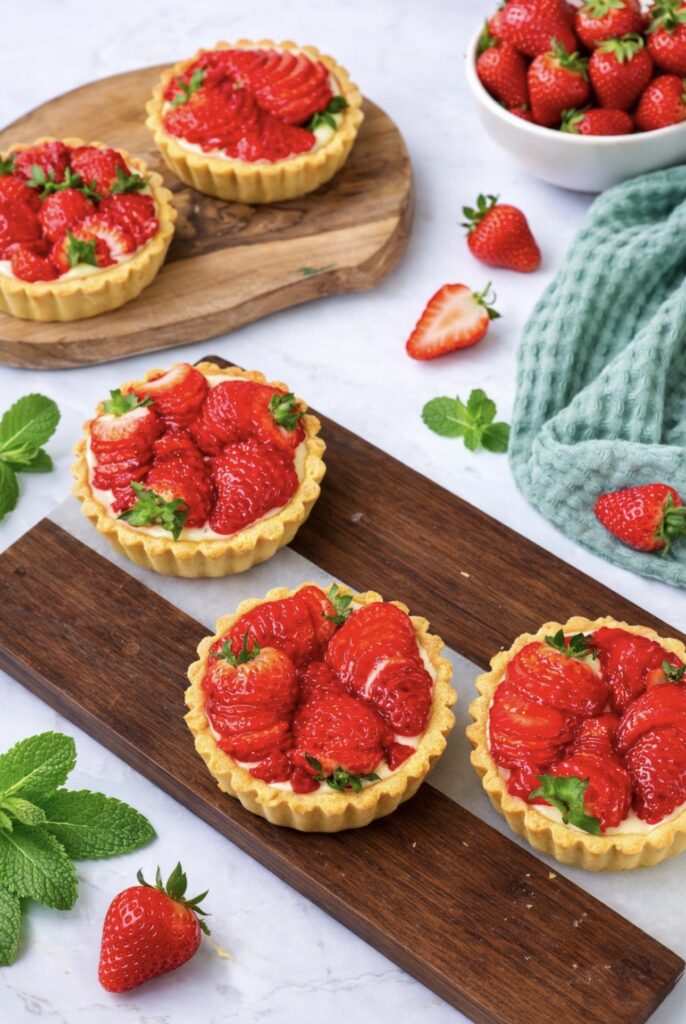
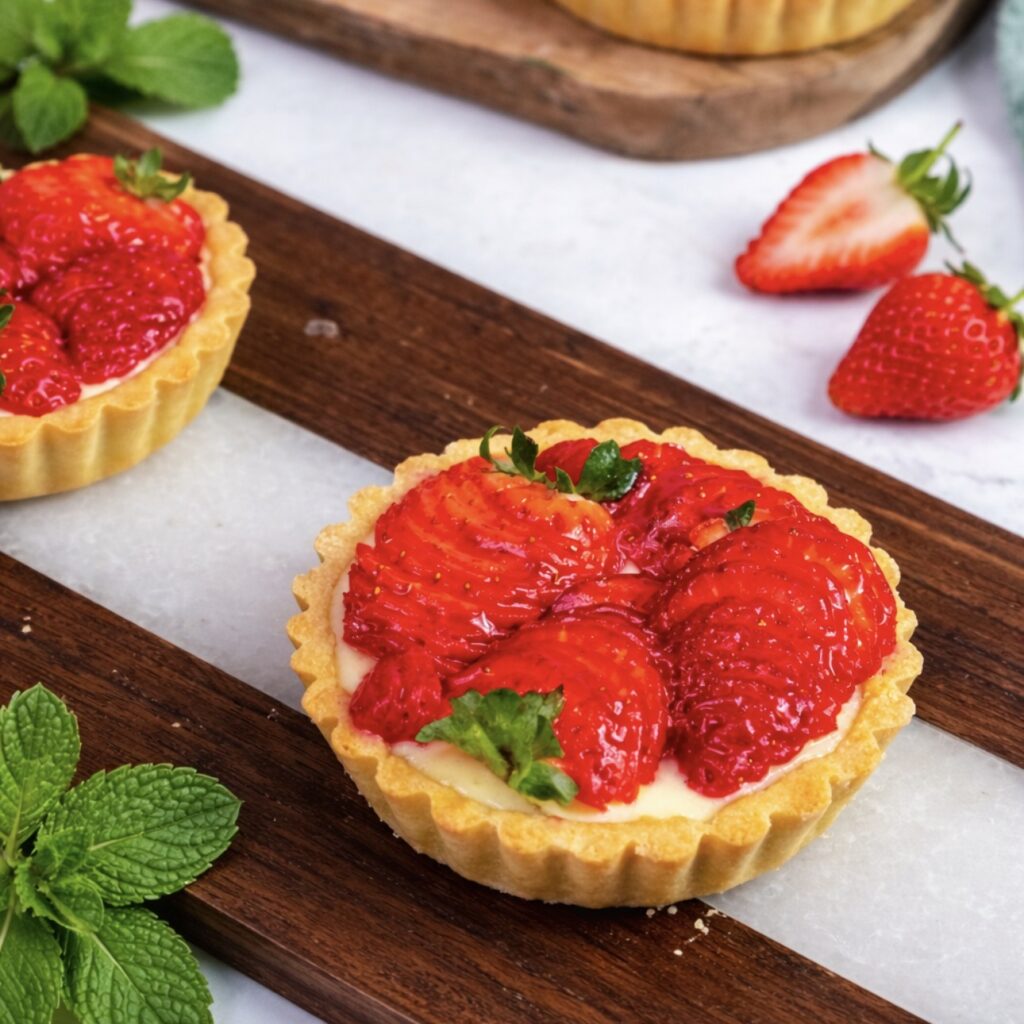
There’s something irresistible about a beautifully made tartlet. The crisp, buttery pastry shell, the creamy filling, and the vibrant fruit on top create a dessert that feels elegant without being overly complicated. These Strawberry Ricotta Tartlets bring all of those elements together in one perfectly balanced bite. Each tartlet starts with a delicate shortcrust pastry that bakes into a golden, crisp shell. Inside, a smooth ricotta filling lightly scented with lemon sets into a creamy centre that pairs beautifully with fresh strawberries and a glossy strawberry glaze. The combination is light, fresh, and just sweet enough, making these tartlets ideal for spring and summer gatherings, afternoon tea, or an elegant dessert after dinner. If you enjoy fruit desserts with fresh berries, you might also love recipes like Pistachio Custard Tartlets or the beautifully simple Strawberry Nutella Puffs, both of which showcase how fruit and pastry create an irresistible combination. Like many recipes on the site, these tartlets focus on simple ingredients that transform into something that looks far more impressive than the effort required.
Scroll down to the printable recipe card for the full ingredient list and step-by-step instructions, or keep reading to see the process with helpful step-by-step photos.
Simple Ingredients, Big Flavours
What makes these Strawberry Ricotta Tartlets so special is how a handful of everyday ingredients come together to create a dessert that feels refined and elegant. Each component contributes its own texture and flavour, building a balanced tartlet with crisp pastry, creamy filling, and fresh fruit.
- Tart Crust – The base is a classic buttery shortcrust pastry made with butter, icing sugar, egg yolks, flour, and a pinch of salt. Creaming the butter and sugar creates a tender dough that bakes into delicate, crisp shells with a light crumb. If you enjoy buttery pastry bases like this, you might also love my Easy Apple Bakewell Tart.
- Ricotta Filling – Smooth ricotta is whisked with egg yolks, icing sugar, vanilla sugar, double cream, and lemon zest to create a creamy mixture that bakes into a soft, velvety filling. It is rich yet light, allowing the fresh strawberry topping to shine. Desserts like my Blueberry Ricotta Tart highlight how beautifully ricotta pairs with fruit in baked pastries.
- Fresh Strawberries – Thinly sliced strawberries bring brightness, sweetness, and colour to the tartlets. Their natural freshness balances the creamy filling and buttery pastry perfectly, creating a dessert that feels light and seasonal.
- Strawberry Glaze – A quick glaze made from strawberry jam and a little water is brushed over the berries to give them a glossy finish. This small step enhances the strawberry flavour while giving the tartlets a polished look.
How to Make Strawberry Ricotta Tartlets
Making these Strawberry Ricotta Tartlets is easier than it might seem at first glance. The process is broken down into a few simple stages: preparing the pastry dough, baking the tart shells, making the ricotta filling, and finishing the tartlets with fresh strawberries and a light glaze.
Prepare the Pastry Dough
Start by preparing the shortcrust pastry. In a large bowl, whisk the softened butter and icing sugar until the mixture becomes smooth and pale. Add the egg yolks and continue whisking until fully incorporated. Then add the pinch of salt and sift in the flour. Switch to a spatula and mix until the dough begins to come together, then gently bring it together with your hands until you have a soft, cohesive dough. Shape the dough into a flat disc, wrap it tightly in cling film, and refrigerate for at least one hour. Chilling the dough allows the butter to firm up, which makes the pastry easier to handle and helps prevent shrinkage during baking.
Bake the Tart Shells
Preheat the oven to 180°C (350°F) and generously butter six 10 cm (4-inch) loose-bottom mini tart tins. Divide the chilled dough into six equal portions and roll each portion into a ball. Press each ball evenly across the base and up the sides of the tart tins, making sure the edges rise slightly above the rim. Prick the bases with a fork, then trim the top edges neatly with a sharp knife for a clean finish.
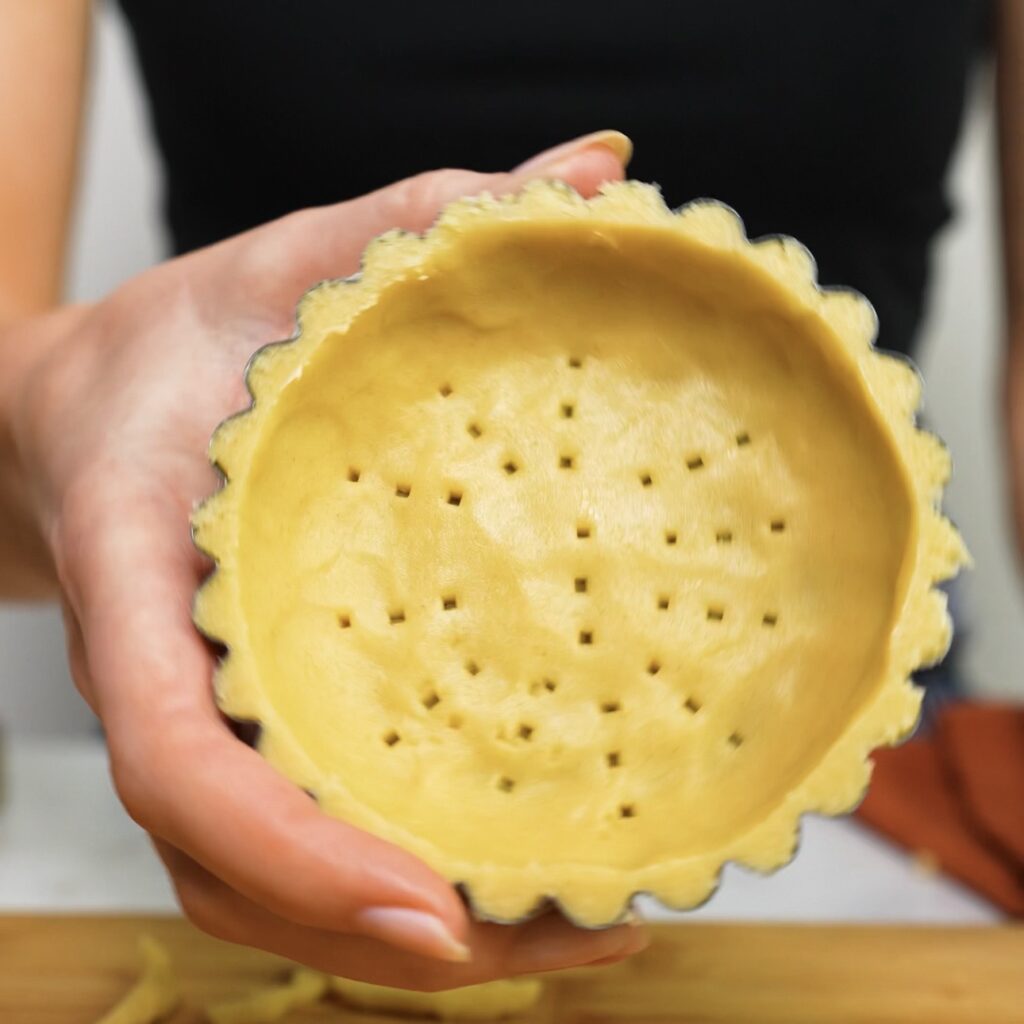
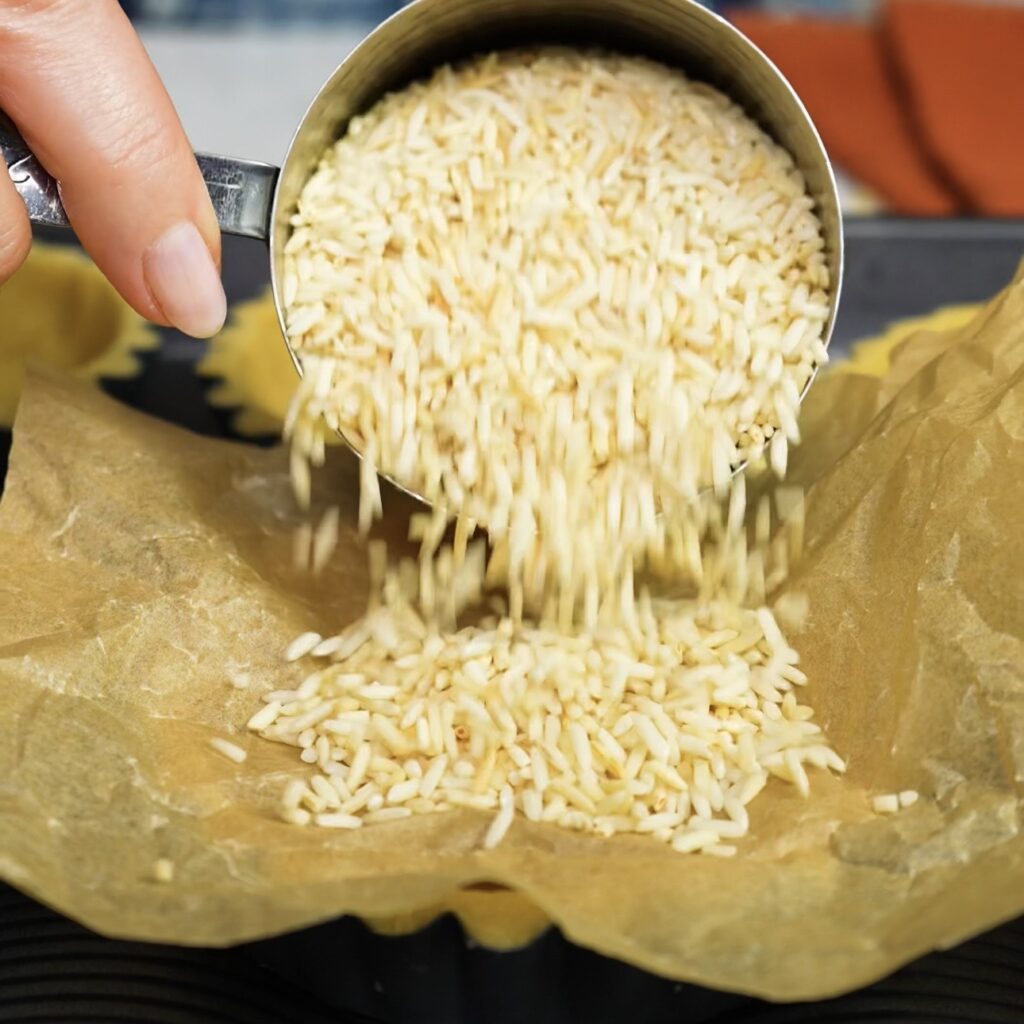
Place the tart shells in the freezer for 15 to 20 minutes. This helps the pastry keep its shape while baking. Line each shell with parchment paper and fill them with baking beans or uncooked rice. Bake for about 15 minutes until the pastry is set.
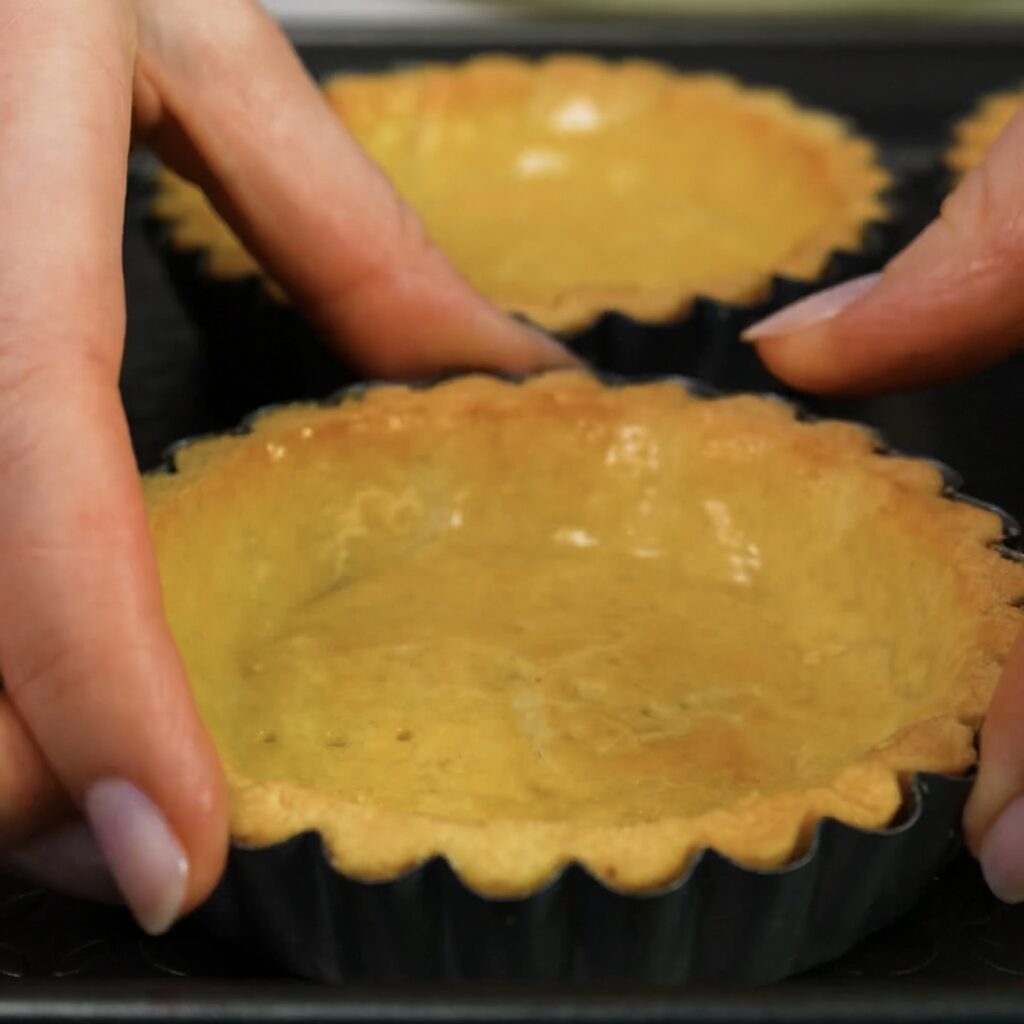
Remove the shells from the oven. Mix the egg yolk with the milk and brush this egg wash over the pastry shells. Return them to the oven and bake for another 8 to 10 minutes until the shells become lightly golden. Allow them to cool slightly while still in the tins. For a neat finish, you can lightly grate the outer edges of the pastry with a fine grater.
Prepare the Ricotta Filling
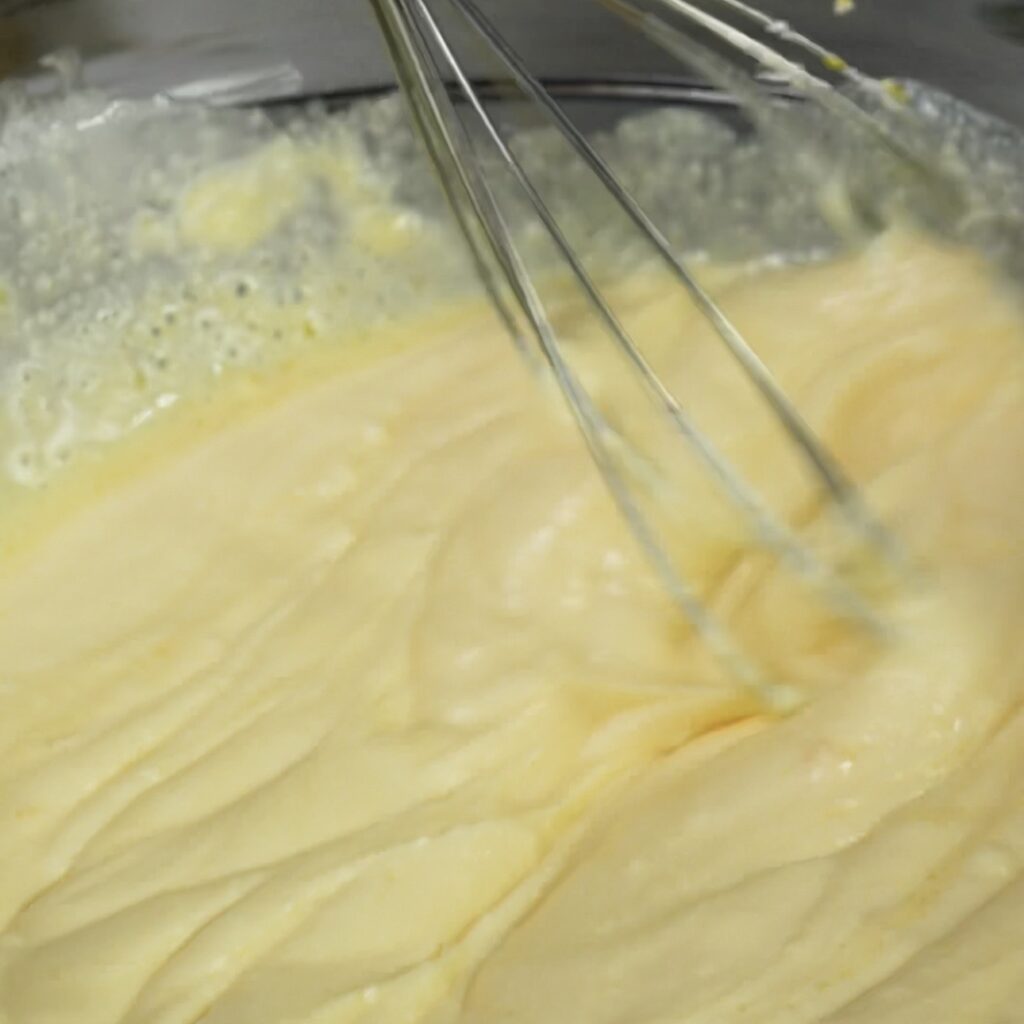
While the tart shells cool slightly, prepare the filling. In a bowl, combine the ricotta, egg yolks, icing sugar, vanilla sugar, double cream, and lemon zest. Whisk everything together until smooth and well combined.
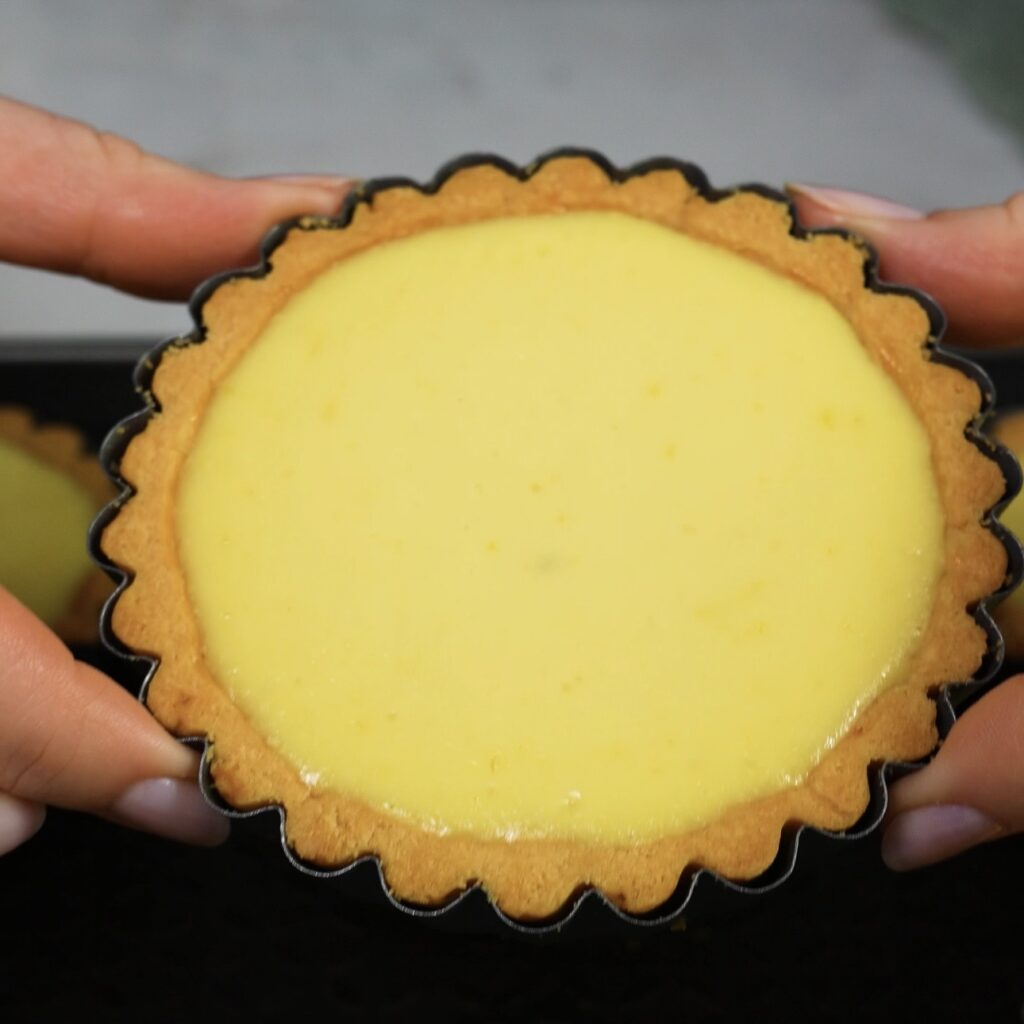
Divide the filling evenly between the baked tart shells and return them to the oven. Bake for about 20 minutes, or until the filling is set but still slightly soft in the centre. Once baked, switch off the oven and leave the door slightly open. Allow the tartlets to rest inside the oven for about 5 minutes. This gentle cooling helps the filling finish setting smoothly. Then remove them from the oven and let them cool completely to room temperature.
Add the Strawberry Topping
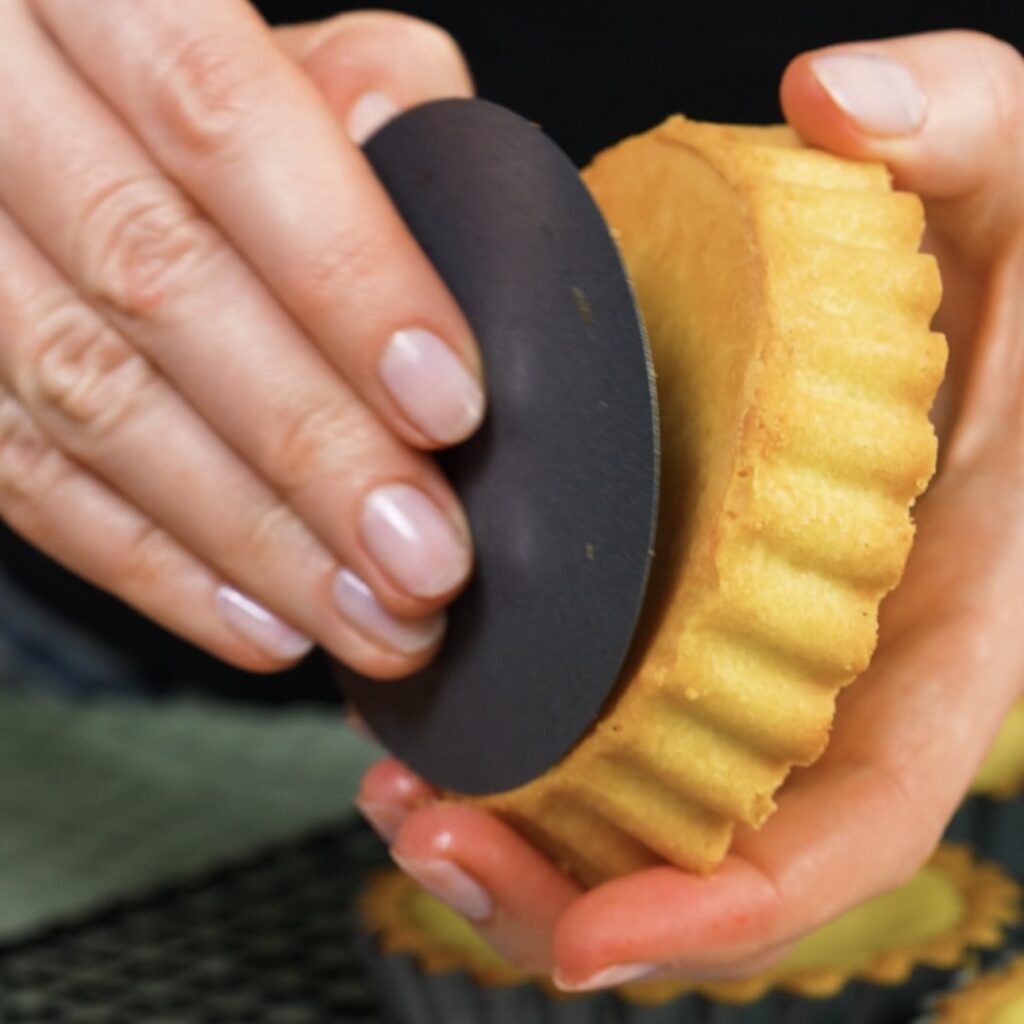
Carefully remove the tartlets from the tins.
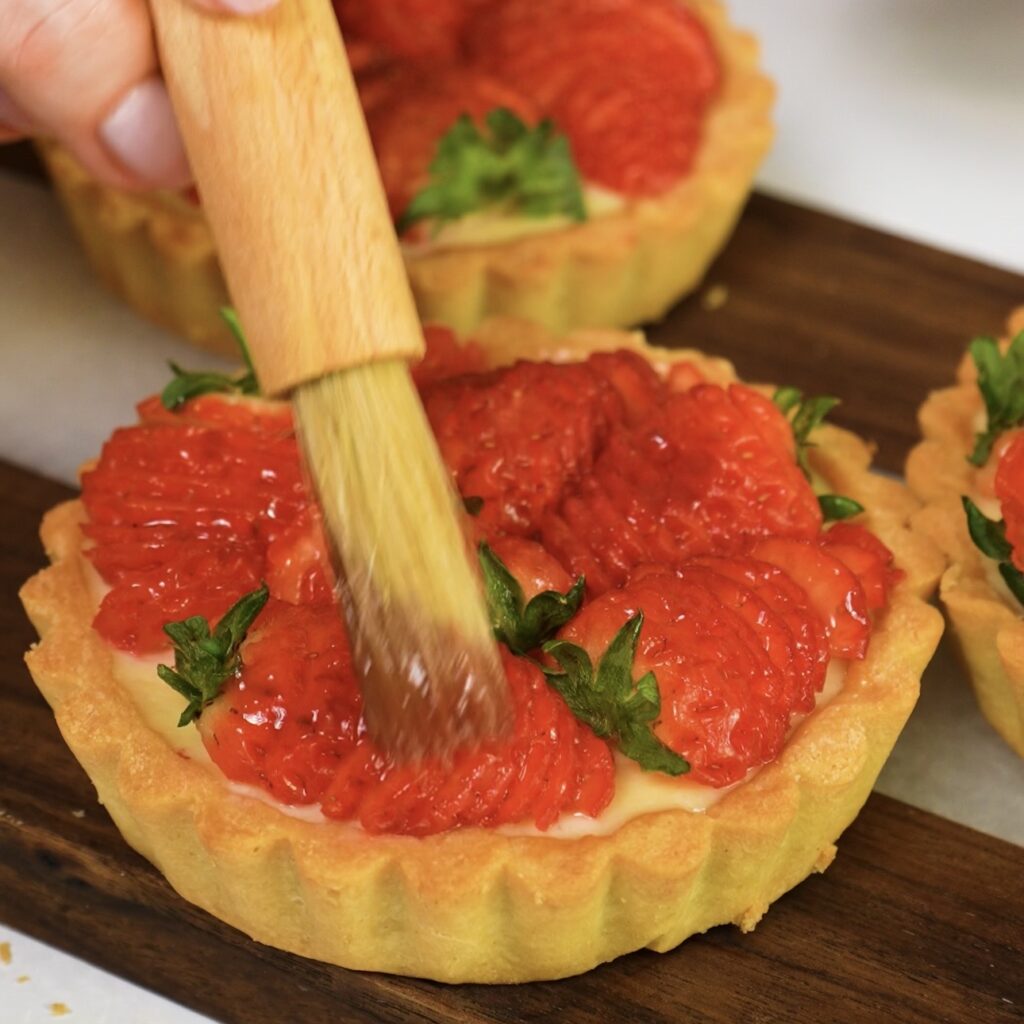
Arrange the thinly sliced strawberries neatly over the top of each tartlet. In a small bowl, mix the strawberry jam with the water until smooth. Brush this glaze over the strawberries to give them a glossy finish and enhance their flavour.
Place the tartlets in the refrigerator for 1 to 2 hours before serving. Chilling helps the filling fully set and allows the flavours to develop, giving you perfectly creamy and refreshing strawberry tartlets.
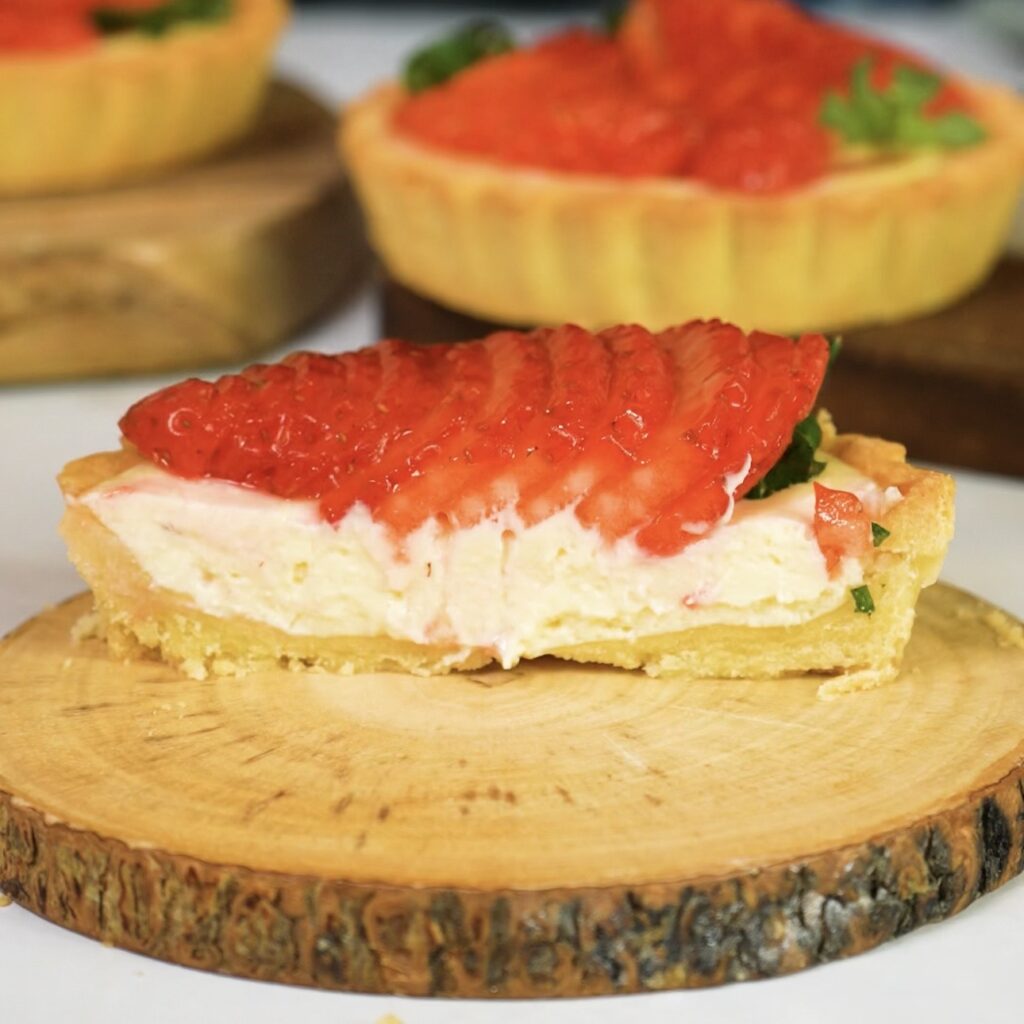
Why We Love Strawberry Ricotta Tartlets
These Strawberry Ricotta Tartlets are the kind of dessert that instantly feels special, yet they are made from simple, familiar ingredients. The contrast of textures is what makes them so enjoyable. You get a crisp buttery tart shell, a soft and creamy ricotta filling, and juicy fresh strawberries on top. Each layer brings something different to the bite, creating a dessert that feels balanced rather than overly rich.
Another reason these tartlets are so appealing is how light they taste. Ricotta creates a creamy filling without the heaviness of some traditional custards, while the lemon zest adds a subtle freshness that lifts the flavour of the strawberries. The glossy strawberry topping not only looks beautiful but also enhances the natural sweetness of the fruit.
It is also a dessert that looks far more complicated than it actually is. Once you try making them, you will see that the steps are straightforward and rewarding, making these tartlets a recipe you will likely return to again and again. And if you are looking for more tartlet inspiration, make sure to check out my Passion Fruit Curd Raspberry Tarts as well.
Perfect for Any Occasion
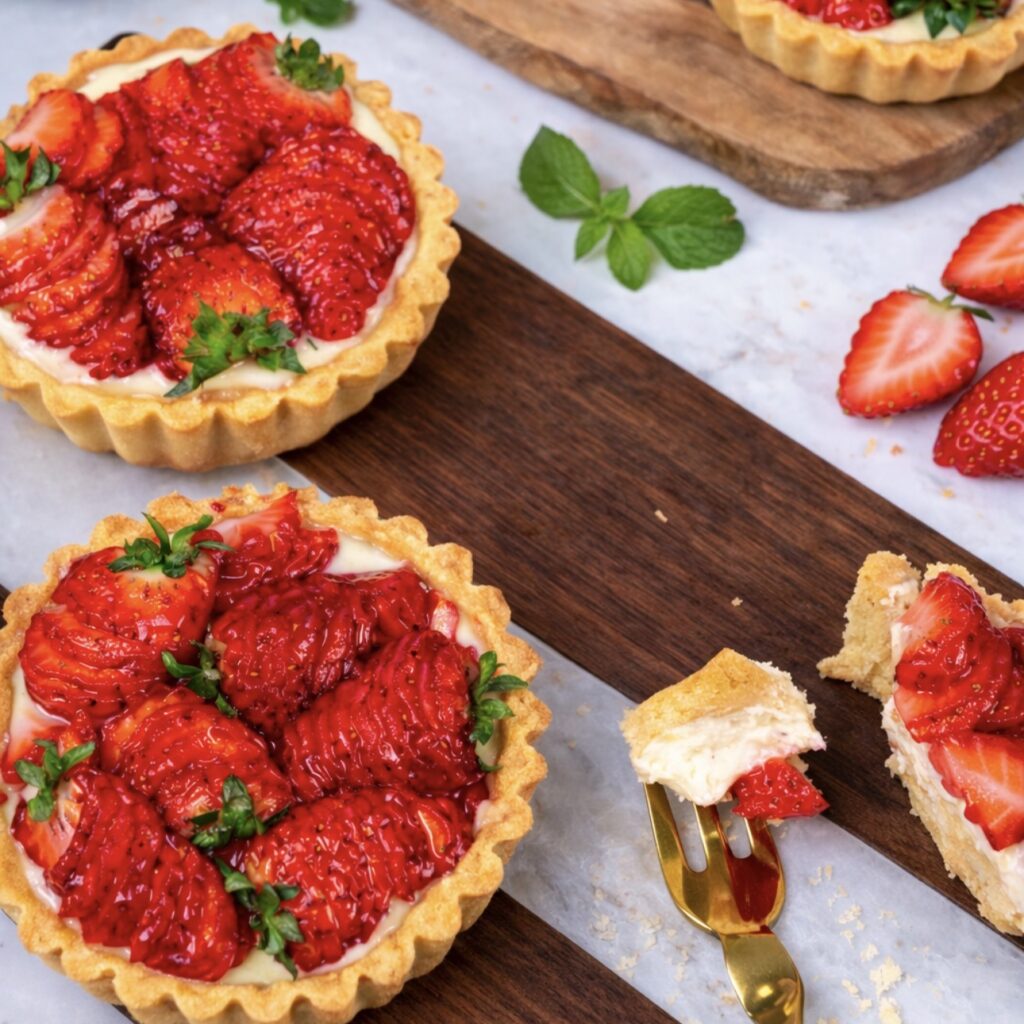
Strawberry Ricotta Tartlets are incredibly versatile and suitable for many occasions. Their elegant appearance makes them perfect for celebrations, dinner parties, and afternoon tea, yet they are simple enough to bake just because you are craving something sweet. Because they are individually portioned, they also work wonderfully for entertaining. Guests love desserts that are easy to serve and already perfectly sized. Arranged on a platter, these tartlets instantly create a beautiful dessert display with their golden pastry, creamy filling, and bright red strawberries. They are especially lovely during spring and summer when strawberries are at their best. Served chilled, the tartlets feel refreshing and light, making them an ideal dessert after a warm-weather meal.
Instagram Tutorial & More
Watch my quick video tutorial on Instagram to see each step of these Strawberry Ricotta Tartlets in action, from shaping the pastry shells to arranging the glossy strawberry topping.
You can also explore more easy and delicious recipes on my website, including:
- Blueberry Tiramisu Cake
- Nectarine Frangipane Tartlets
- Blueberry, Banana & Nutella Puffs
- Cherry Cottage Cheese Ice Cream (High Protein)
Happy baking,
Izabella
Description
These Strawberry Ricotta Tartlets feature crisp, buttery pastry shells filled with a smooth ricotta cream lightly scented with lemon. The filling bakes until just set, creating a delicate, creamy centre that pairs beautifully with the flaky crust. Fresh strawberries are arranged on top and brushed with a light jam glaze for a glossy finish. They look elegant but are surprisingly straightforward to make. Perfect for spring and summer gatherings, afternoon tea, or a light dessert. Serve chilled for the best texture and flavour.
Ingredients
For the tart crust
For the egg wash
For the ricotta filling
For the topping
Instructions
-
Make the pastry. In a large bowl, whisk the softened butter and icing sugar until smooth and pale. Add the egg yolks and continue whisking until fully incorporated. Next add the salt and sift in the flour. Switch to a spatula and mix until the dough begins to come together, then finish bringing it together gently with your hands until you have a soft, smooth dough. Shape the dough into a flat disc, wrap it tightly in cling film and refrigerate for at least 1 hour so it firms up and becomes easier to handle.
-
Bake the tart shells. Preheat the oven to 180°C / 350°F. Generously butter six 10 cm (4 inch) loose-bottom mini tart tins. Divide the chilled dough into six equal portions and roll each into a ball. Press each portion evenly across the base and up the sides of the tart tins, making sure the edges rise slightly above the rim. Prick the bases with a fork and trim the edges neatly with a sharp knife. Freeze the shells for 15 to 20 minutes, then line each one with parchment paper and fill with baking beans or uncooked rice. Bake for 15 minutes until the pastry is set. Remove from the oven, mix the egg yolk with the milk and brush the mixture over the pastry shells. Return them to the oven for another 8 to 10 minutes until lightly golden. Allow the shells to cool slightly in the tins and, for a perfectly neat finish, lightly grate the outer edges with a fine grater.
-
Prepare the ricotta filling. In a bowl, combine the ricotta, egg yolks, icing sugar, vanilla sugar, double cream and lemon zest. Whisk until smooth and well combined. Divide the filling evenly between the baked tart shells and return them to the oven. Bake for about 20 minutes until the filling is just set. Switch off the oven, leave the door slightly open and allow the tartlets to rest inside for 5 minutes before removing them. Let them cool completely to room temperature.
-
Add the topping. Carefully remove the tartlets from the tins and arrange the sliced strawberries neatly over the top. Warm the strawberry jam with the water and stir until smooth, then gently brush the glaze over the strawberries to give them a glossy finish. Chill the tartlets in the fridge for 1 to 2 hours before serving.
Nutrition Facts
Servings: 6 ServingCalories:480.02kcalTotal Fat:25.83gCholesterol:193.16mgSodium:93.53mgPotassium:272.98mgTotal Carbohydrate:53.48gDietary Fiber: 2.32gSugars: 20.96gProtein:9.99gVitamin A: 259.96IUVitamin C: 37.17mgCalcium: 148.5mgIron: 2.24mgVitamin D: 0.89IUVitamin E: 1.07IUVitamin K: 3.32mcgVitamin B6: 0.14mgVitamin B12: 0.69mcgPhosphorus: 183.58mgMagnesium: 26.96mgZinc: 0.88mg
Note
Keep the pastry cold: Chilling the dough and briefly freezing the tart shells before baking helps the pastry keep its shape and prevents shrinking. If the dough becomes too soft while shaping it, return it to the fridge for a few minutes.
Press the dough evenly: When shaping the tart shells, try to keep the pastry thickness even across the base and sides. This helps the shells bake evenly and prevents weak spots in the crust.
Blind baking the shells: Pre-baking the shells with parchment and baking beans (or rice) allows the pastry to set before the filling is added and helps prevent a soggy base.
The egg wash step: After the initial blind bake, brushing the shells with egg yolk and milk and returning them to the oven creates a thin baked layer on the pastry. This helps seal the crust and keeps it crisp once the ricotta filling is added.
Do not overbake the filling: The ricotta filling should be just set with a slight wobble in the centre when you remove the tartlets from the oven. It will continue to firm up as it cools.
Cool before adding the fruit: Allow the tartlets to cool completely before arranging the strawberries. This helps the filling finish setting and prevents the berries from releasing excess moisture.
Glazing the strawberries: Warming the strawberry jam with a little water creates a quick glaze that gives the berries a glossy finish and helps them stay fresh-looking.
Best served chilled: Chilling the tartlets for at least 1 hour improves both texture and flavour. The filling becomes smoother and the tartlets slice more cleanly.
Storage: Store the tartlets in an airtight container in the refrigerator for up to 2 days. They are best enjoyed fresh, as the strawberries may release juice over time.