

Cherry Cheesecake: Creamy, Fruity and Made for Cherry Season
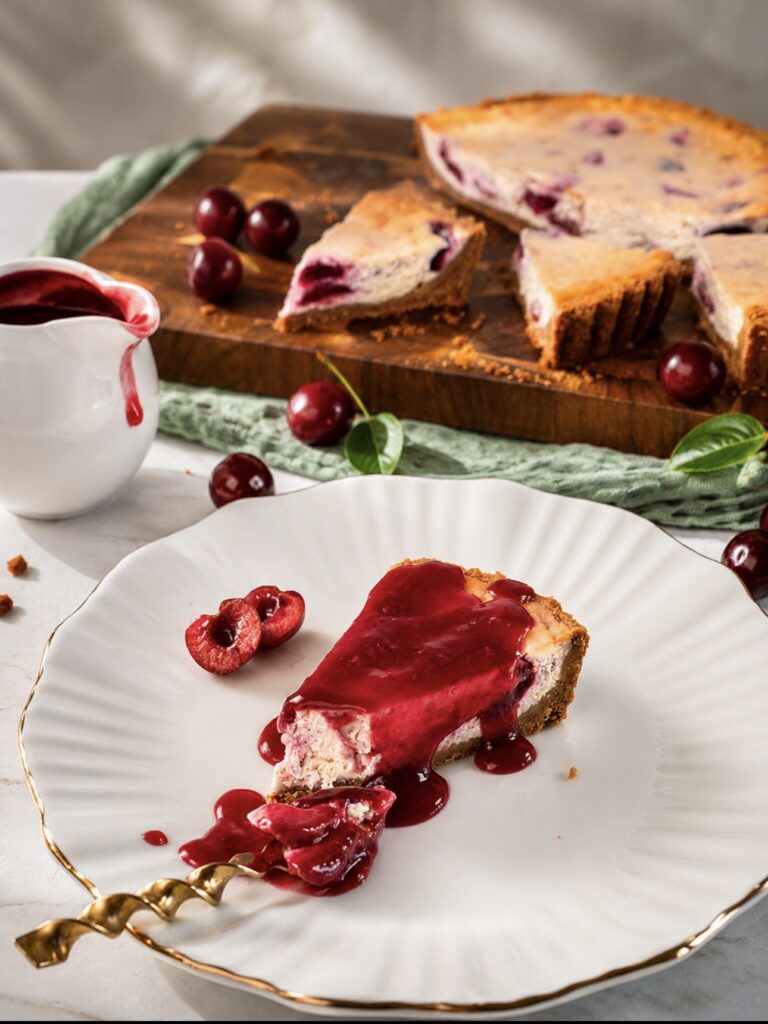
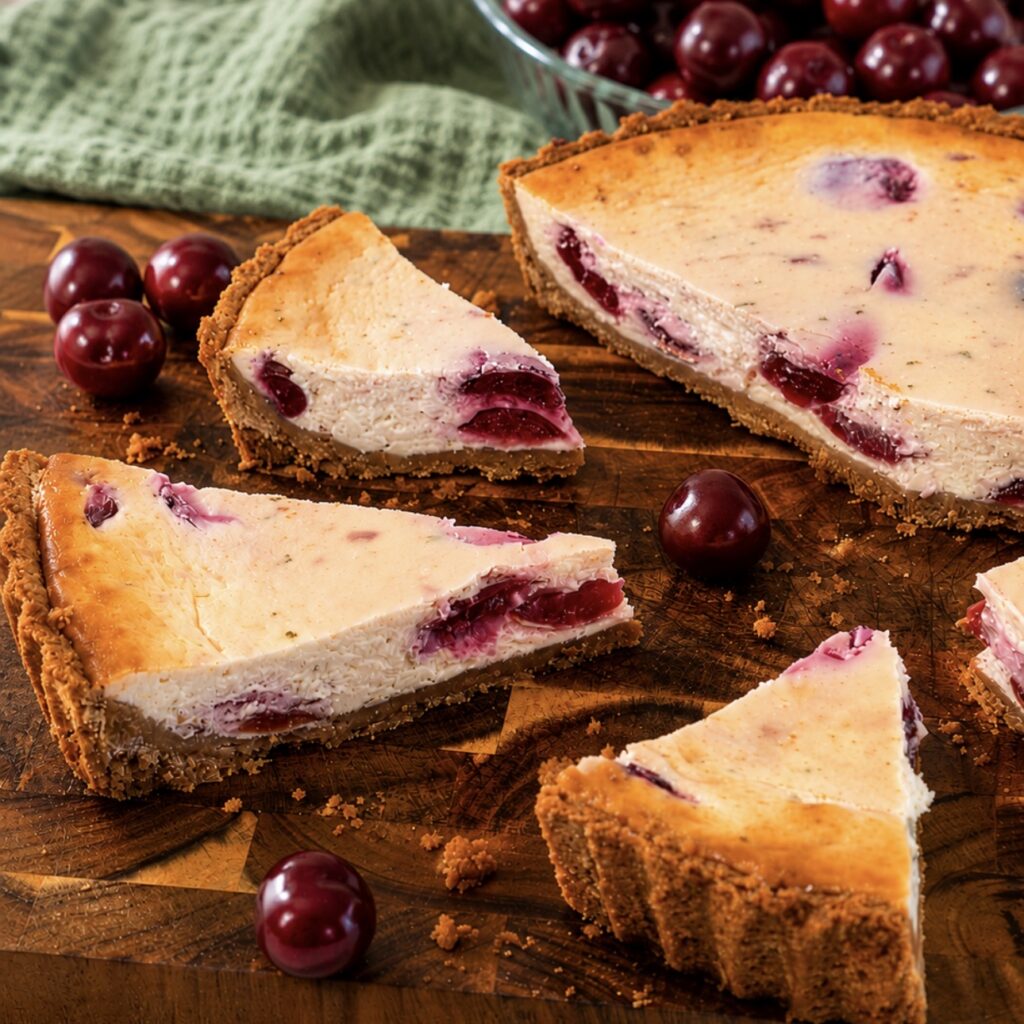
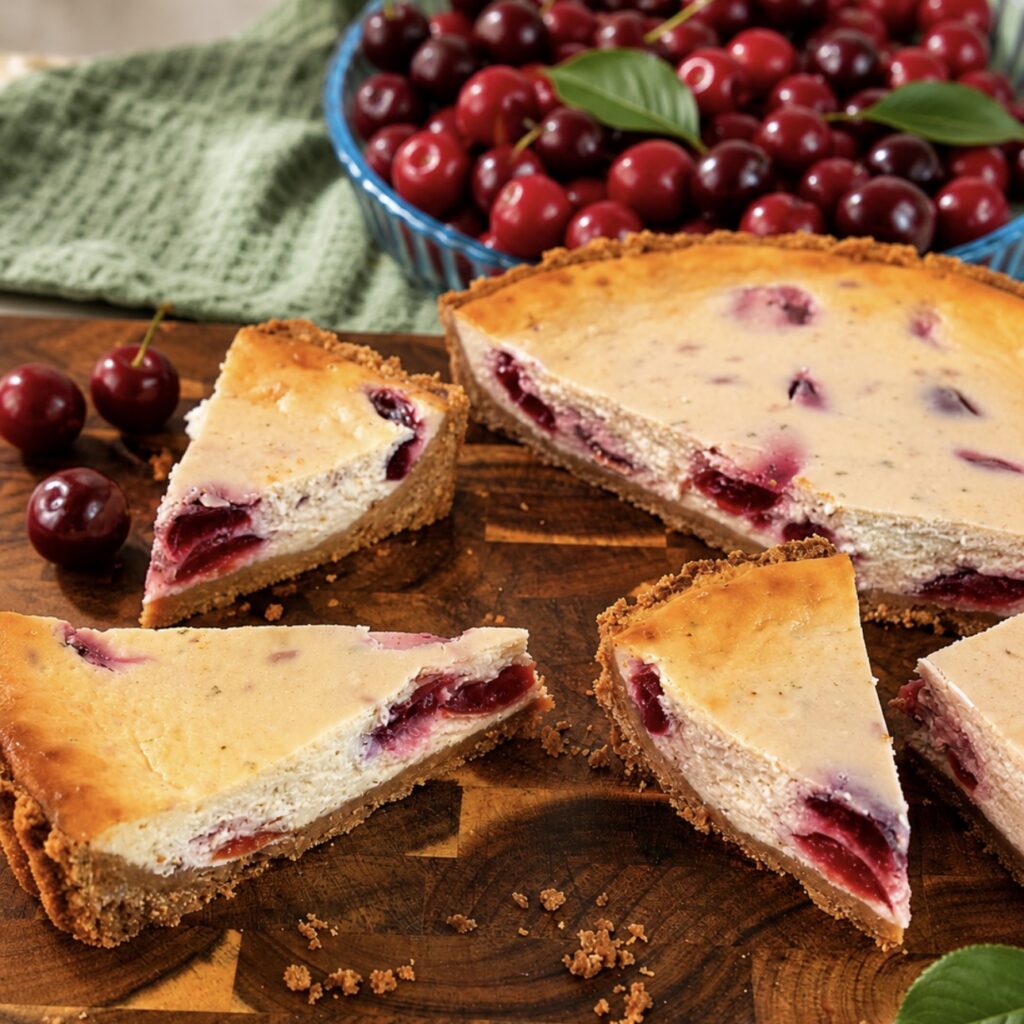
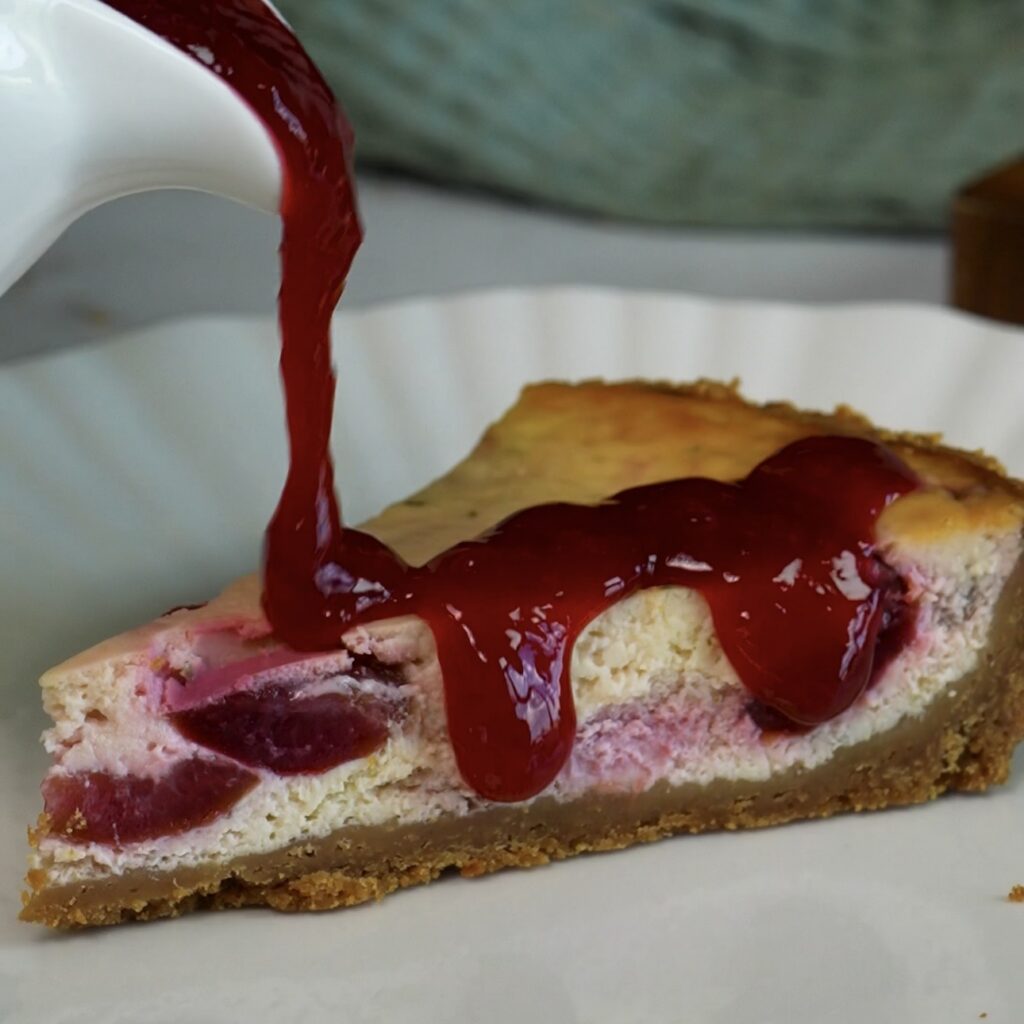
This Cherry Cheesecake brings together everything a good baked dessert should have: a buttery biscuit crust, a smooth cream cheese filling and a bright layer of cherry flavour running through every slice. The compote is gently folded into the filling rather than fully mixed, creating beautiful red swirls and little pockets of soft fruit. Lime zest cuts through the richness, while the chilled cherry sauce adds a glossy, fresh finish at the table. If you enjoy playful cherry desserts such as Cherry Ricotta Rice Paper Dumplings or Cherry Rice Paper Mochi this is a more classic way to make the most of the season.
Scroll down or tap ‘Jump to Recipe’ for the complete ingredient list, exact timings and printable instructions.
Simple Ingredients, Big Flavours
The appeal of this baked cherry cheesecake comes from the way familiar ingredients are used in separate layers. The biscuit base gives the filling structure, the compote brings soft pieces of fruit, and the strained sauce delivers a smoother, more concentrated cherry finish. It has the creamy comfort of a Carrot Salted Caramel Cheesecake but the fresh, fruit-led character of a Blueberry Ricotta Tart. Each component has a clear purpose, so the finished dessert feels balanced rather than overly sweet or heavy.
- Cherries – Fresh or frozen pitted cherries can be used for both the compote and sauce. They soften into the filling while keeping enough flavour to remain the star, just as they do in my High-Protein Cherry Cottage Cheese Chocolate Bars and Cherry Cottage Cheese Ice Cream (High Protein).
- Digestive biscuits and butter – Digestive biscuits are the best choice for a firm, buttery base with a gentle caramelised flavour. Their crumb works particularly well beneath creamy fillings.
- Full-fat cream cheese and double cream – Full-fat cream cheese gives the cheesecake its smooth body and reliable set, while double cream softens the texture without making the filling loose.
- Egg yolks and icing sugar – Egg yolks help the filling bake into a creamy, custard-like centre, while icing sugar dissolves quickly and keeps the mixture smooth.
- Lime zest and vanilla – Lime zest brings freshness and stops the cheesecake tasting too rich, while vanilla rounds out the fruit and dairy flavours. These small additions give the filling a brighter finish.
- Honey, lemon juice and cornflour – Honey sweetens the cherry sauce without masking the fruit, lemon sharpens it, and cornflour thickens both cherry mixtures so they hold their shape.
How to Make Cherry Cheesecake
Although this Cherry Cheesecake has several separate components, each one is straightforward to prepare. Make the cherry compote and cherry sauce first so they have enough time to cool completely before you assemble the cheesecake.
Prepare the Cherry Compote
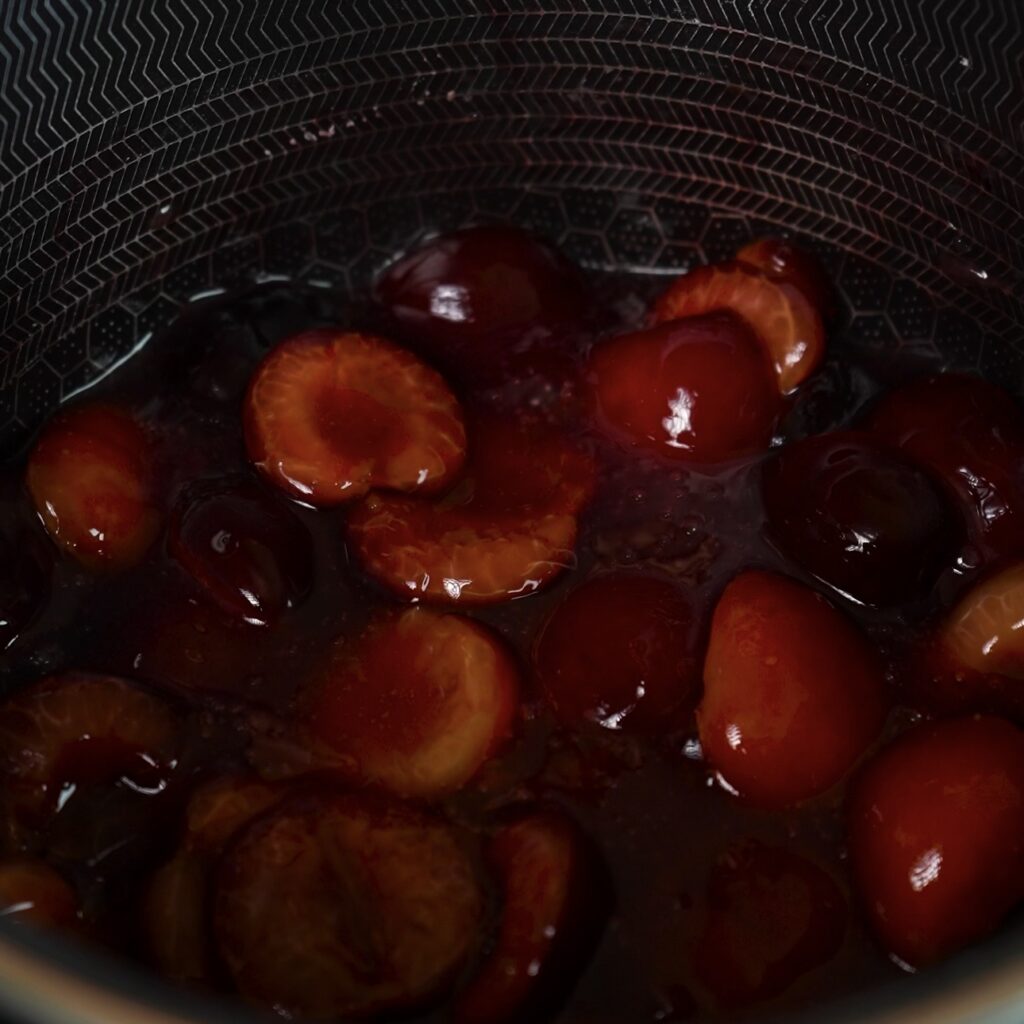
Place the pitted and halved cherries in a small saucepan. Add the caster sugar and cornflour, then mix until the cherries are evenly coated. Pour in the water and stir again until everything is well combined. Set the saucepan over a medium heat and bring the mixture to the boil, stirring constantly to prevent the cornflour from catching on the bottom. Cook for approximately 5 minutes, or until the cherries have softened slightly and the liquid has thickened into a compote. Transfer it to a bowl and leave it to cool completely before adding it to the cheesecake filling.
Prepare the Cherry Sauce
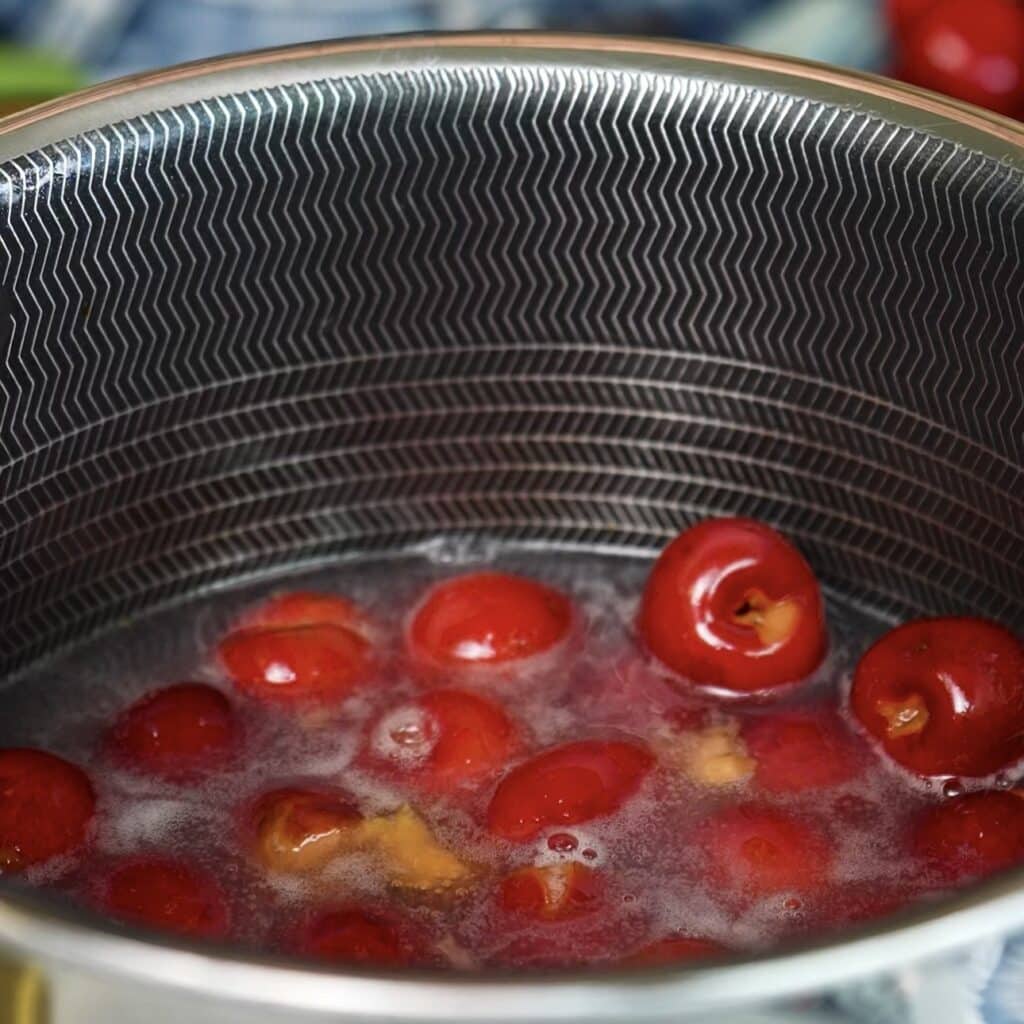
Add the pitted cherries, honey, cornflour, water and a squeeze of fresh lemon juice to a saucepan. Stir thoroughly before placing the pan over the heat, making sure the cornflour has completely dissolved and no dry lumps remain.Place the saucepan over a medium-low heat and bring the mixture to the boil. Once boiling, cook for approximately 10 minutes, stirring frequently, until the cherries are soft and the sauce has thickened.
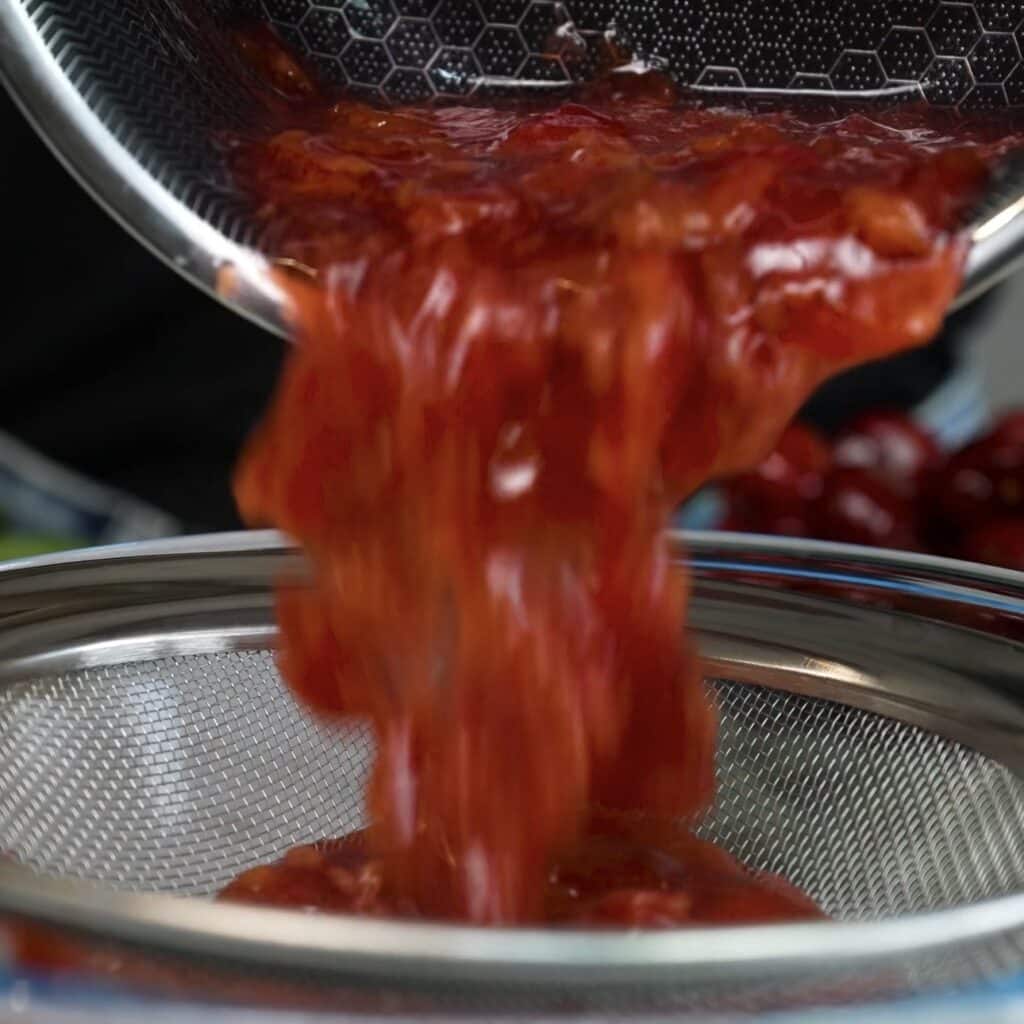
Pass the cooked cherry mixture through a fine-mesh sieve set over a bowl. Press the cherries firmly against the sieve with a spatula to extract as much sauce as possible. Discard the remaining solids, then leave the strained sauce to cool. Cover and refrigerate it until completely chilled. The sauce can be prepared the day before, which allows it plenty of time to cool and makes assembling the cheesecake easier.
Prepare the Biscuit Base
Preheat the oven to 170°C/340°F fan. Lightly grease a 20 cm (8-inch) loose-bottomed tart tin, approximately 3.5 cm (1½ inches) deep, with a little butter. Place the digestive biscuits in a food processor and process until they form fine, even crumbs. Transfer the crumbs to a mixing bowl, pour in the melted unsalted butter and stir until all the crumbs are evenly coated Tip the biscuit mixture into the prepared tart tin. Use the back of a spoon or the flat base of a measuring cup to press the crumbs firmly and evenly across the bottom and up the sides of the tin. Pay particular attention to the edges and corners so the crust holds its shape when the cheesecake is removed from the tin.

Bake the biscuit base for approximately 10 minutes, or until it feels firm and looks lightly golden. Remove it from the oven and leave it to cool for 10 to 15 minutes before adding the filling. Keep the oven set to 170°C/340°F with the fan switched off.
Prepare the Cheesecake Filling
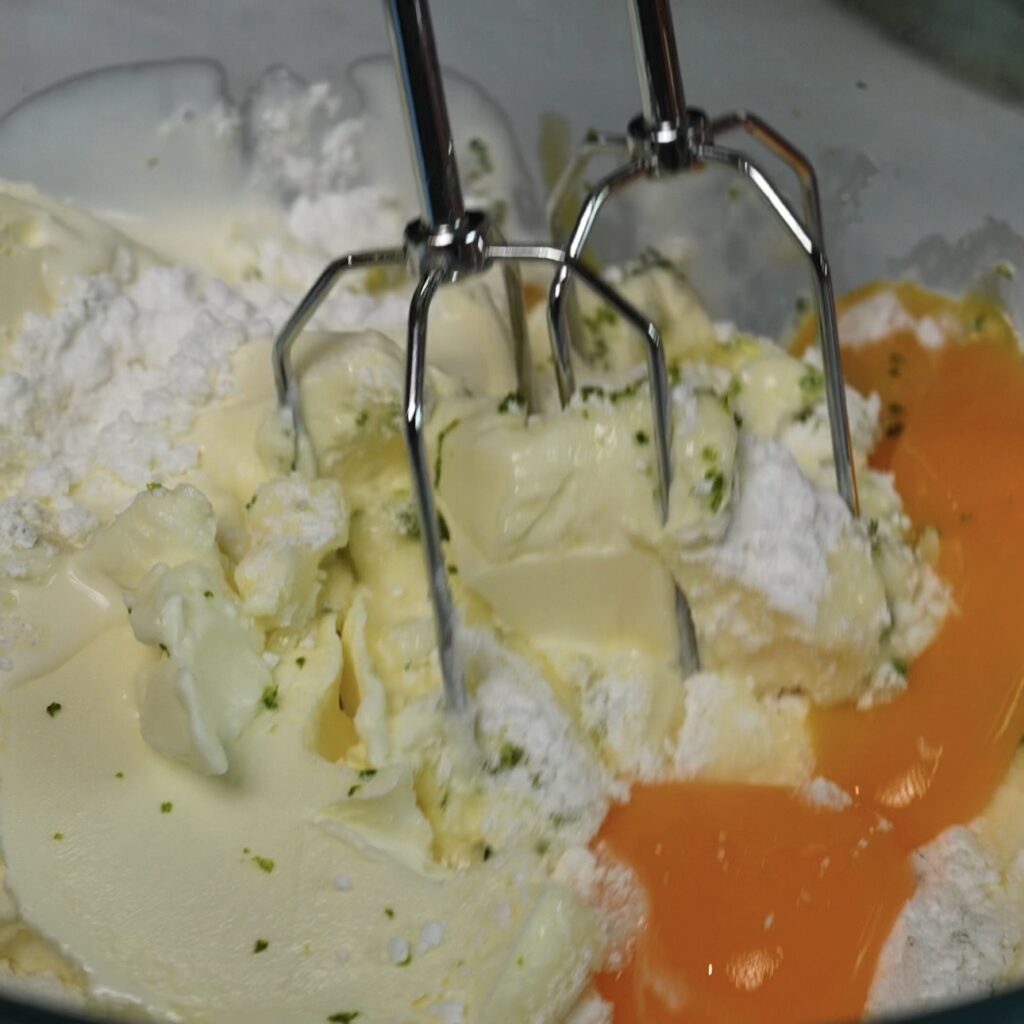
Place the room-temperature cream cheese, double cream, icing sugar, vanilla powder, egg yolks and finely grated lime zest in a large mixing bowl. Using an electric mixer or a hand whisk, beat the ingredients only until the filling is smooth and evenly combined. Avoid overmixing the filling, as incorporating too much air may cause the cheesecake to rise excessively in the oven and then crack or sink as it cools.
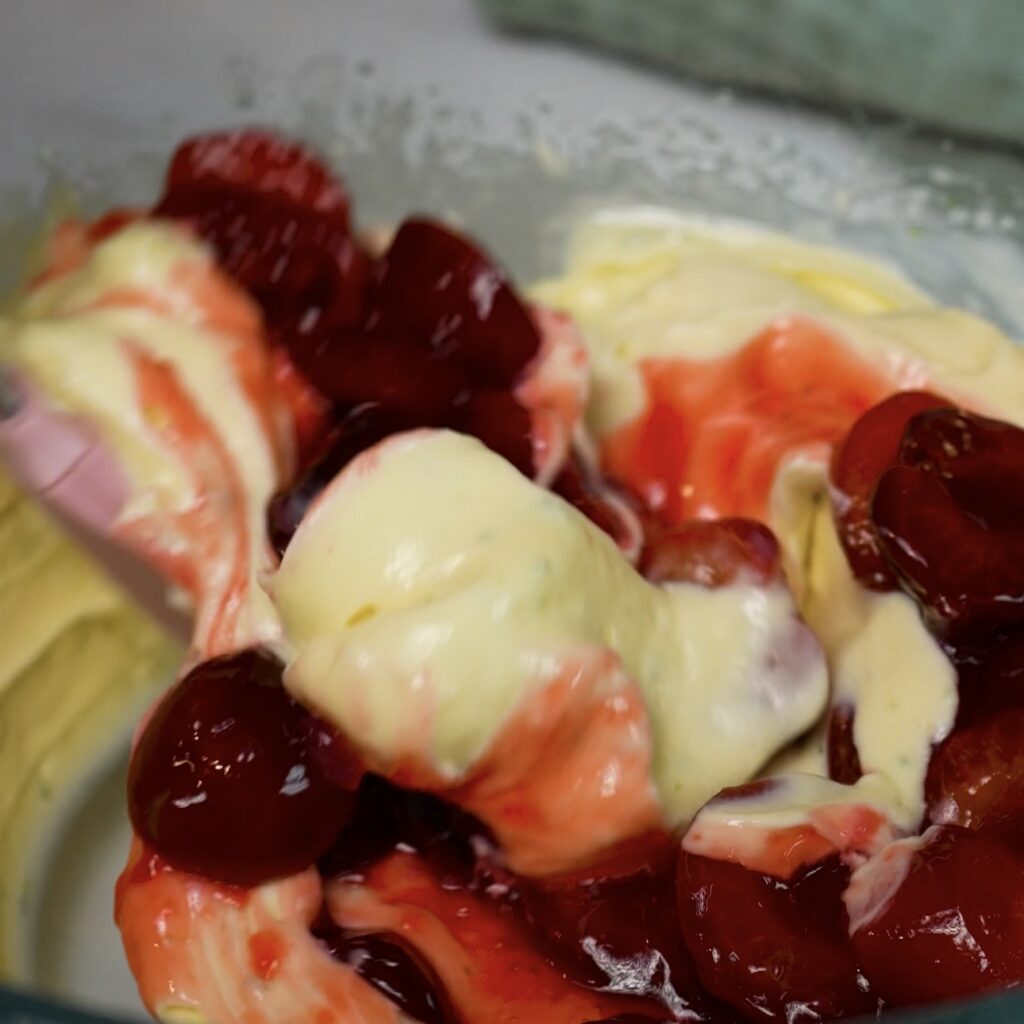
Add the completely cooled cherry compote to the cream cheese mixture. Using a spatula, gently fold the compote through the filling only a few times. Do not mix until the colour is completely even. Leaving visible ribbons and pockets of cherry compote creates an attractive marbled pattern throughout the cheesecake.
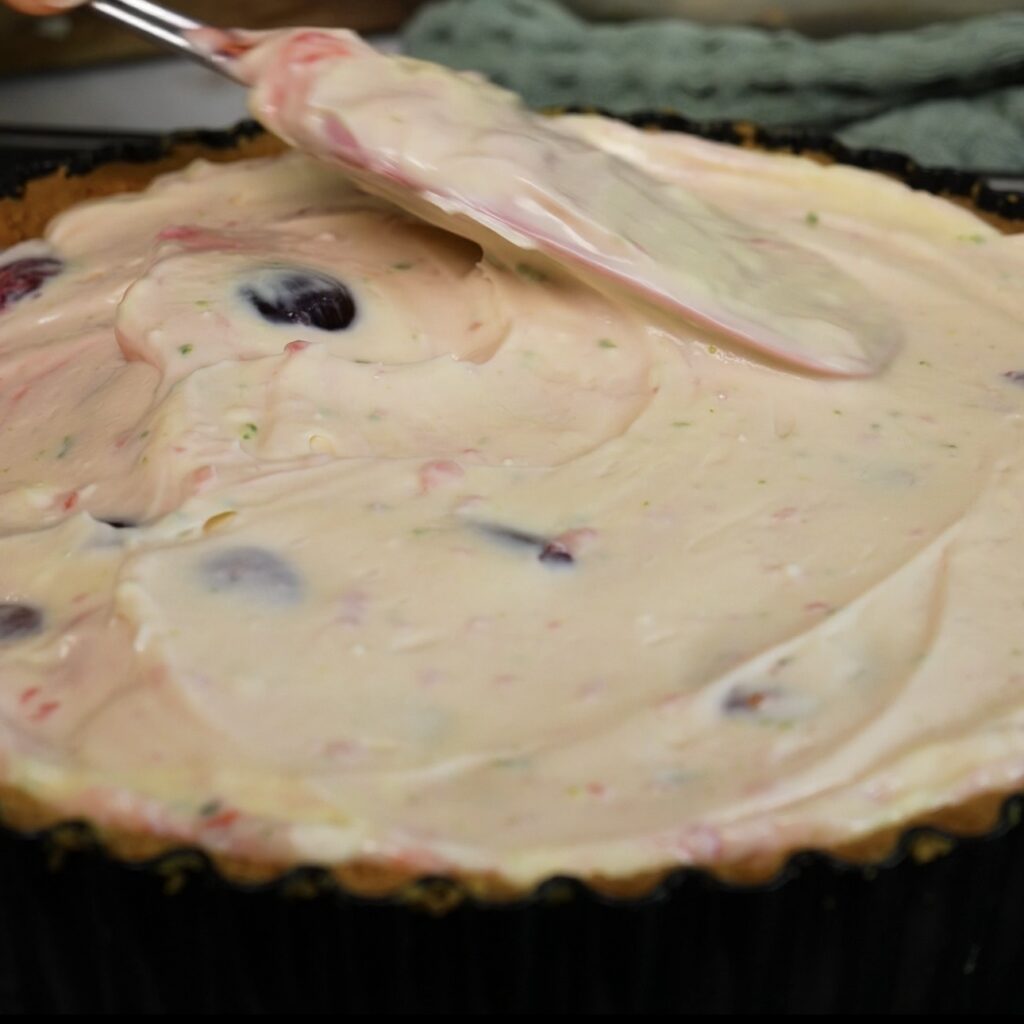
Pour the filling into the cooled biscuit base and spread it evenly. Smooth the top gently with a spatula without pressing out the visible cherry swirls.
Bake and Chill the Cheesecake
Bake the cheesecake at 170°C/340°F with the fan switched off for 40 to 45 minutes. It is ready when the filling looks set and firm around the edges but the centre still has a slight wobble when the tin is gently moved. Do not continue baking until the middle is completely firm, as the cheesecake will set further while cooling. Switch off the oven and leave the cheesecake inside for approximately 15 minutes with the oven door slightly open. Allowing the temperature to fall gradually helps prevent sudden sinking or cracking. Remove the cheesecake from the oven and leave it to cool completely to room temperature. Once cooled, transfer it to the refrigerator and chill for a minimum of 2 hours. For the firmest texture, cleanest slices and best overall result, refrigerate the cheesecake overnight. When ready to serve, carefully remove the chilled cheesecake from the loose-bottomed tart tin.
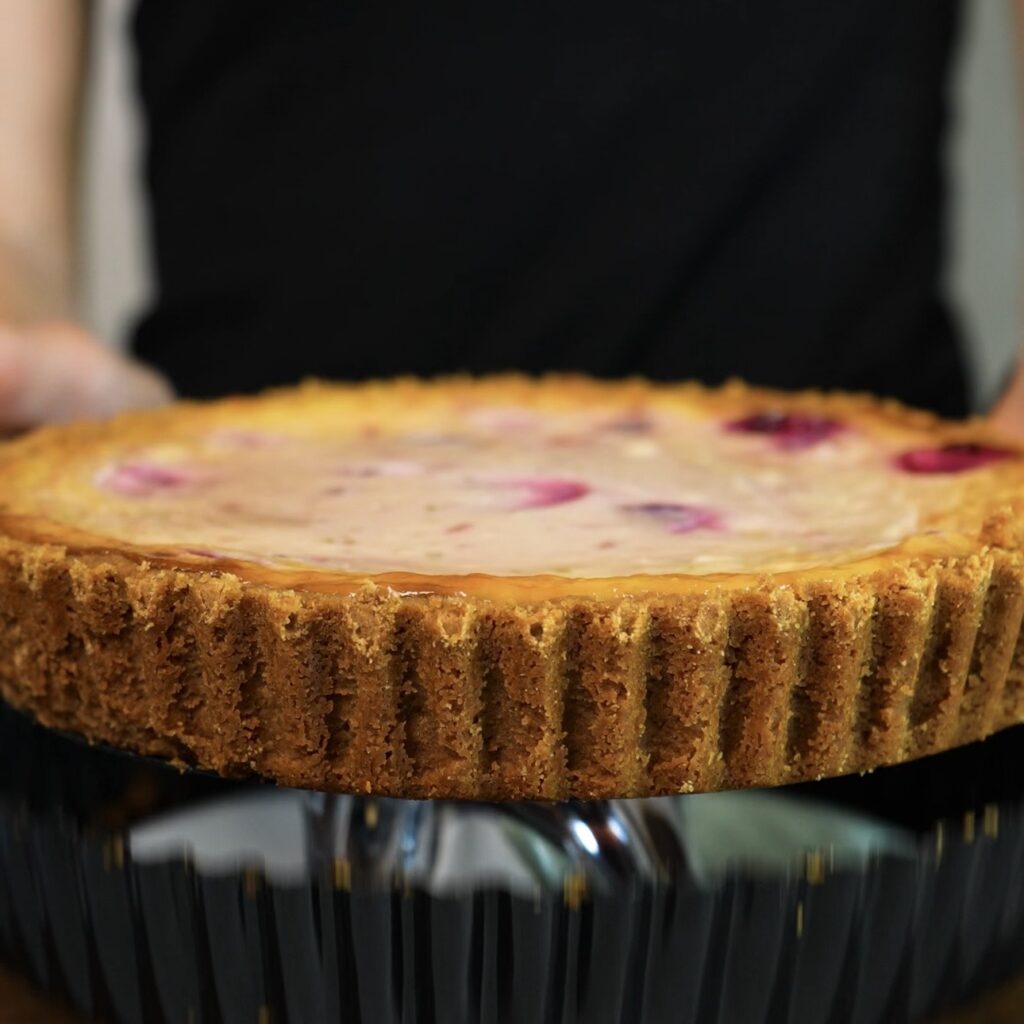
Slice it with a sharp knife and serve each portion with the cold cherry sauce.
Why We Love Cherry Cheesecake
This Cherry Cheesecake delivers several tempting textures in every slice without requiring complicated decoration. The biscuit crust is firm and buttery, the baked filling is smooth and creamy, and the loosely folded compote creates beautiful cherry swirls and soft pockets of fruit throughout. Lime zest balances the richness with a subtle freshness, while the chilled cherry sauce intensifies the fruit flavour and gives the finished dessert an elegant touch. It is also an excellent make-ahead recipe because the sauce can be prepared one day in advance and the cheesecake benefits from chilling overnight, leaving very little to do before serving. Once properly chilled, it holds its shape well and cuts into neat slices that reveal the marbled filling inside. For more cherry desserts, try my Picota Cherry Pistachio Chocolate Bar or Cherry and Pistachio Yogurt Puffs.
Perfect for Any Occasion
Serve this baked Cherry Cheesecake for summer celebrations, birthdays, afternoon tea, family lunches or relaxed dinners with friends. It looks polished enough for a special occasion but remains approachable enough to prepare whenever cherries are in season. The 20 cm cheesecake makes approximately eight generous slices and can be transported easily once it has chilled completely, making it a practical choice for picnics, parties and shared dessert tables. Serve the cold cherry sauce alongside so guests can add as much as they like, or spoon it over each slice just before serving for a more finished presentation. For individual fruit desserts that are equally well suited to entertaining, try my Strawberry Ricotta Tartlets or Nectarine Frangipane Tartlets.
Instagram Tutorial & More
Want to see how this Cherry Cheesecake comes together? Watch our quick video on Instagram and don’t miss our other easy and delicious fruity desserts:
- Mini Blueberry Filo Pies
- Easy Berry Puff Squares
- Strawberry Nutella Puffs
- Easy Banana Ice Cream Bar (No Churn)
- Cottage Cheese Berry Tartlets
- Blueberry Ricotta Tart
- Passion Fruit Curd Raspberry Tarts
- Berry Semolina Tart
Happy baking,
Izabella
Description
This Cherry Cheesecake combines a buttery digestive biscuit base with a smooth baked cream cheese filling swirled with homemade cherry compote. Lime zest adds a fresh citrus note that balances the richness without overpowering the cherries. The compote is only lightly folded through the filling, creating visible cherry ribbons in every slice. A strained cherry sauce adds extra fruit flavour and gives the finished cheesecake a polished finish. It is best chilled overnight, which helps the filling set properly and makes it easier to slice. Serve it as a summer dessert, for afternoon tea or whenever you need a simple cheesecake that still looks special.
Ingredients
For the cherry compote
For the biscuit base
For the cheesecake filling
For the cherry sauce
Instructions
-
Prepare the cherry compote and cherry sauce first, as they both need time to cool: Place the pitted and halved cherries in a small saucepan. Add the sugar and cornflour and mix until the cherries are evenly coated. Pour in the water and stir again. Place the saucepan over a medium heat and bring the mixture to the boil, stirring constantly. Cook for about 5 minutes, or until the cherries have softened slightly and the compote has thickened. Transfer the compote to a bowl and set aside to cool completely.
-
Prepare the cherry sauce: Add the pitted cherries, honey, cornflour, water and lemon juice to a saucepan and mix thoroughly until the cornflour has completely dissolved. Place the saucepan over a medium-low heat and bring the mixture to the boil. Once boiling, cook for about 10 minutes, stirring frequently, until the cherries are soft and the sauce has thickened. Pass the mixture through a fine-mesh sieve, pressing the cherries firmly with a spatula to extract as much sauce as possible. Transfer the sauce to a bowl and leave it to cool, then refrigerate until completely chilled. For the best flavour and consistency, prepare the sauce the day before.
-
Prepare the biscuit base: Preheat the oven to 170°C/340°F fan. Lightly grease a 20 cm (8-inch) loose-bottomed tart tin, approximately 3.5 cm (1½ inches) deep, with butter. Place the digestive biscuits in a food processor and process until fine crumbs form. Transfer the crumbs to a bowl, pour in the melted butter and mix until evenly combined. Tip the mixture into the prepared tart tin and use the back of a spoon or the base of a measuring cup to press it firmly and evenly over the bottom and up the sides of the tin. Bake for about 10 minutes, or until the base feels firm and is lightly golden. Remove it from the oven and leave it to cool for 10 to 15 minutes before adding the filling. Remove it from the oven and leave it to cool for 10 to 15 minutes before adding the filling. Keep the oven set to 170°C/340°F fan switched off.
-
Prepare the cheesecake filling: Place the cream cheese, double cream, icing sugar, vanilla powder, egg yolks and lime zest in a large mixing bowl. Using an electric mixer or hand whisk, beat until smooth and well combined. Avoid overmixing, as incorporating too much air can cause the cheesecake to rise and crack during baking. Add the cooled cherry compote and gently fold it through the filling with a spatula. Do not mix it in completely, as leaving visible swirls of compote will create a beautiful marbled pattern. Pour the filling into the cooled biscuit base and smooth the top with a spatula.
-
Bake and chill the cheesecake: Bake for 40 to 45 minutes, or until the edges are set but the centre still has a slight wobble. Switch off the oven and leave the cheesecake inside for 15 minutes with the oven door slightly open. Remove the cheesecake from the oven and allow it to cool completely at room temperature. Transfer it to the refrigerator and chill for at least 2 hours, although overnight chilling will give the best texture. Carefully remove the cheesecake from the tart tin and serve with the chilled cherry sauce.
Nutrition Facts
Servings: 8 ServingCalories:413.49kcalTotal Fat:26.23gCholesterol:114.23mgSodium:240.58mgPotassium:192.46mgTotal Carbohydrate:40.54gDietary Fiber: 1.31gSugars: 22.68gProtein:5.87gVitamin A: 208.19IUVitamin C: 3.1mgCalcium: 68.63mgIron: 1.25mgVitamin D: 0.35IUVitamin E: 0.73IUVitamin K: 4.12mcgVitamin B6: 0.07mgVitamin B12: 0.21mcgPhosphorus: 109.36mgMagnesium: 15.53mgZinc: 0.56mg
Note
- Use full-fat cream cheese for the smoothest texture and the best set. Low-fat cream cheese may make the filling softer.
- Bring the cream cheese to room temperature before mixing to help prevent lumps in the filling.
- Make sure the cherry compote has cooled completely before folding it into the cheesecake mixture.
- Fold the compote through the filling only a few times to preserve the visible cherry swirls.
- Avoid overmixing the filling, as incorporating too much air can cause the cheesecake to rise, crack or sink as it cools.
- The cheesecake is ready when the edges are set but the centre still has a slight wobble. It will continue to firm up as it cools.
- Chill the cheesecake for at least 2 hours before slicing. For the best texture and cleanest slices, refrigerate it overnight.
- The cherry sauce can be prepared one day in advance and kept covered in the refrigerator until serving.
- Store leftover cheesecake in an airtight container in the refrigerator for up to 3 days.