Crispy Air Fryer Rice Paper Cheese Balls: Crunchy Outside, Gooey Centre, Zero Fuss
If you love recipes that combine texture, simplicity, and that instant “wow” factor, these Crispy Air Fryer Rice Paper Cheese Balls are about to become a favourite. Thin rice paper transforms into a golden, crackly shell in the air fryer, while the inside melts into a soft, stretchy cheese centre that pulls apart with every bite. It is one of those clever recipes that feels almost too easy for how good it turns out. The same crisp-meets-soft contrast is what makes recipes like Feta and Spinach Rice Paper Rolls (Air Fryer, Gluten-Free) and Rice Paper Chicken Sausage Rolls so popular, and this version takes it in a more indulgent, snackable direction.
Scroll down or tap ‘Jump to Recipe’ to access the full printable recipe card with exact measurements.
Simple Ingredients, Big Flavours
What makes this recipe so effective is how a handful of everyday ingredients come together to create something with real impact. Each element plays a clear role:
Rice paper sheets – The key to that signature crisp texture. Once air fried, they turn light, blistered, and golden. You can find rice paper in most Asian grocery stores or in the Asian section of major supermarkets. In this recipe, they crisp up beautifully straight out of the air fryer, but will soften over time, so they are best enjoyed immediately.
Eggs and milk – This simple mixture softens the rice paper just enough to make it pliable, while also helping it seal and crisp properly.
Babybel cheese – Perfectly portioned and ideal for melting, giving you that soft, gooey centre.
Olive oil spray – Just enough to help achieve a golden, crispy finish without deep frying.
Sesame seeds – Optional, but they add a subtle nutty crunch and a nice finish.
How to Make Crispy Air Fryer Rice Paper Cheese Balls
Prepare the Egg Mixture
Start by whisking together the eggs and milk in a shallow plate that is slightly larger than your rice paper sheets. You want a smooth, well-combined mixture that will lightly coat the rice paper without oversaturating it.
First Wrap
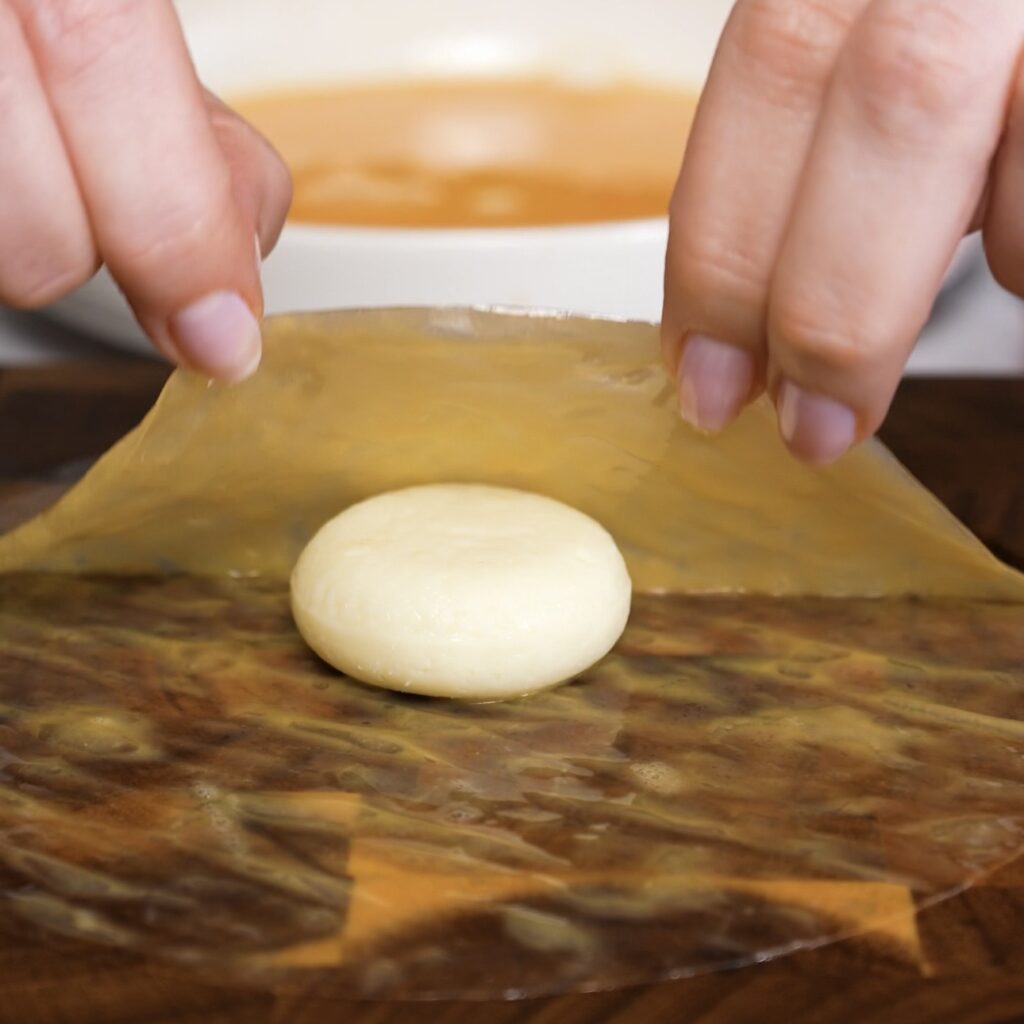
Working one at a time, briefly dip a rice paper sheet into the egg mixture. Do not wait for it to fully soften, as it will continue to soften while you assemble. Transfer it to a clean, flat working surface, place one Babybel cheese in the centre,
Babybel cheese added to egg-dipped rice paper before wrapping
and wrap the rice paper around it so the cheese is fully enclosed.
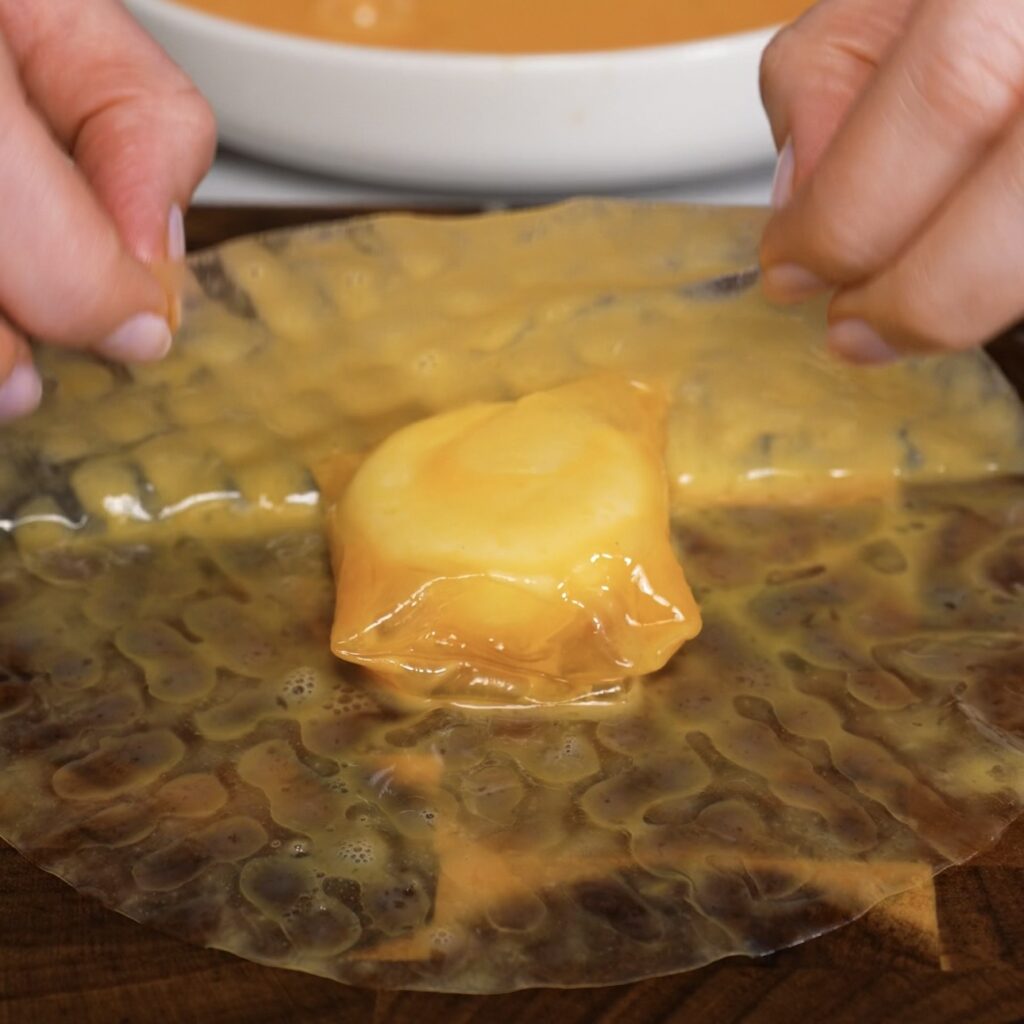
Babybel cheese after the first wrap, ready for the second layer
Second Wrap
This step is key for structure and preventing leaks. Working quickly, dip a second rice paper sheet into the egg mixture and place it on your work surface. Position the wrapped cheese in the centre, sealed side down, and wrap again so it is completely covered. Set aside and repeat with the remaining rice paper sheets and cheeses.
Wrapped Babybel placed on egg-dipped rice paper, ready for the second layer
Arrange in the Air Fryer
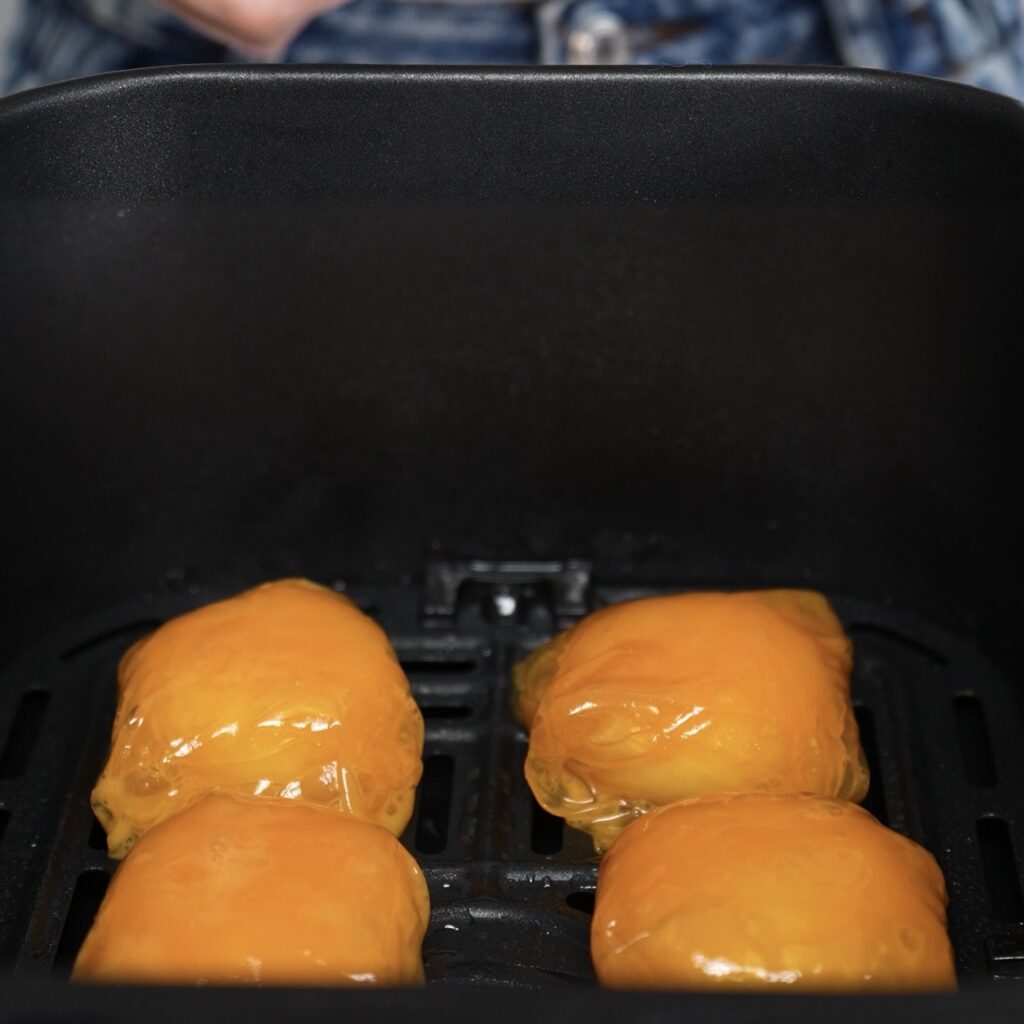
Lightly spray the air fryer basket with olive oil. Place the wrapped cheese balls inside, sealed side down, leaving a little space between each one so the air can circulate properly.
Wrapped Babybel cheese balls arranged in the air fryer basket
Garnish and Cook
Sprinkle the tops with sesame seeds, then lightly spray with olive oil. Air fry at 200°C / 400°F for about 10 minutes, or until golden and crispy. Cooking time may vary slightly depending on your air fryer, so keep an eye on them towards the end.
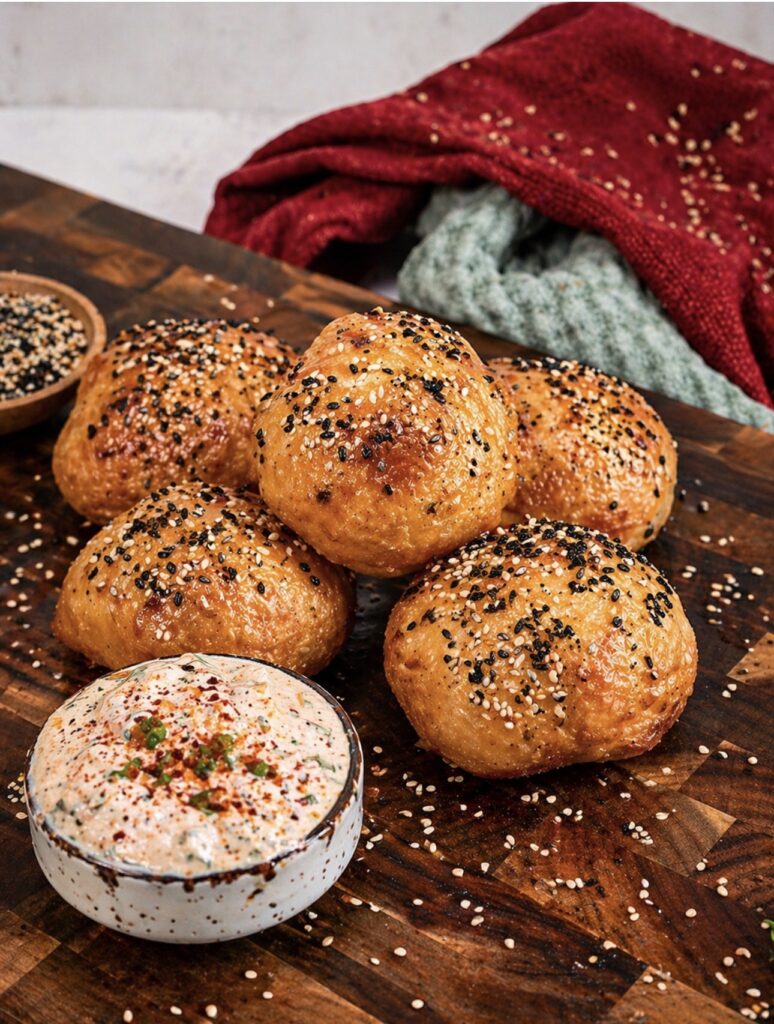
Golden and crispy rice paper cheese balls straight from the air fryer
Serve Immediately
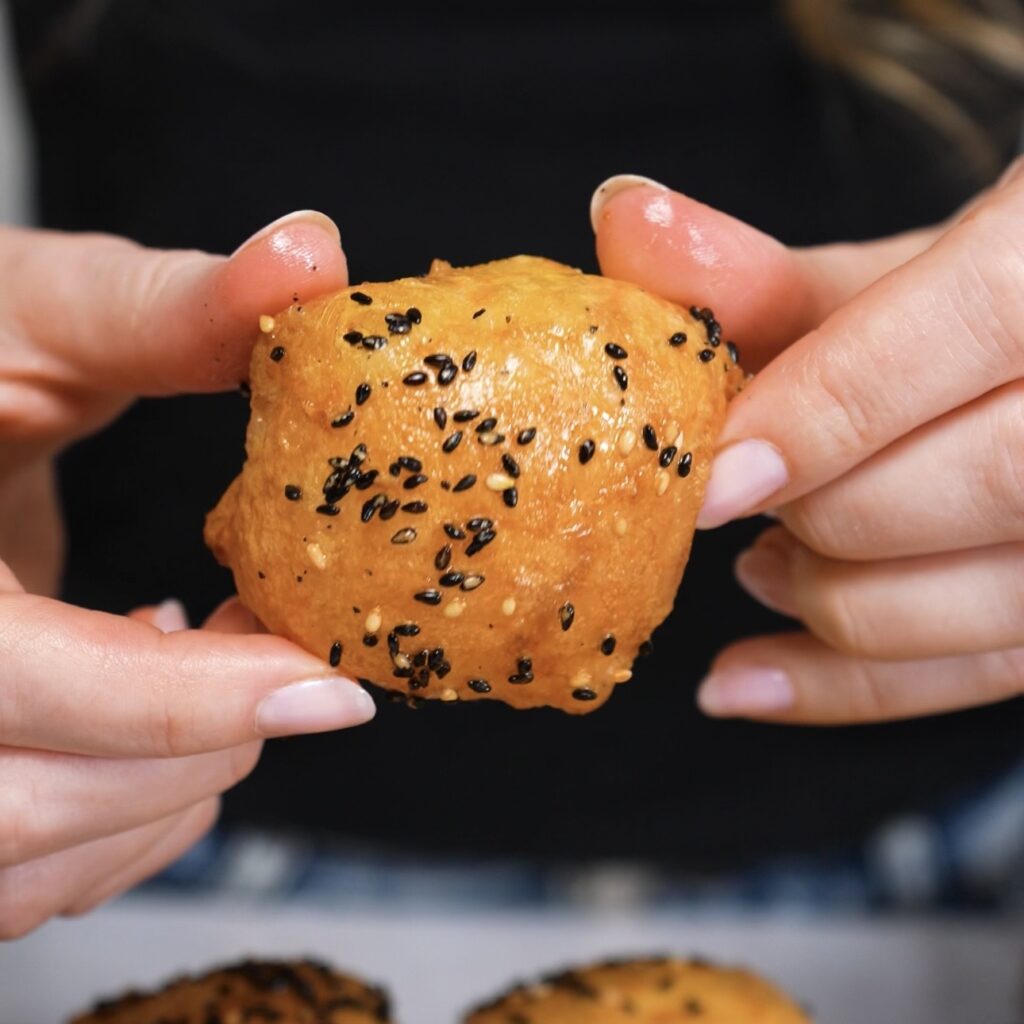
Serve straight from the air fryer while still hot. The outside will be crisp and golden, with a soft, gooey cheese centre. Keep in mind that the rice paper will soften as they sit, so they are best enjoyed right away.
Hands holding a crispy rice paper cheese ball straight from the air fryer
Serving and Enjoying
These cheese balls are best enjoyed straight from the air fryer, when the contrast between the crispy shell and the molten centre is at its peak. As they sit, the rice paper will soften slightly, so timing matters. Serve them with simple dips like soy sauce or a quick garlic yoghurt dip for balance. They also work beautifully as part of a larger spread. Pair them with lighter options like Rice Paper Chicken Nori Rolls for freshness, or something more substantial like Crispy Rice Paper Mozzarella Chips to create a mix of textures and flavours.
Why This Recipe Works
This recipe is all about contrast and technique. Rice paper, usually associated with fresh rolls, completely transforms when exposed to high heat. It becomes crisp, light, and slightly blistered, creating the perfect shell for a soft, rich filling. This transformation is what makes recipes like Salmon Rice Paper Parcels and Air-Fried Rice Paper Parcels so effective, and it works just as well here. Another key factor is the double wrapping method. Without it, the cheese is likely to leak as it melts. With it, you get a sealed, structured bite that holds together perfectly while still delivering that gooey centre.
Perfect for Any Occasion
These Crispy Air Fryer Rice Paper Cheese Balls are one of those recipes that fit effortlessly into any setting, whether you are putting together a quick snack, a casual appetiser, or something fun to share with guests. They are fast, simple, and guaranteed to impress, with that irresistible contrast between the crispy shell and the gooey centre. What makes rice paper so exciting is how versatile it is, from fresh rolls like Rice Paper Cucumber Roll to sweet desserts like No-Cook Mango Mochi (Rice Paper Dessert), it can completely transform depending on how you use it. This recipe is a perfect example of that versatility, turning a light, delicate wrapper into something crunchy, golden, and deeply satisfying.
Scroll down for the full recipe card with exact measurements and step-by-step instructions.
Instagram Tutorial & More
Want to see how these Crispy Air Fryer Rice Paper Cheese Balls come together? Watch our quick video on Instagram and don’t forget to check out more of our easy and delicious recipes:
Crispy Air Fryer Rice Paper Cheese Balls are the ultimate quick snack with a golden, crunchy shell and a perfectly gooey centre. Made with simple ingredients like rice paper and Babybel cheese, they come together in minutes and cook effortlessly in the air fryer. The double layer of rice paper helps keep the cheese sealed inside while creating that irresistible crisp texture. They are best served hot, straight from the air fryer, when the centre is still soft and melty. Pair them with soy sauce or a simple garlic yoghurt dip for extra flavour. This recipe is easy, satisfying, and perfect for sharing, although they tend to disappear fast.
Ingredients
12 rice paper sheets (16cm diameter, 6 inches)
2 eggs
2tbsp milk
6 Babybel cheeses (unwrapped)
Olive oil spray
Sesame seeds (for garnish)
Instructions
1
In a shallow plate slightly larger than your rice paper sheets, whisk together the eggs and milk until smooth.
2
Working one at a time, briefly dip a rice paper sheet into the mixture. Do not wait for it to fully soften as it will continue to soften while you assemble. Place it onto a clean, flat surface, add one Babybel cheese in the centre, and wrap the rice paper around it so the cheese is fully enclosed. Then, working quickly, dip a second rice paper sheet into the egg mixture and place it on your work surface. Position the wrapped cheese in the centre, sealed side down, and wrap again so it is completely covered. This double layer helps prevent leaking during cooking. Set aside and repeat with the remaining rice paper sheets and cheeses.
3
Lightly spray the air fryer basket with olive oil and place the wrapped cheese balls inside, sealed side down. Sprinkle with sesame seeds and spray the tops with a little more olive oil. Air fry at 200°C/400°F for about 10 minutes, or until golden and crispy. Serve immediately while hot, as they will soften over time.
Work quickly when handling the rice paper. It should only be briefly dipped into the egg mixture, as it continues to soften while you assemble. If it becomes too soft, it will be harder to handle and may tear during wrapping.
The double layer of rice paper is important. It helps seal the cheese properly and prevents it from leaking out during cooking. Make sure the second wrap fully covers any seams, and always place the balls sealed side down in the air fryer to keep them intact.
Avoid overcrowding the air fryer basket. Leave a little space between each piece so the hot air can circulate properly and create an even, crispy texture. Depending on the size of your air fryer, you may need to cook in batches.
Cooking time may vary slightly depending on your air fryer model. Start checking around the 8 minute mark. The cheese balls are ready when they are golden and crisp on the outside.
These are best served immediately while the centre is still soft and melty. As they sit, the rice paper will lose its crispness and the texture will soften.
If you notice any cheese starting to leak during cooking, it usually means the wrap was not fully sealed. You can add an extra small piece of rice paper to patch any weak spots before air frying if needed.
For variation, you can swap Babybel for other firm, meltable cheeses, but keep the size similar so they cook evenly and do not burst too quickly.
Serve with simple dips like soy sauce or a garlic yoghurt dip. Adding chopped coriander and a little sun-dried tomato pesto to the yoghurt gives a nice extra layer of flavour.
Keywords:
crispy air fryer rice paper cheese balls, rice paper cheese balls, air fryer cheese balls, rice paper recipes, crispy rice paper snacks, rice paper snacks, air fryer snacks, easy air fryer recipes, quick snack ideas, vegetarian snack recipes, gluten-free snacks, cheese snack recipes, babybel cheese recipes, melty cheese snacks, crispy cheese bites, party snack ideas, easy appetisers, 10 minute snacks, crunchy snacks, homemade snacks
Did you make this recipe?
Tag @shicocooks if you made this recipe. Follow @shicocooks on Instagram for more recipes.
Pin this recipe to share with your friends and followers.
Izabella Jakubec
Food Blogger and Recipe Developer
Hi there!
I’m Izabella, and I’m thrilled to have you here!
Here, you’ll discover a collection of simple, easy-to-follow recipes that are perfect for anyone who loves quick and delicious meals.