
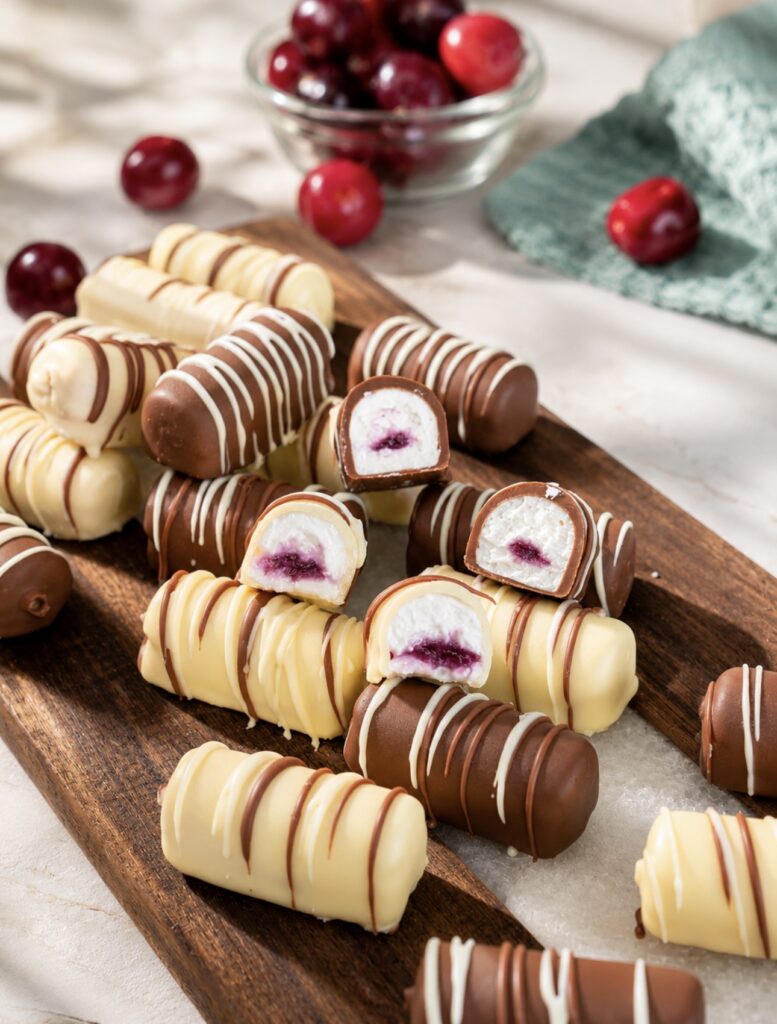

High-Protein Cherry Cottage Cheese Chocolate Bars: Creamy, Fruity and Coated in Chocolate
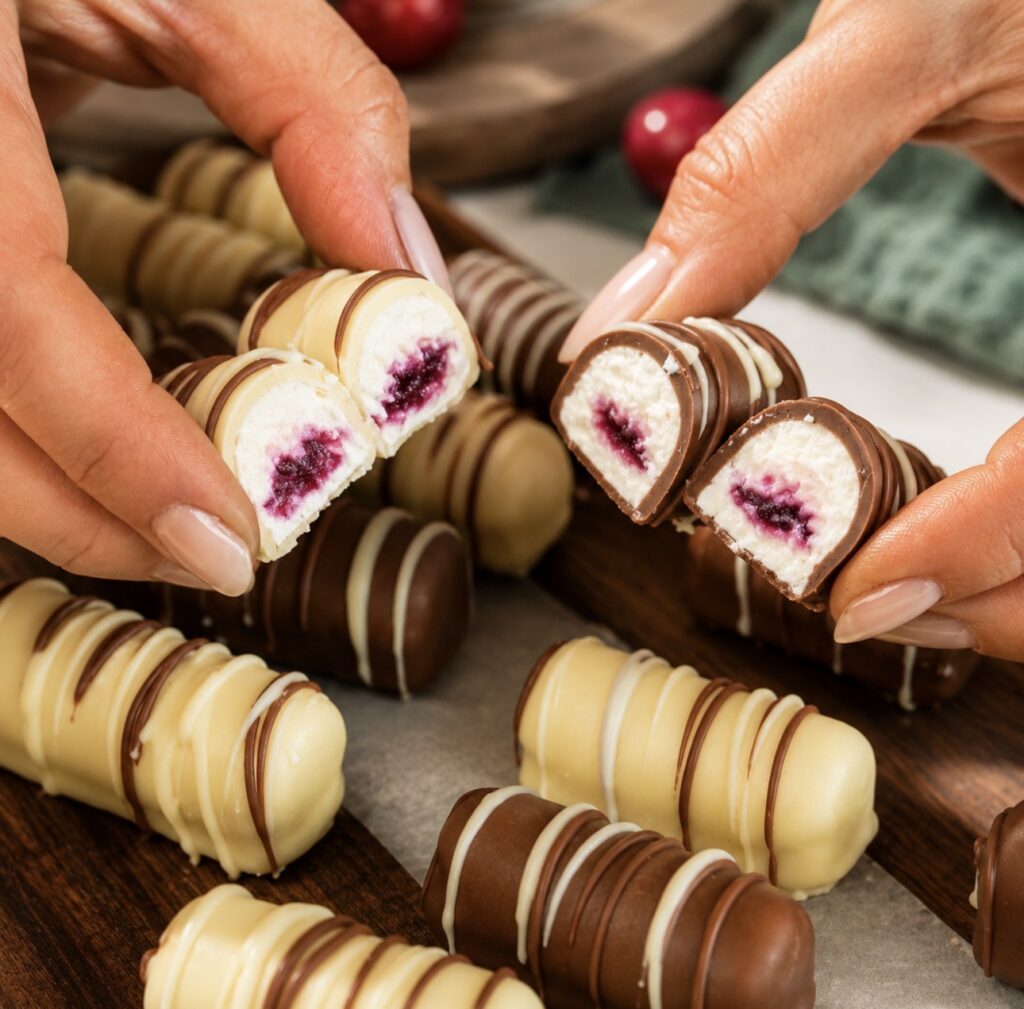
If you love a dessert that feels indulgent but still has a lighter, fresher side, these High-Protein Cherry Cottage Cheese Chocolate Bars are exactly the kind of treat you will want to keep in the freezer. They are made with a smooth cottage cheese and yoghurt filling, a homemade cherry centre, and a glossy chocolate coating that gives every bite that satisfying little snap. Think creamy, fruity, chilled cheesecake-style bars, but easier to portion and much more fun to dip in chocolate. If you enjoyed my Chocolate Blueberry Protein Bars or my Cherry Cottage Cheese Ice Cream (High Protein) , this recipe follows the same beautiful idea: creamy dairy, juicy fruit and chocolate doing what chocolate does best.
Scroll down or tap ‘Jump to Recipe’ to get the full recipe with exact measurements and step-by-step instructions.
Simple Ingredients, Big Flavours
What makes these cherry cottage cheese chocolate bars so good is the balance between creamy, fruity and chocolatey. The ingredients are simple, but each one has a job to do:
- Cherries – The cherries are cooked down into a quick homemade sauce, giving the bars a juicy, fruity centre with a gorgeous natural colour.
- Cornstarch and water – These help thicken the cherry sauce so it pipes neatly into the centre of the bars.
- Honey – Used in both the cherry filling and the cottage cheese mixture, honey adds gentle sweetness without making the bars taste overly sugary.
- Lemon juice – Just a squeeze brightens the cherry sauce and balances the sweetness.
- Cottage cheese – Once blended, cottage cheese becomes smooth and creamy, giving these bars their protein-rich base.
- Plain yoghurt – Yoghurt lightens the filling and adds a fresh, slightly tangy flavour.
- Vanilla – A small amount of vanilla makes the cottage cheese mixture taste more dessert-like.
- Milk chocolate and white chocolate – Using two chocolates gives you a pretty finish and two different flavour profiles.
- Neutral oil – Sunflower oil or light olive oil helps loosen the melted chocolate, making it smoother and easier to dip.
The cherry filling is really what makes these bars feel special. Instead of adding raw fruit straight into the mould, the cherries are gently cooked with honey, lemon juice and cornstarch until they soften and turn into a glossy sauce. Once strained, you get a smooth cherry centre that pipes neatly into the bars and gives a lovely surprise when you bite into them. If cherries are your thing, make sure to also try my Picota Cherry Pistachio Chocolate Bar and Cherry Ricotta Rice Paper Dumplings.
How to Make High-Protein Cherry Cottage Cheese Chocolate Bars
Preparing the Cherry Sauce
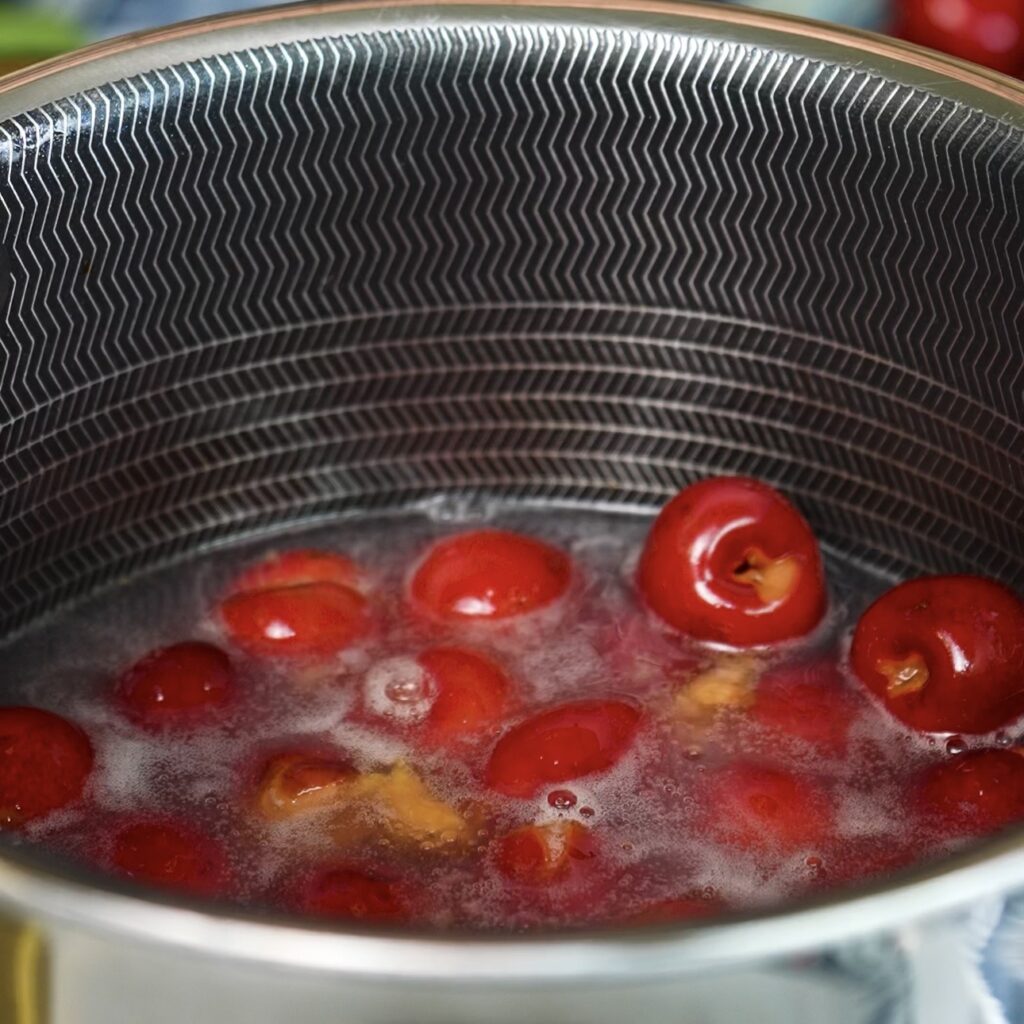
Start by making the cherry sauce, as it needs time to cool before you pipe it into the bars. Add the pitted cherries, cornstarch, water, honey and a squeeze of lemon juice to a saucepan, then mix well until the cornstarch has fully dissolved. Place the saucepan over a medium-low heat and bring the mixture to a boil. Once boiling, cook for about 10 minutes, stirring constantly, until the cherries soften and the sauce thickens.
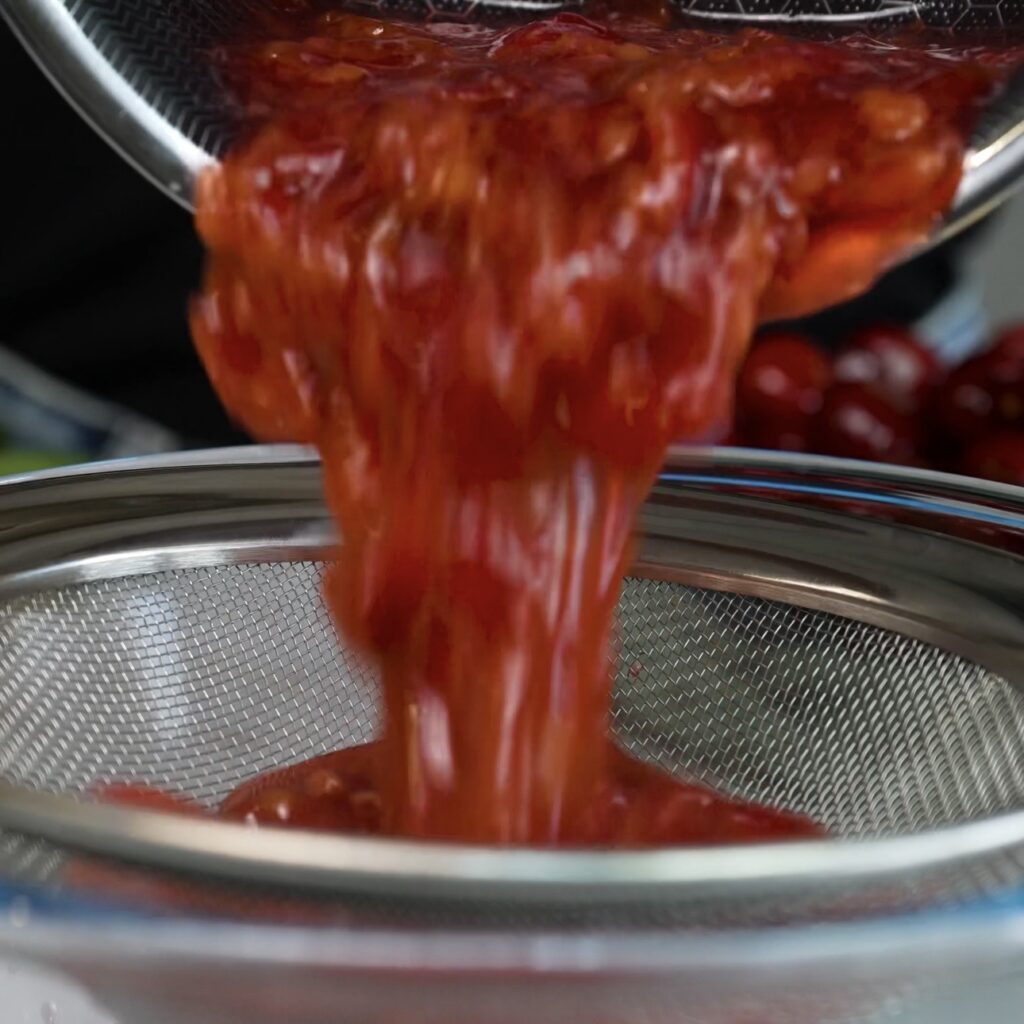
Pass the cherry mixture through a fine sieve into a bowl, using a spatula to press the cherries and extract as much sauce as possible. Leave the sauce to cool to room temperature, then transfer it into a piping bag. You can also store it in the fridge until needed.
Making the Cottage Cheese Filling
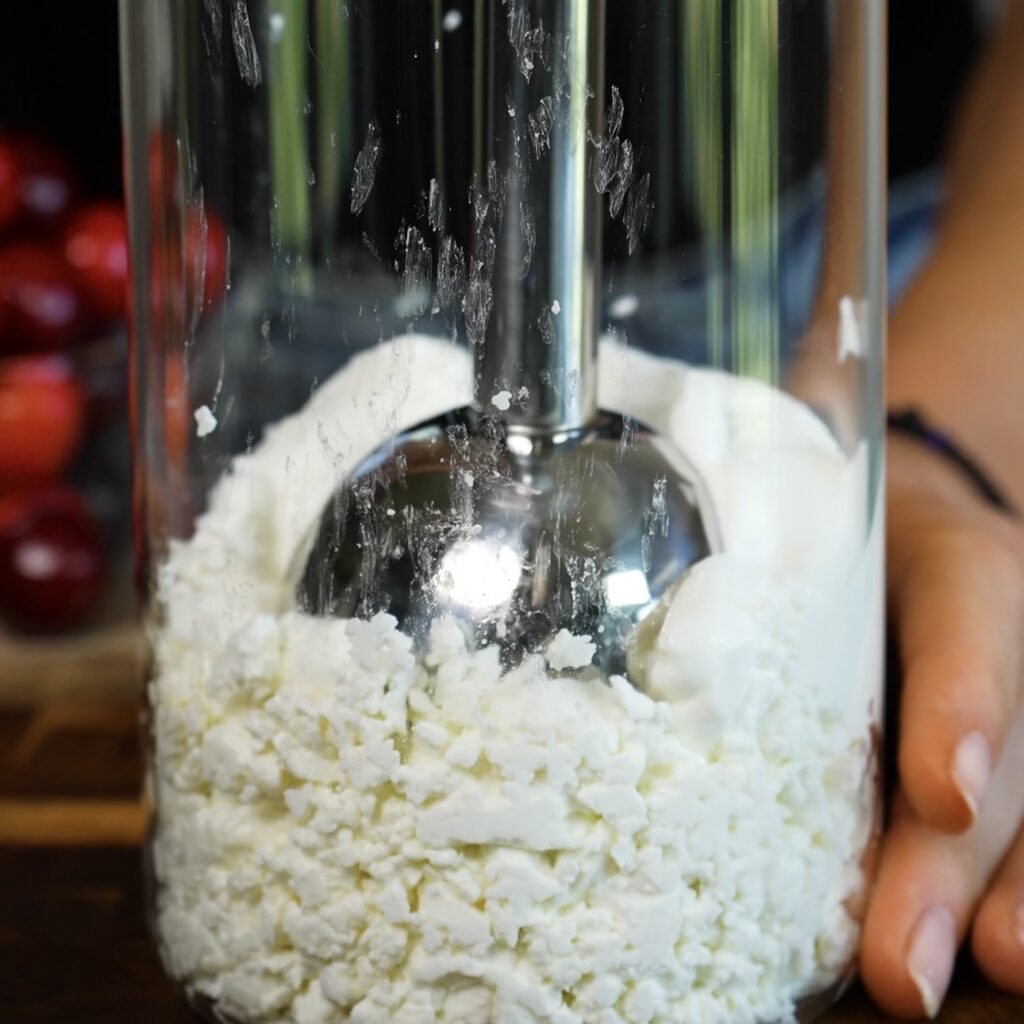
Add the cottage cheese, plain yoghurt, honey and vanilla to a food processor and blend until smooth. You can also use an immersion blender if that’s more convenient. Once the mixture is creamy and smooth, transfer it into a separate piping bag.
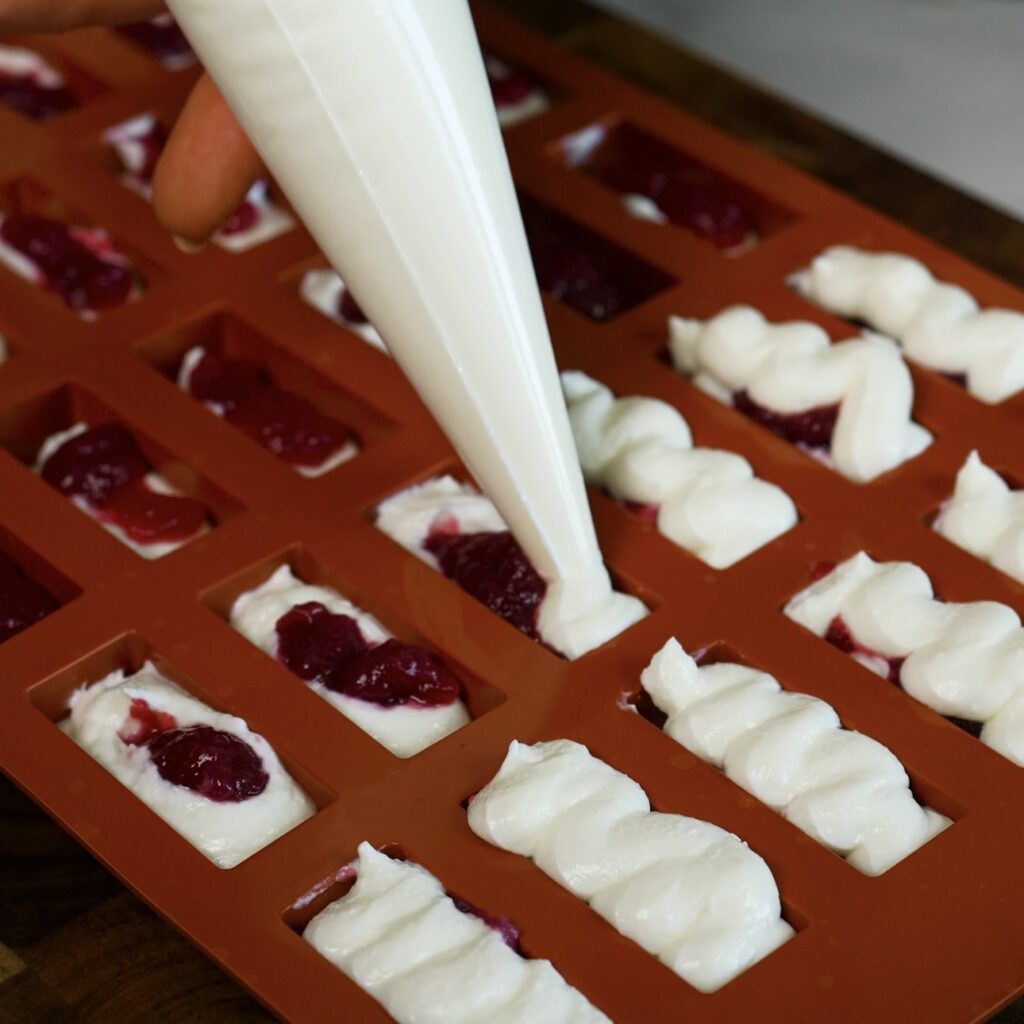
Fill the cavities of a 30-cavity cylinder silicone chocolate mould about halfway with the cottage cheese mixture. Pipe a little cherry sauce into the middle of each one, then cover again with more cottage cheese mixture. Please note that if you are using a different shape silicone mould, you may get more or fewer bars.
Smooth the tops with a spatula to even them out and remove any excess mixture.
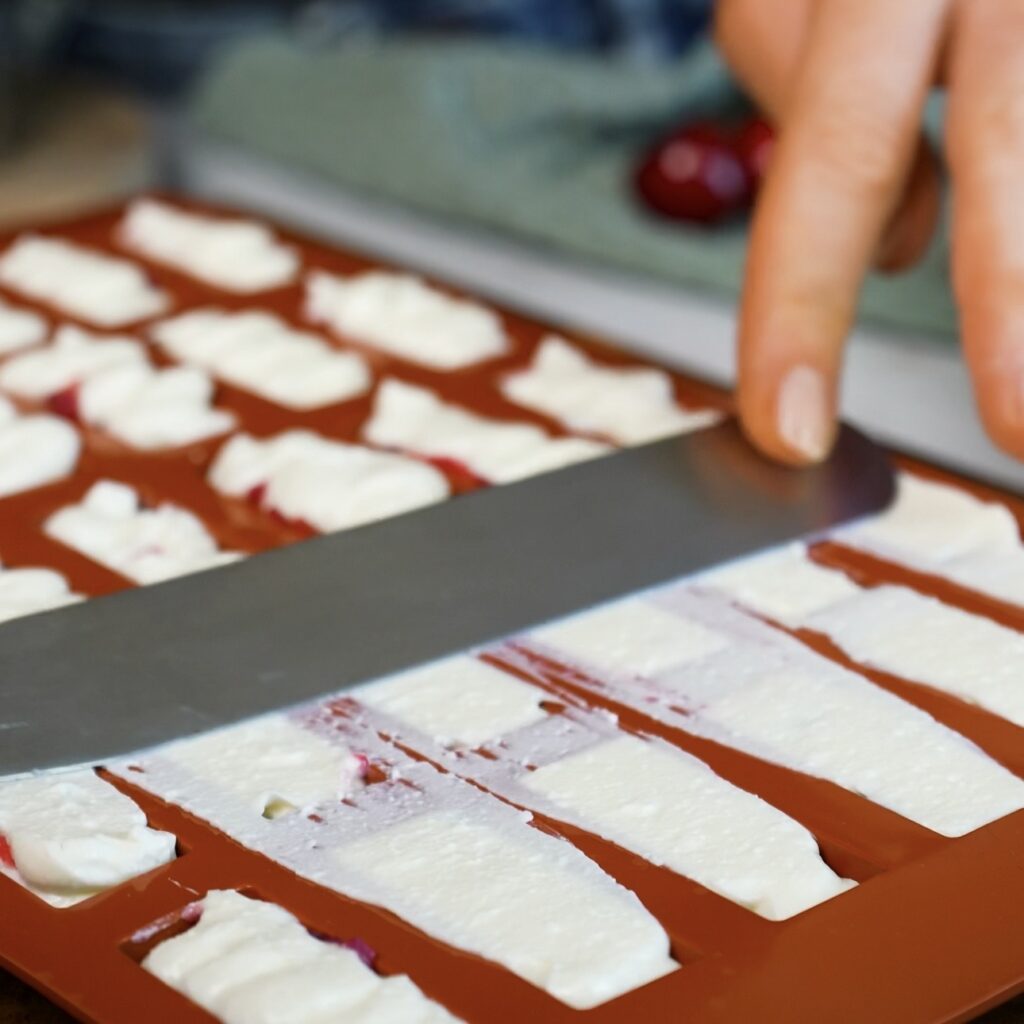
Place the silicone mould onto a wooden board so you can easily transfer it to the freezer. Freeze for 2–3 hours, or until deeply frozen.
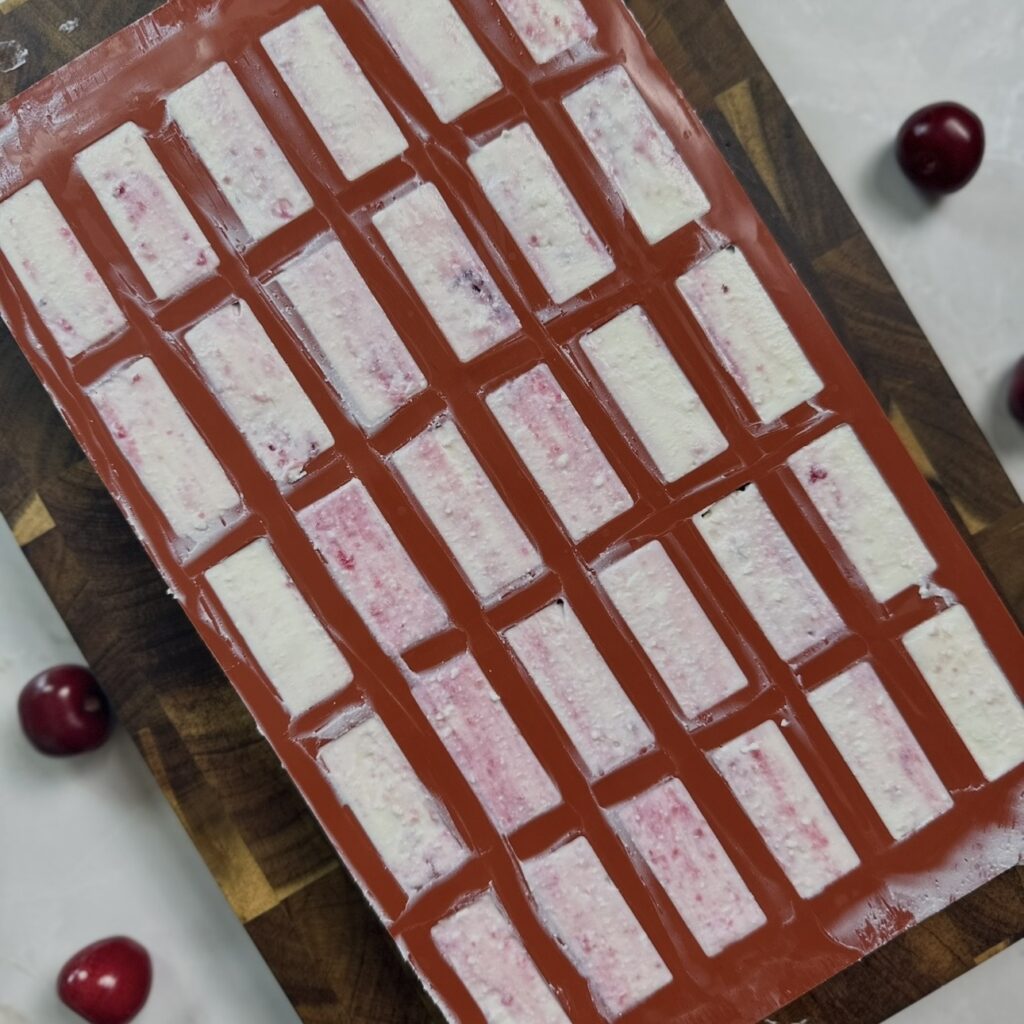
Preparing the Chocolate Glaze
About 30 minutes before removing the bars from the freezer, prepare the chocolate glaze. Melt the milk chocolate using either the microwave or a double boiler method. For the microwave, heat the chocolate in short 10-second bursts, stirring well between each one, until fully melted. For the double boiler, place the chocolate in a heatproof bowl over gently simmering water, making sure the bowl does not touch the water, and stir until melted.
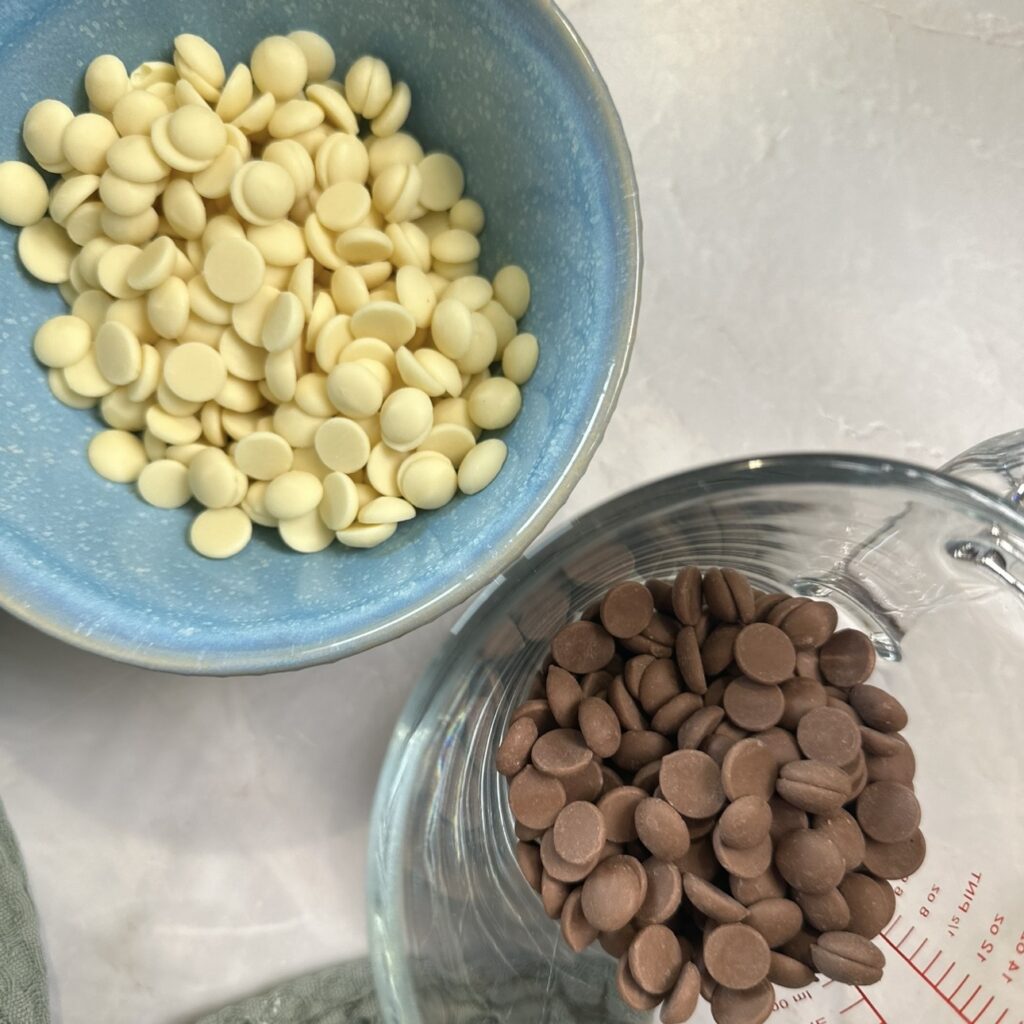
Stir 20 ml of neutral oil into the melted milk chocolate until smooth and glossy, then allow it to cool for 10–15 minutes so it thickens slightly. Repeat the same process with the white chocolate and the remaining 20 ml oil. Transfer each chocolate glaze to a glass or bowl deep enough for dipping the bars.
Dipping and Decorating the Bars
Prepare a tray or wooden board that fits in your fridge and line it with parchment paper. Remove the bars from the mould. You can work with them in batches so they do not defrost too quickly.
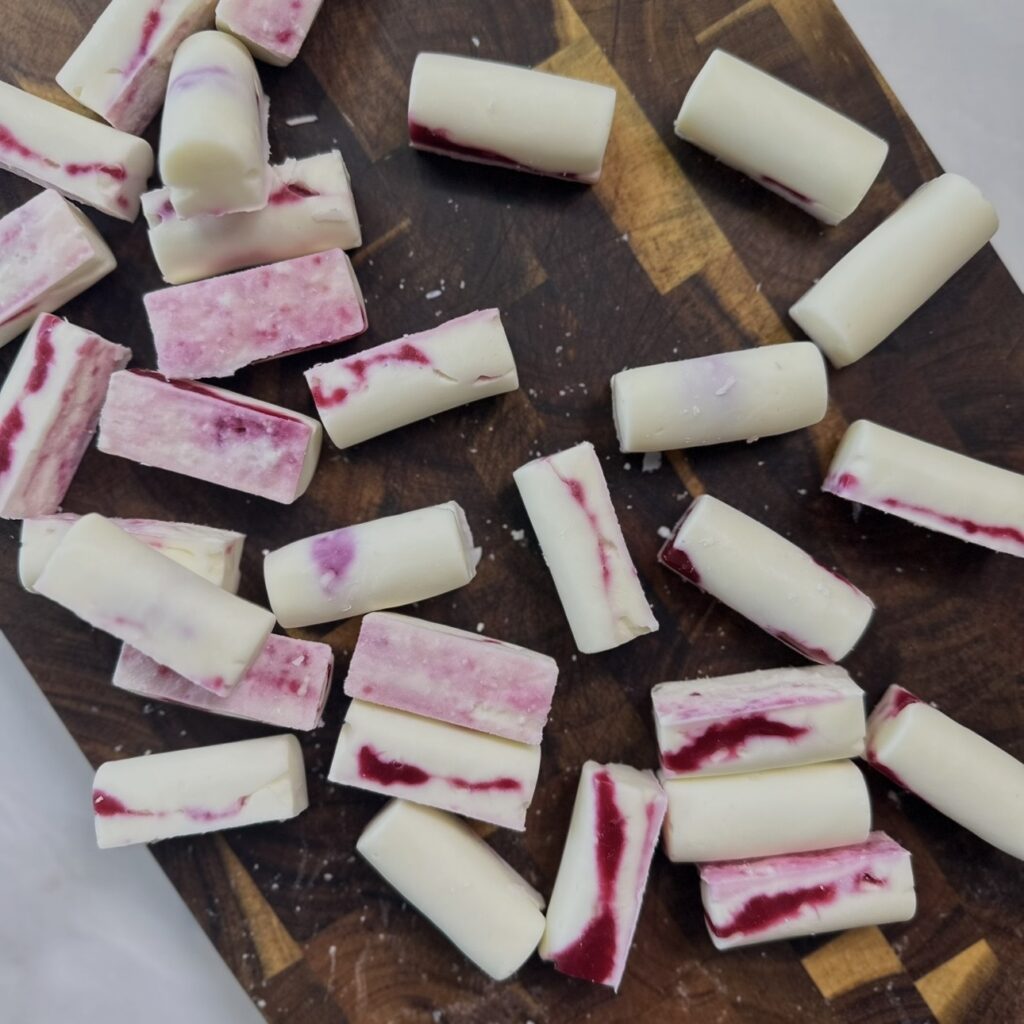
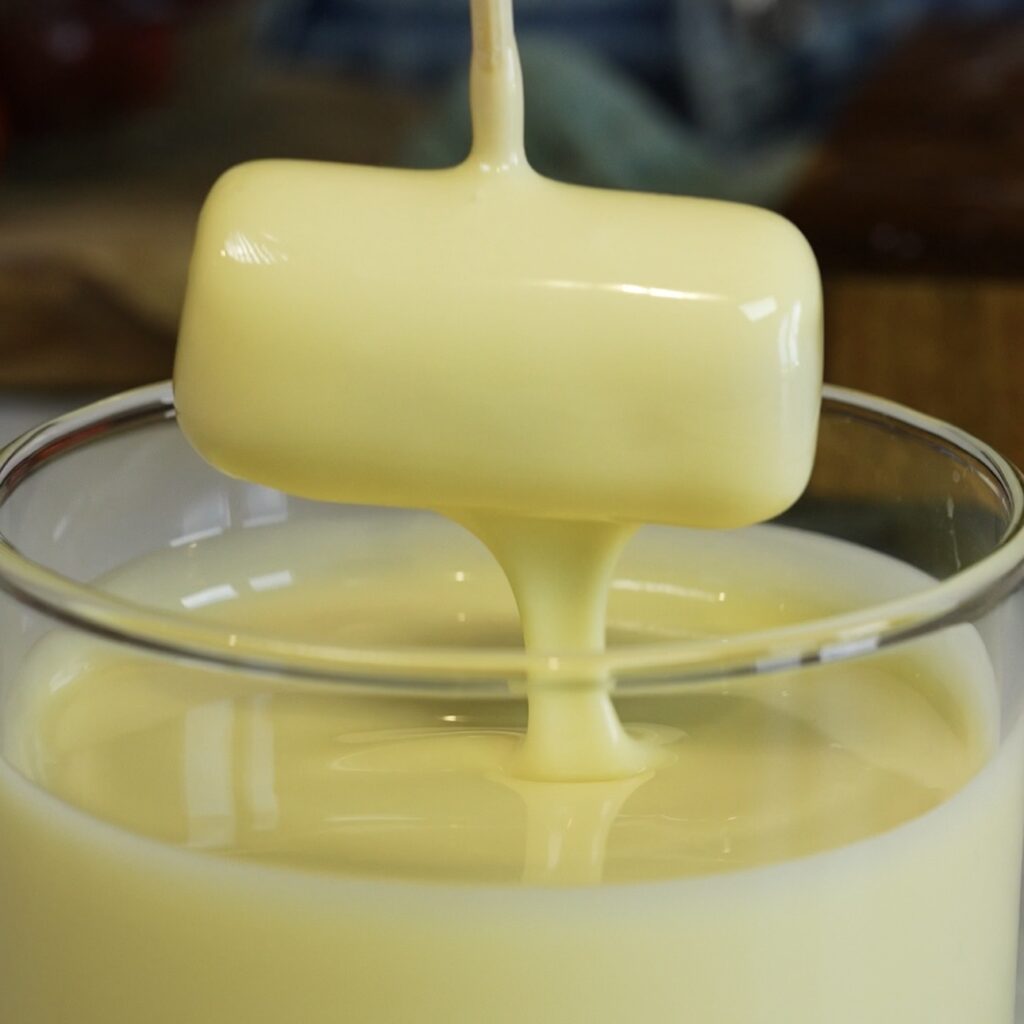
Working with one bar at a time, insert a toothpick or wooden skewer into the bar, then dip it into the melted chocolate. Place it onto the prepared tray or wooden board and gently twist the toothpick or skewer to remove it. Coat half of the bars in milk chocolate and half in white chocolate. Keep the dipped bars in the fridge while working with the next batch, so the chocolate sets quickly and the bars do not soften too much.
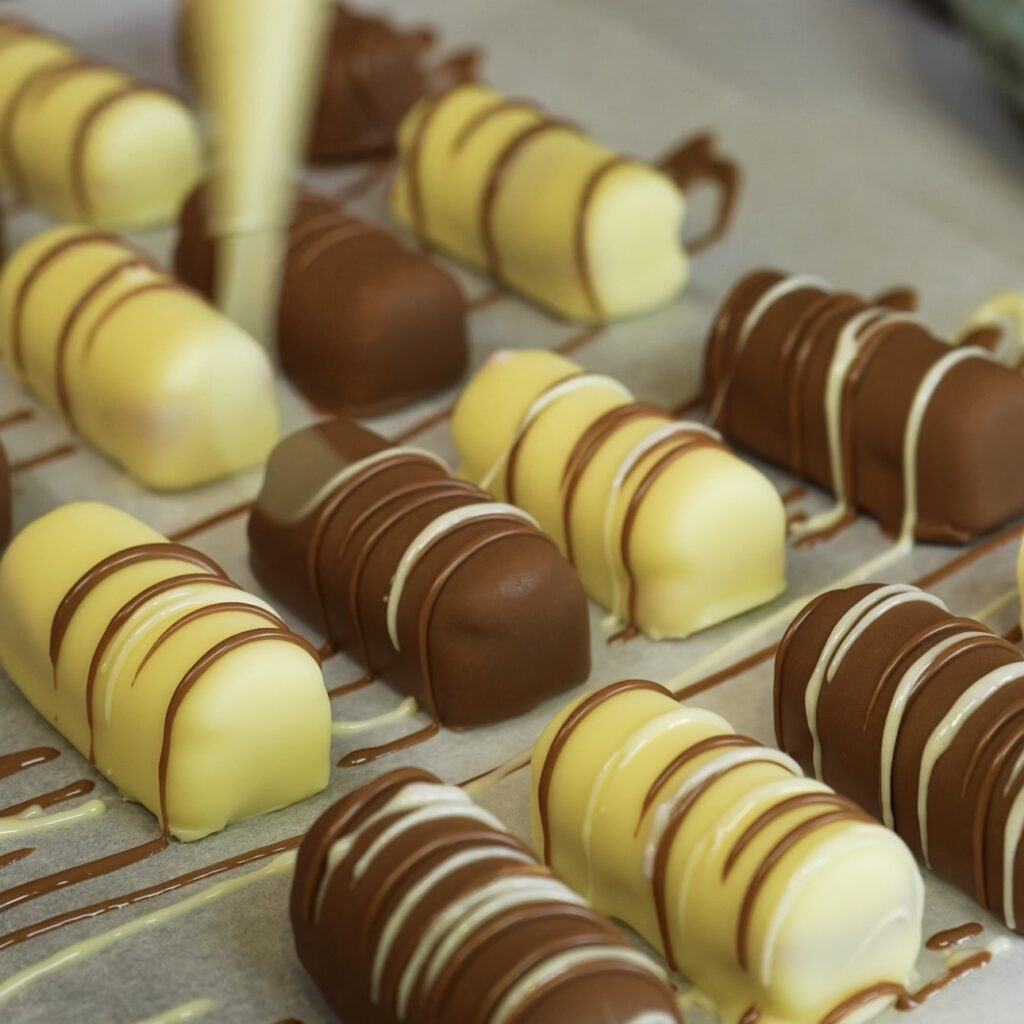
Transfer any remaining white and milk chocolate into two separate piping bags, then drizzle over the bars to decorate. Store the bars in an airtight container in the freezer, separated with parchment paper, for up to 2 months. Defrost them in the fridge for about 30 minutes before serving, or for a few minutes at room temperature.
Scroll down or tap ‘Jump to Recipe’ for the full printable recipe card with exact measurements, freezing time and step-by-step instructions.
Why We Love These Cherry Cottage Cheese Chocolate Bars
These High-Protein Cherry Cottage Cheese Chocolate Bars are the kind of dessert that feels fun, fresh and a little bit fancy, without needing complicated pastry work or baking. The cottage cheese and yoghurt blend into a creamy, cheesecake-style filling, the cherry sauce adds a bright fruity centre, and the chocolate coating gives each bar that satisfying snap. I also love that they are made ahead and stored chilled or frozen, which makes them perfect for busy weeks when you still want something homemade waiting for you. If you enjoy creamy fruit-based desserts, you may also love my Frozen Mango Yogurt Bars and Chocolate Raspberry Yogurt Gems.
Perfect for Any Occasion
These bars are perfect for warm days, after-dinner treats, casual entertaining or simply keeping in the freezer for when you want something sweet but not too heavy. They look polished enough to serve to guests, but the process is very manageable: blend, pipe, freeze, dip and decorate. The combination of cherries, cottage cheese, yoghurt, milk chocolate and white chocolate makes them feel indulgent while still tasting fresh and balanced. For another fruity treat, try my No-Cook Mango Mochi (Rice Paper Dessert), or if you want something chocolate-coated and snackable, my Raspberry Cottage Cheese Bars would be a lovely one to make next.
Instagram Tutorial & More
Want to see how these bars come together? Watch our quick video on Instagram. And don’t miss these other easy and delicious fruity desserts:
- Frozen Grape Yogurt Chocolate Bars
- Easy Banana Ice Cream Bar (No Churn)
- Mosaic Jelly Domes
- Frozen Strawberry Yogurt Gems
- Pistachio Stuffed Raspberries
- Passion Fruit Ricotta Dessert (Syrok)
- Frozen Blueberry Ricotta Pops
Happy cooking,
Izabella
Description
These High-Protein Cherry Cottage Cheese Chocolate Bars are a creamy, fruity and chocolatey freezer treat made with a smooth cottage cheese and yoghurt filling. The homemade cherry sauce adds a lovely sweet-tart centre, which works beautifully with both the milk chocolate and white chocolate coating. They taste a little like a frozen cheesecake bite, but with a lighter, fresher filling and a boost of protein from the cottage cheese and yoghurt. I love that you can make a batch ahead and keep them in the freezer for whenever you want something sweet but not too heavy. The bars need to be frozen before dipping, which helps the chocolate set quickly and gives them that neat, glossy shell. They are perfect as a make-ahead snack, a healthier dessert, or a little after-dinner treat.
Ingredients
Cherry filling
For the cottage cheese bars
For the chocolate glaze
Instructions
-
Prepare the cherry sauce first, as it needs time to cool. Add the pitted cherries, cornstarch, water, honey and a squeeze of lemon juice to a saucepan and mix well until the cornstarch has fully dissolved. Place over a medium-low heat, bring to a boil, then cook for about 10 minutes, stirring constantly once boiling, until the cherries have softened and the mixture has thickened. Pass the cherry mixture through a fine sieve into a bowl, using a spatula to press the cherries and extract as much sauce as possible. Leave to cool to room temperature, then transfer to a piping bag. You can also store it in the fridge until needed.
-
In a food processor, combine the cottage cheese, plain yoghurt, honey and vanilla. Blend until smooth. You can also use an immersion blender if that’s more convenient. Transfer the mixture to a separate piping bag. Fill the cavities of a 30-cavity cylinder silicone chocolate mould about halfway with the cottage cheese mixture, pipe a little cherry sauce into the middle, then cover again with more cottage cheese mixture. Please note, if you are using a different shape silicone mould, you may get more or fewer bars. Smooth the tops with a spatula to even them out and remove any excess. Place the silicone mould onto a wooden board so it is easy to transfer, then freeze for 2–3 hours, or until deeply frozen.
-
About 30 minutes before removing the bars from the freezer, prepare the chocolate glaze. Melt the milk chocolate using either the microwave or a double boiler method. For the microwave, heat in short 10-second bursts, stirring well between each one, until fully melted. For the double boiler, place the chocolate in a heatproof bowl over gently simmering water, making sure the bowl does not touch the water, and stir until melted. Stir in 20 ml of neutral oil until smooth and glossy, then allow the chocolate to cool for 10–15 minutes so it thickens slightly. Repeat the same process with the white chocolate and the remaining 20 ml oil. Transfer each chocolate glaze to a glass or bowl deep enough for dipping the bars.
-
Prepare a tray or wooden board that fits in your fridge and line it with parchment paper. Remove the bars from the mould. You can work with them in batches so they don’t defrost too quickly. Working with one bar at a time, insert a toothpick or wooden skewer into the bar, then dip it into the melted chocolate. Place onto the prepared tray and gently twist the toothpick or skewer to remove it. Coat half of the bars in milk chocolate and half in white chocolate. Keep the dipped bars in the fridge while working on the next batch, so the chocolate sets quickly and the bars don’t soften too much.
-
Transfer any remaining white and milk chocolate into two separate piping bags, then drizzle over the bars to decorate. Store the bars in an airtight container in the freezer, separated with parchment paper, for up to 2 months. Defrost in the fridge for about 30 minutes before serving, or for a few minutes at room temperature.
Nutrition Facts
Servings: 30 ServingCalories:83.48kcalTotal Fat:4.78gCholesterol:4mgSodium:32.06mgPotassium:63.44mgTotal Carbohydrate:8.78gDietary Fiber: 0.32gSugars: 7.95gProtein:1.67gVitamin A: 7.46IUVitamin C: 0.52mgCalcium: 32.27mgIron: 0.16mgVitamin D: 0.01IUVitamin E: 0.3IUVitamin K: 1.76mcgVitamin B6: 0.01mgVitamin B12: 0.11mcgPhosphorus: 36.2mgMagnesium: 5.71mgZinc: 0.21mg
Note
- For the smoothest texture, blend the cottage cheese mixture really well until completely creamy. Cottage cheese can vary a lot between brands, so if your mixture looks slightly grainy, keep blending for a little longer or use an immersion blender for a smoother finish.
- Use a silicone mould for this recipe, as it makes the frozen bars much easier to remove. I used a 30-cavity cylinder silicone chocolate mould, but you can use a different shape if that’s what you have. Just keep in mind that the final number of bars may change depending on the size of your mould.
- Make sure the cherry sauce is completely cool before piping it into the cottage cheese mixture. If it is still warm, it can soften the filling and make the bars harder to layer neatly.
- Freezing the bars until deeply frozen is important. If they are not frozen solid, they will soften too quickly when dipped into the melted chocolate and may lose their shape.
- Let the melted chocolate cool for 10–15 minutes before dipping. If the chocolate is too hot, it can melt the frozen bars. If it becomes too thick, gently warm it again for a few seconds and stir until smooth.
- Work in batches when dipping the bars. Keep the rest in the freezer or fridge while you dip a few at a time, so they stay firm and easier to handle.
- The oil helps loosen the melted chocolate and gives the coating a smoother, glossier finish. Sunflower oil or light olive oil both work well, but avoid strongly flavoured oils as they can affect the taste.
- You can drizzle the remaining milk and white chocolate over the bars to decorate them. I like to drizzle milk chocolate over the white chocolate bars and white chocolate over the milk chocolate bars for a prettier contrast.
- Store the bars in an airtight container in the fridge for up to 3 days. For longer storage, keep them in the freezer in an airtight container, with parchment paper between the layers, for up to 2 months. If frozen, let them defrost in the fridge for about 30 minutes before serving, or for a few minutes at room temperature.