
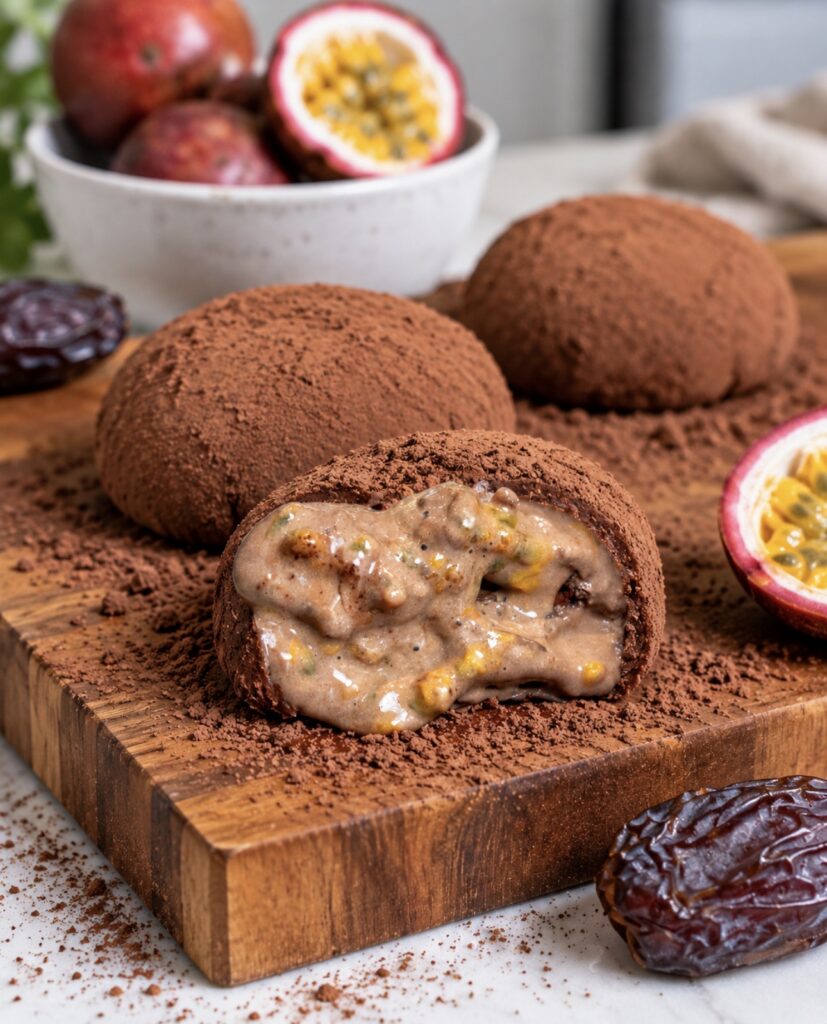

High-Protein Chocolate Rice Paper Mochi with Passion Fruit: Creamy, Chewy and Packed with a Tropical Centre
Chocolate and passion fruit are one of those combinations that just work: deep cocoa flavour on one side, bright tropical sharpness on the other. These High-Protein Chocolate Rice Paper Mochi with Passion Fruit bring the two together in a chilled dessert with a creamy cottage cheese filling, a juicy passion fruit centre and a soft, pleasantly chewy rice paper wrapper. Protein powder and thick Greek-style yogurt make the filling more satisfying, while dates provide natural sweetness without overpowering the fruit. If you already love the soft rice paper texture in my No-Cook Mango Mochi (Rice Paper Dessert) or the fruity centre of my Cherry Rice Paper Mochi, this chocolate version is definitely one to try next.
Scroll down or tap ‘Jump to Recipe’ for the full printable recipe card.
Simple Ingredients, Big Flavours
The beauty of these chocolate rice paper mochi is that the filling comes together from just a handful of simple ingredients. Each one has a purpose, from creating that smooth chocolate centre to adding natural sweetness and a fresh burst of passion fruit. Cottage cheese works particularly well in chilled desserts because once blended, it becomes surprisingly creamy, something you can also see in my Blueberry Cottage Cheese Chocolate Spheres and High-Protein Cherry Cottage Cheese Chocolate Bars.
- Rice paper sheets – Use round rice paper sheets approximately 20 cm in diameter. They create the soft, slightly chewy exterior of the mochi and only need a very quick dip in water before shaping.
- Cottage cheese – The base of the chocolate filling. Once blended thoroughly, cottage cheese becomes wonderfully smooth and creamy while also adding plenty of protein.
- High-protein Greek-style yogurt – Use a thick yogurt rather than a runny one. It helps create a silky texture without making the filling too loose. If your cottage cheese is already quite moist, you may need slightly less yogurt.
- Dates – Naturally sweeten the chocolate filling and add a subtle caramel-like flavour. Roughly chopping them before blending can help achieve an extra-smooth consistency.
- Cocoa powder – Gives the filling its rich chocolate flavour and is also used for dusting the mochi to prevent them from sticking.
- Protein powder – Adds an extra protein boost and helps make the filling even more satisfying. You can skip it if you prefer; the mochi will still work beautifully without it.
- Passion fruit – The fresh, tangy centre that balances the rich chocolate filling. Drain away a little of the excess juice before adding it to the mochi so the filling doesn’t become too wet.
How to Make High-Protein Chocolate Rice Paper Mochi with Passion Fruit
Prepare the Chocolate Protein Filling
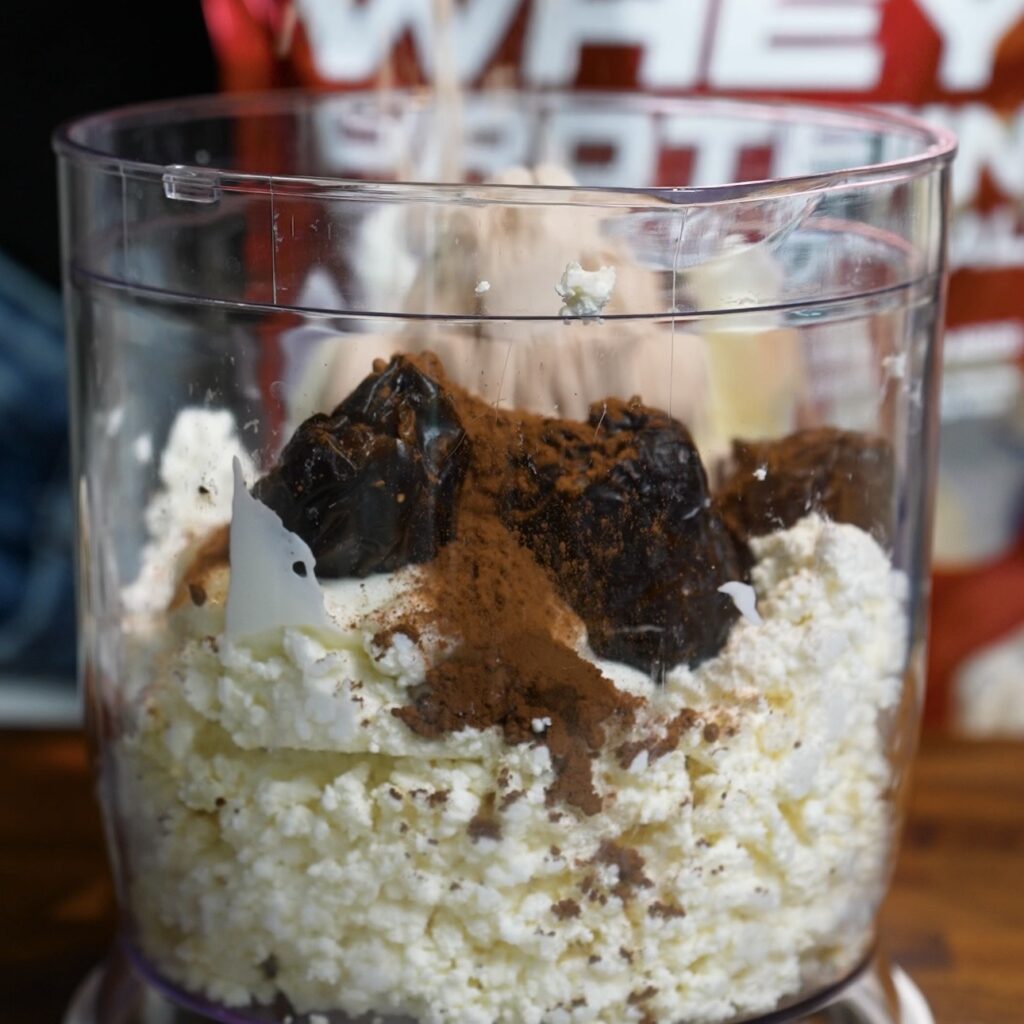
Start by making the filling, as it’s important to have everything ready before you begin dipping the rice paper. Add the cottage cheese, thick high-protein Greek-style yogurt, dates, cocoa powder and protein powder to a food processor. Blend until completely smooth and creamy. Roughly chopping the dates before adding them can make them easier to blend, especially if they are quite firm. Transfer the filling to the fridge until you are ready to assemble the mochi. If your cottage cheese contains quite a lot of moisture, use slightly less yogurt so the mixture doesn’t become too runny. The yogurt itself should also be thick rather than pourable.
Prepare the Tray and Shaping Station
Line a baking tray that fits comfortably inside your freezer with baking paper. Lightly dust the entire surface with cocoa powder to help prevent the finished mochi from sticking. Fill a large, shallow plate with water; it should be slightly wider than your 20 cm rice paper sheets so they can be dipped easily. Place a small bowl, approximately 10 cm in diameter, beside it. This bowl will act as a mould and make it much easier to create a neat, rounded mochi shape.
Soften the Rice Paper
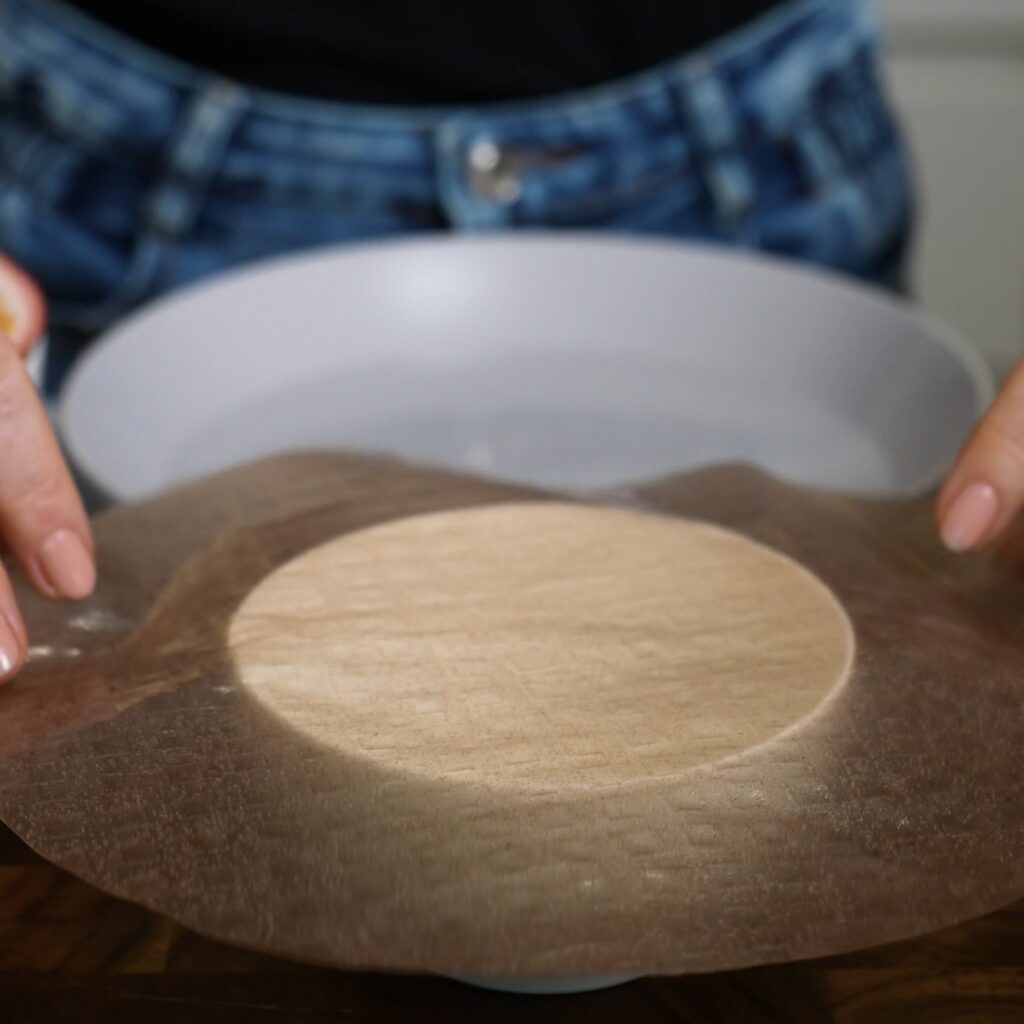
Dip one rice paper sheet briefly into the water, then immediately place it over the small bowl. Don’t wait for the rice paper to become completely soft before removing it from the water. It will continue to absorb moisture and soften naturally while you add the filling and shape the mochi. This makes it much easier to handle without becoming overly sticky or fragile.
Add the Filling and Passion Fruit
Spoon one-quarter of the chocolate filling into the centre of the rice paper. By this point, the wrapper should have started to soften. If it still feels slightly firm, simply wait another 10 seconds before shaping it. Gently press the rice paper down into the bowl so it naturally takes on the rounded shape, then spread the chocolate mixture slightly towards the sides, leaving enough space around the edges to close the mochi.
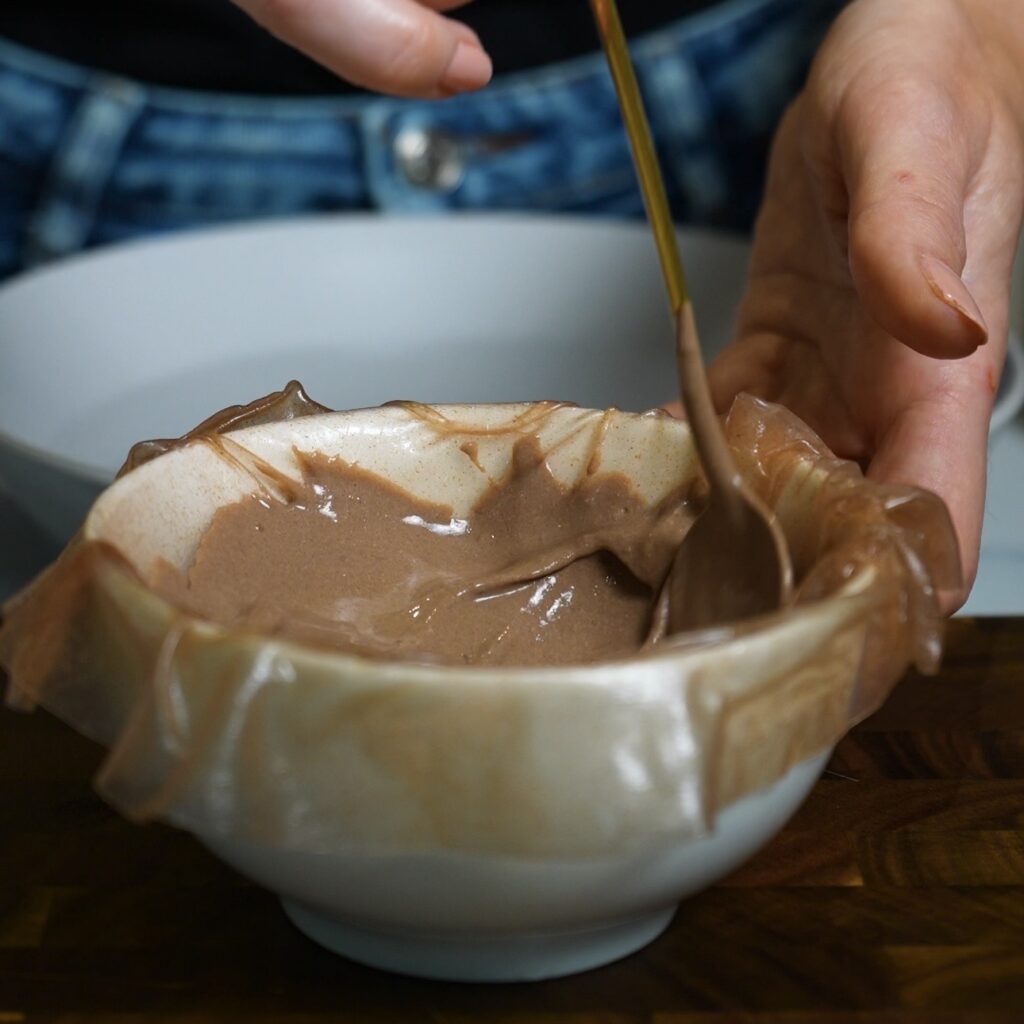
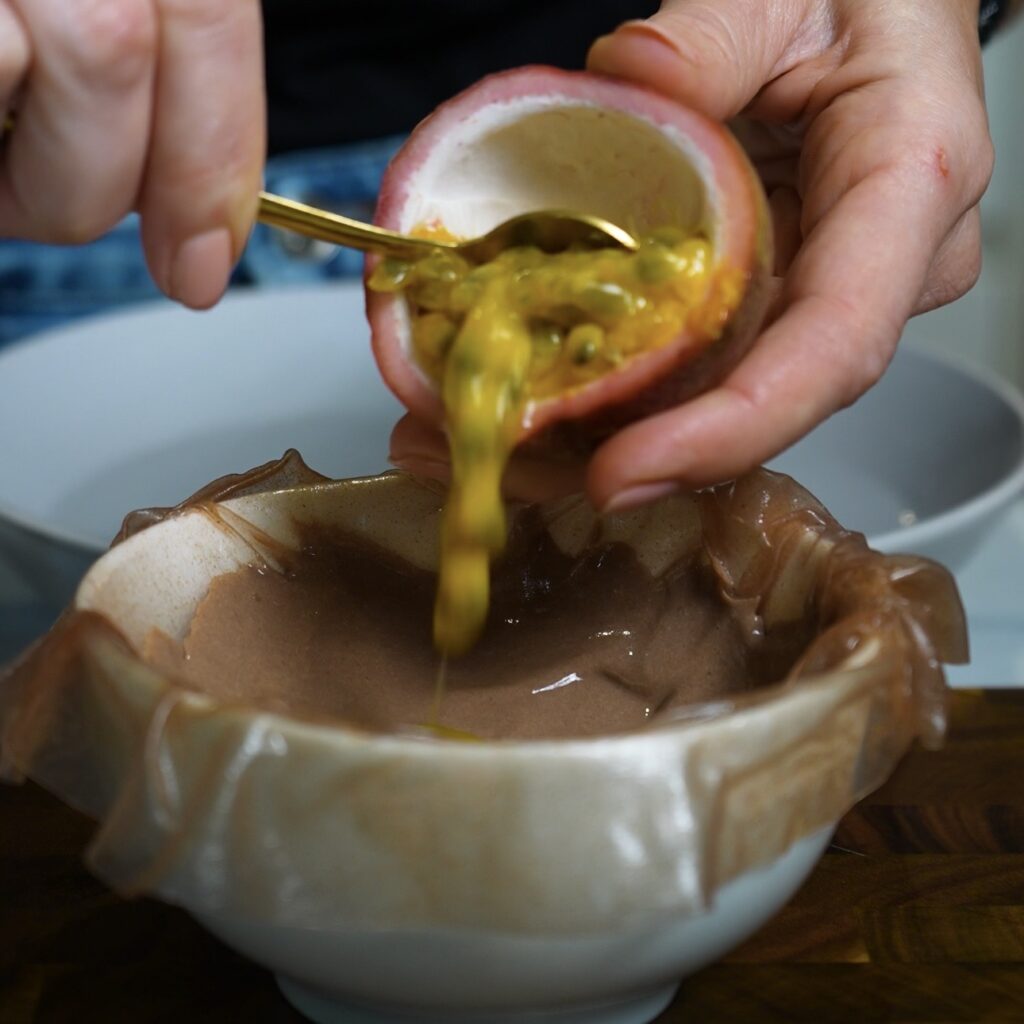
Cut one passion fruit in half and allow a little of the excess juice to drain away. Spoon the flesh and seeds from one passion fruit half into the centre of the chocolate filling. The fresh, tangy passion fruit creates a juicy centre that balances the rich chocolate filling beautifully.
Seal and Shape the Mochi
Once the rice paper is completely flexible, gently bring the edges together over the filling, overlapping them to fully enclose the centre. Carefully lift the mochi out of the bowl and place it seam-side down on the prepared cocoa-dusted tray. Repeat the same process with the remaining three rice paper sheets, the rest of the chocolate filling and the remaining passion fruit halves.
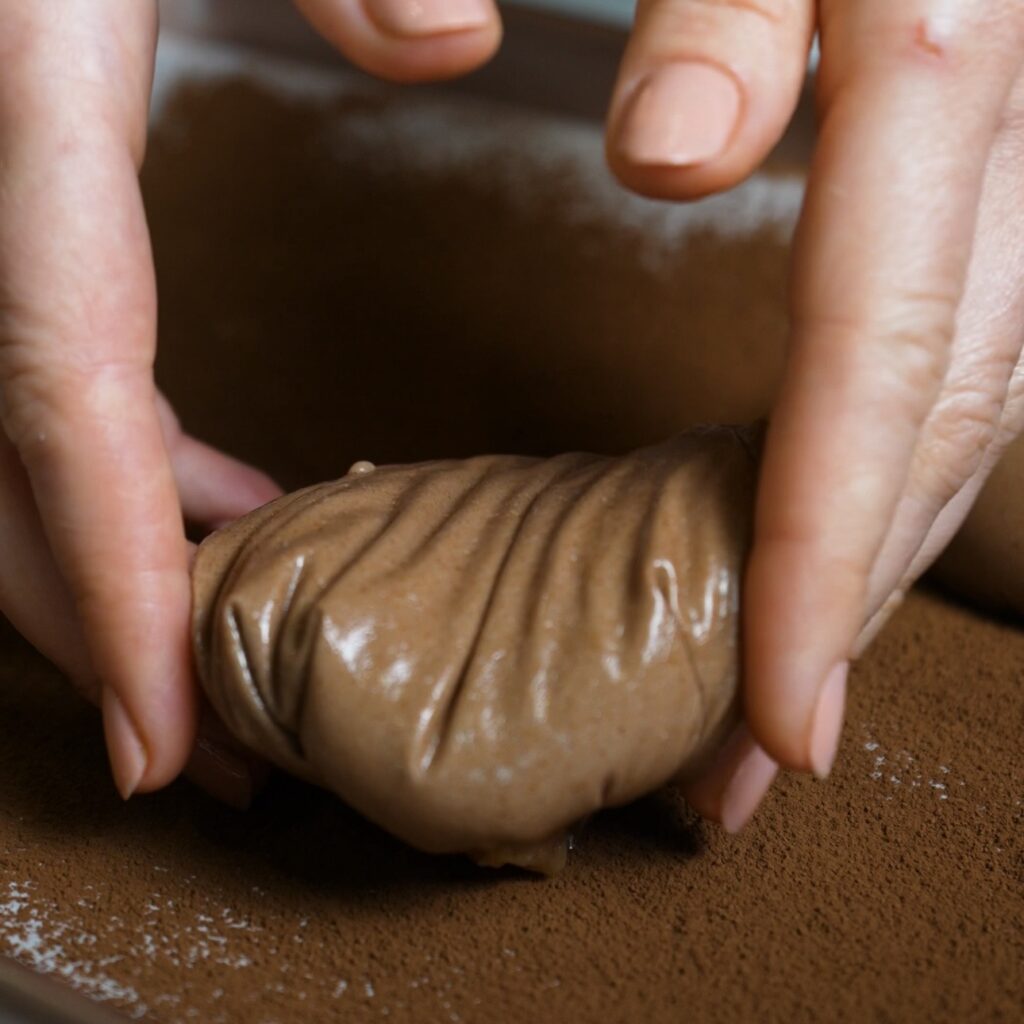
Once all four mochi are assembled, lightly dust the tops with additional cocoa powder. Gently pick each one up and use your hands to shape it into a slightly smoother, rounder parcel. Handle them carefully, as the softened rice paper will be delicate at this stage.
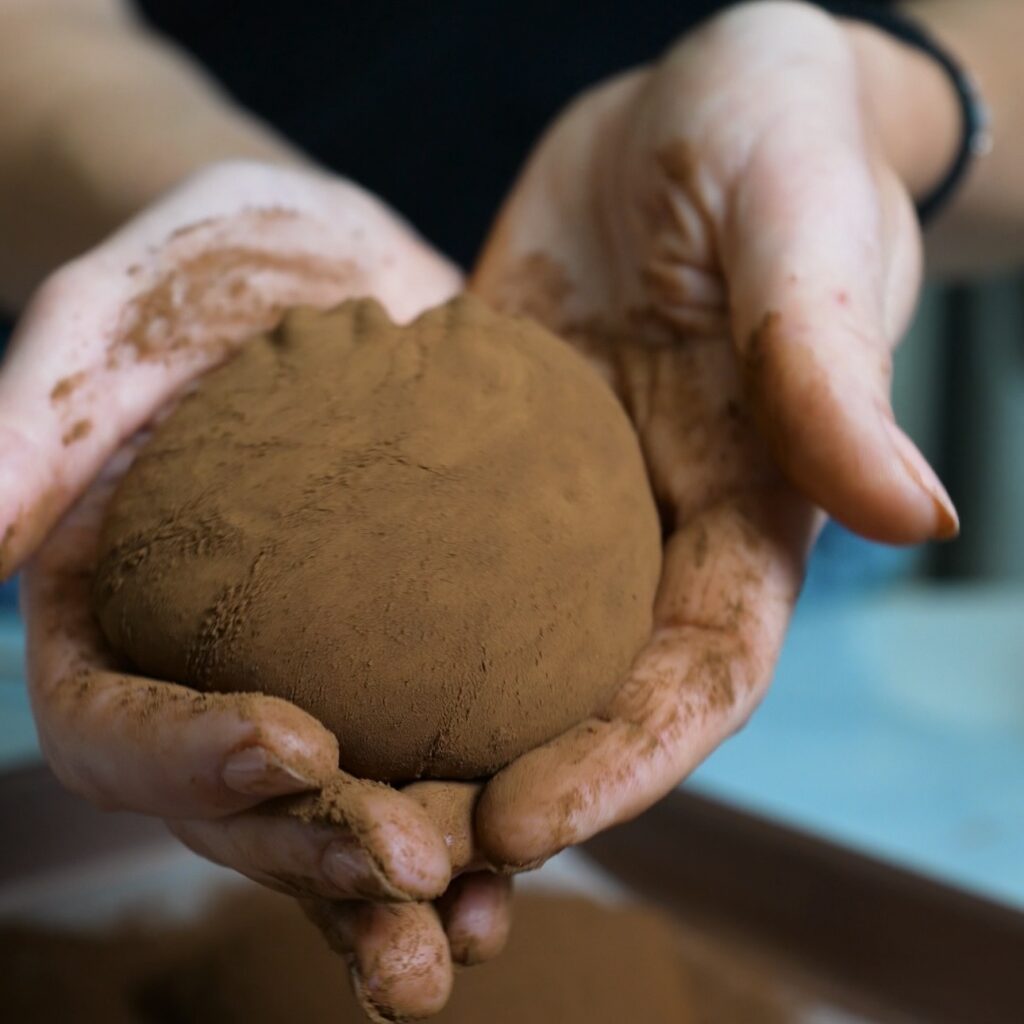
Freeze and Serve
Place the shaped mochi back onto the prepared tray and transfer them to the freezer for approximately 1 hour. This gives the chocolate filling enough time to firm up while keeping the centre creamy and the rice paper pleasantly soft and chewy.
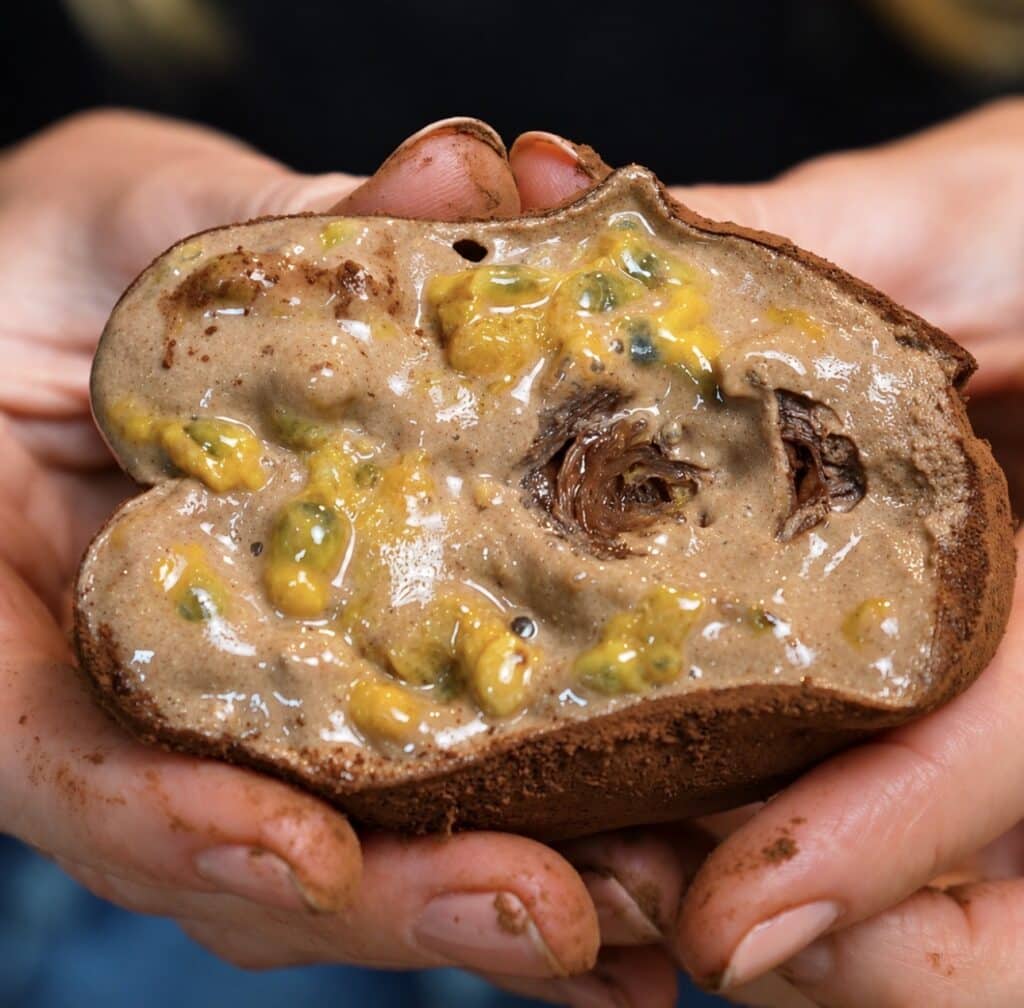
You can also leave the mochi in the freezer for longer and store them as an ice cream-style treat. If they become fully frozen, remove them from the freezer and let them sit at room temperature for around 10 minutes before eating. This allows the filling to soften slightly and gives the rice paper a much better texture.
Why We Love High-Protein Chocolate Rice Paper Mochi
There is so much packed into one little dessert: rich chocolate, tangy passion fruit, natural sweetness from dates and that distinctive soft, chewy rice paper exterior. The cottage cheese, thick Greek-style yogurt and protein powder create a creamy, satisfying filling while giving the recipe an extra protein boost, and I especially love how the sharp passion fruit cuts through the chocolate so every bite still tastes fresh. There is no baking, no dough to prepare and no complicated technique involved, making these mochi surprisingly simple once you get used to working with rice paper. If you enjoy creamy, protein-rich desserts, try my Cherry Cottage Cheese Ice Cream (High Protein) next, or make a batch of my Chocolate Blueberry Protein Bars for another easy freezer-friendly treat.
Perfect for Any Occasion
These chocolate passion fruit mochi work equally well as an afternoon sweet treat, a refreshing dessert after dinner or a freezer snack to keep ready when you want something chocolatey. Their individual size makes them easy to serve, while the hidden passion fruit centre gives them enough visual impact for entertaining too. They are especially good during warmer months when a cold dessert is far more tempting than turning on the oven. For a larger selection of chilled treats, pair them with my Passion Fruit Ricotta Dessert (Syrok) or Low-Calorie Fruity Yogurt Jelly.
Instagram Tutorial & More
Want to see how these High-Protein Chocolate Rice Paper Mochi with Passion Fruit come together? Watch the quick video on Instagram, and don’t miss our other easy and delicious recipes:
- Crispy Rice Paper Toast
- Spinach Feta Rice Paper Bombs
- Redcurrant Rice Paper Pancake
- Cherry Ricotta Rice Paper Dumplings
- Air Fryer Rice Paper Salmon en Croûte
- Air Fryer Salmon Sushi Parcels
- Air Fryer Pesto Mozzarella Rice Paper Sticks (Gluten-Free Snack)
- Air Fryer Pesto Parmesan Rice Paper Rings
- Crispy Air Fryer Rice Paper Cheese Balls
- Cottage Cheese Strawberry Rice Paper Dessert (Air Fryer)
Happy cooking,
Izabella
Description
These High-Protein Chocolate Rice Paper Mochchi with Passion Fruit are rich, creamy and incredibly satisfying. The chocolate filling is made with cottage cheese, thick Greek-style yogurt, dates, cocoa and protein powder, giving each one a smooth texture with plenty of protein. Fresh passion fruit in the centre adds a sharp, tropical contrast that cuts through the richness beautifully. Rice paper keeps the outside soft and chewy while making the recipe naturally gluten-free. They need just a short time in the freezer to set and can also be stored frozen for an easy dessert or snack. Leave them at room temperature for a few minutes before serving for the best texture.
Ingredients
Instructions
-
Prepare the chocolate protein filling first, as you’ll want everything ready once you start working with the rice paper. Add the cottage cheese, yogurt, dates, cocoa powder and protein powder to a food processor and blend until completely smooth and creamy. You can roughly chop the dates first to make them easier to blend. Transfer the filling to the fridge until needed. If your cottage cheese is particularly moist, use slightly less yogurt so the filling doesn’t become too runny. Make sure the yogurt is thick rather than pourable.
-
Line a baking tray that fits inside your freezer with baking paper, then lightly dust the entire surface with cocoa powder. Fill a large, shallow plate, slightly wider than the rice paper sheets, with water. You’ll also need a small bowl, around 10 cm in diameter, to help shape the mochi.
-
Dip one rice paper sheet briefly into the water, then immediately lay it over the small bowl. Don’t wait for the rice paper to soften completely, as it will continue to soften while you work. Spoon one-quarter of the chocolate protein filling into the centre. By this point, the rice paper should be flexible; if it still feels a little firm, wait another 10 seconds. Gently press the rice paper down into the bowl so it naturally takes on the bowl shape, then spread the filling slightly towards the sides. Cut a passion fruit in half, allow a little of the excess juice to drain away, then place one half in the centre of the filling.
-
Gently bring the edges of the rice paper together over the filling, lift the mochi out of the bowl and place it seam-side down on the prepared tray. Repeat with the remaining rice paper, filling and passion fruit. Dust the tops with a little more cocoa powder, then gently pick each mochi up and shape it with your hands into a slightly rounder shape. Return them to the tray and freeze for about 1 hour before serving.
-
You can freeze the mochi for longer and keep them in the freezer as an ice cream-style treat. If they are fully frozen, leave them at room temperature for around 10 minutes before eating so the rice paper and filling soften slightly.
Nutrition Facts
Servings: 4 ServingCalories:218.43kcalTotal Fat:5.28gCholesterol:13.28mgSodium:280.85mgPotassium:405.57mgTotal Carbohydrate:33.56gDietary Fiber: 5.56gSugars: 17.25gProtein:14.57gVitamin A: 38.14IUVitamin C: 2.7mgCalcium: 100.75mgIron: 2.39mgVitamin D: 0.06IUVitamin E: 0.05IUVitamin K: 0.73mcgVitamin B6: 0.1mgVitamin B12: 0.26mcgPhosphorus: 266.95mgMagnesium: 59.55mgZinc: 1.34mg
Note
- Use a thick Greek-style yogurt. If your cottage cheese is quite moist, start with less yogurt and add more only if needed. The filling should be thick and creamy, not runny.
- Don’t soak the rice paper for too long. Dip it briefly in water and let it soften naturally while you add the filling and shape the mochi.
- Roughly chop the dates before blending to help achieve a smoother filling, especially if your food processor isn’t very powerful.
- Drain a little of the excess passion fruit juice before adding it to the centre to prevent the filling from becoming too wet.
- Dust the baking paper and mochi with cocoa powder to help prevent sticking and make them easier to handle.
- Freeze for around 1 hour for a soft, chilled mochi texture. If frozen for longer, leave them at room temperature for about 10 minutes before serving.
- Keep any leftover mochi stored in an airtight container in the freezer.